Friday, April 02, 2010

Four Ways Friday #2

Today's Lesson From The Craft Room:  Enjoy A Massage

It had been ages since I had my last massage so yesterday turned out to be a real treat!  I was given a gift certificate for a 90-minute massage and I must say it was the perfect gift.  How often do we stop and allow ourselves to be pampered?  I kept telling myself I would get a massage "some day," but with the pace of life, my "some day" kept getting put off.  Until I received my gift.  My hope is that this will start a new healthy habit - one of treating my body as well as it treats me everyday!

Today's Four Ways Friday focuses on the Friends 24-7 stamp set.  I really love this set!!!!  For my first card I used the popping pastels technique.  I stamped the image in versamark and then pounced on the images using sponge daubers and my chalk pastels.  I added a little spritz with the spritzer tool.  Another great technique that I used on this card was running my white organza ribbon across my Cameo Coral ink pad numerous times in order to get Cameo Coral ribbon!  What a great way to get ribbon of whatever color you need!
This second card came together quickly!  I stamped the image on the base layer of the card.  One trick I used was to ink up the image and then spray it lightly with water before stamping.  I love the watercolor effect this creates.  I did the same for the image I stamped on the Confetti card stock.  I used my bone folder to break down the fibers in the card stock and peeled back the corners and one full layer of the Bravo Burgundy card stock for a sueded effect.  A few brads and the greeting complete the look.
The third card uses the same watercolor effect technique.  I stamped the image multiple times, using this technique of spraying water onto the stamp after inking it and then stamping onto the card.  I punched 5 flowers from the 5-petal flower punch and used my bone folder to loosen the fibers and then I scrunched and crunched until I liked how the flower looked.  A touch of ribbon and a rhinestone brad add a little elegance.
For the fourth card I decided to create a flower by stamping the image multiple times - each time creating a 90 degree angle from the stamped image that came before.  In this way I created a flower with 4 petals and then created a center for the flower using the scallop circle punch and the 1 1/4" and 1 1/2" circle punches.  A corduroy button brad in the corner along with some spritzer tool spattered color complete the card.
I hope you are inspired to use your Friends 24/7 stamp set in new and exciting ways!  I'd love to hear your thoughts on how you are enjoying Four Ways Fridays and if you would like to see this feature continued every Friday.  Also, if there is a stamp set you would like to see featured in a future Four Ways Friday, just let me know!  I'll do my best to respond to what you'd like to see!  Are you wishing you had the Friends 24/7 stamp set?  Feel free to click HERE to shop now! :)

Thursday, April 01, 2010

Two-Step Into Spring Promotion

The Two-Step Into Spring Promotion begins today and runs through the month of April!  Here are the details:
Hostesses
Host a $350 workshop and receive the brand-new Two-Step Awash with Flowers stamp set FREE!
Item  Description 
117062 Awash with Flowers (wood-mount) 
120549  Awash with Flowers (clear-mount)

Customers
Two-Step into spring with a sneak peek from the 2010-2011 Idea Book & Catalog! Be the first to add the Awash with Flowers stamp set to your collection.
Item  Description  Price 
117062  Awash with Flowers (wood-mount)  $39.95 
120549  Awash with Flowers (clear-mount)  $27.95

Plus, purchase spring-themed Two-Step Stampin' sets at 20 percent off the retail price--no additional purchase necessary! Qualifying stamp sets are listed below:
Item  Page  Description  Discount Price 
113824  94 Greenhouse Garden  $20.76 
113734  98  Fifth Avenue Floral  $19.96 
111578  101  Flower Fancy  $29.56 
113258  112  Trendy Trees  $14.36 

Things to Remember
  • The Awash with Flowers stamp set is a sneak peek from the 2010-2011 Idea Book & Catalog and will not be available again until the release of the new Idea Book & Catalog.
Hostess Promotion:
  • You must place your order on a workshop, customer, or demonstrator order to qualify. Online orders are not eligible for this part of the promotion.
  • There is a limit of one free Awash with Flowers stamp set per workshop; the reward is for reaching the $350 workshop level, and is not incremental.
  • Qualifying hostesses may choose either the wood-mount or clear-mount set. Please note: Clear-mount blocks are not included with the clear-mount set (blocks C and H are recommended this set).
Customer Promotion:
  • You may place your order on any order type (customer, demonstrator, workshop, or online).
  • There are no limits, and there is no minimum purchase to qualify for the 20 percent off.
  • The 20 percent off discount does not apply to the Awash with Flowers stamp set.
Click HERE to shop now or contact me to set up a workshop!

Wednesday, March 31, 2010

Metal Die Cutting

Today's Lesson From The Craft Room:  Move Outside Your Comfort Zone!

I took my permission to make a mess seriously the other day and I have the inked up fingers and cuts to prove it!  I decided to have a little fun with my Big Shot and some metal flashing from the home improvement store.  Metal is quite a bit different from paper and I knew this meant moving outside my comfort zone...literally...die cut flashing is sharp!  I highly recommend wearing gloves if you're going to make a mess with metal!  I used alcohol inks to die the metal, but the dies I used were all Stampin' Up! exclusives!  I used the flower folds and the daisies #2 die.  Now I'm thinking of the artwork that I'm going to create that will incorporate these flowers...I sense more messes ahead!!!

Tuesday, March 30, 2010

Clear Embossed Stencil

Today's Lesson From The Craft Room:  It's OK To Make A Mess!

I keep telling myself that it's OK to make a mess and I'm waiting to accept that message with the energy of a child!!!!  I seem to look at the piles or messes I make in the craft room with a bit of disdain - like it's something I'm not supposed to do.  This attitude, I feel, is holding me back.  I remember as a child, the idea of making a mess was a joy!  Mud pies and puddles to jump in were the BEST!  I want to tap into that again - wish me luck making a mess!!!!!

Today's card was a ton of fun to make!  I began by sponging my stencil with versamark ink on whisper white card stock and then clear embossed.  I used my brayer to brayer on basic gray ink.  I touched up the brayering with some basic gray sponging.  The flower is 5 scallop circle punches that I sponged with bermuda bay and basic gray and then scrunched, crunched and softened with a bone folder and my fingers.  The center is a build-a-brad with an image from tiny tags stamped in basic gray onto so saffron and and then punched with a 3/4" circle punch.  I hope you like it!  There is only 1 day left of Sale-A-Bration!  Don't miss out!  Shop HERE now!

Sunday, March 28, 2010

Beautiful Butterflies

Today's Lesson From The Craft Room:  Strive For What You Believe You Cannot Do!

Almost 14 years ago, I ran a marathon.  Talk about a feeling of accomplishment!  I had never been a big runner, but one day I woke up and decided to set a marathon as my goal...and I did it!  Now, 14 years later, running a marathon feels like something totally out of reach.  Prior to March 6th, I hadn't run, wogged, jogged or did much of anything exercise-related in AGES!  My standby excuse here in Denver is that it's because of the altitude :)  Well, on March 6th, I got out of bed, went for my morning walk with Buddy and decided to wog instead (my word for a jog that looks a bit more like a walk with a little umph)!  I have not looked back since that morning and Buddy and I have continued to wog since then.  I actually jogged 4 miles the other day!  So now, I'm striving for what I would have believed a month ago I was not capable of doing.  I have looked at marathons in the fall and am setting my sights on a return to the Marine Corps Marathon in October!!!!!  I'm going to try to not get too excited...I had tried, after the last marathon, to train for another and ended up with an unrelated injury that made me hang up my running shoes for awhile.  I am praying for health as I start out on this new journey towards who I once was and who I want to be!  Wish me luck!!!!

Today's card began with sponging some butterfly silhouettes.  I used the background scrap as a stencil after running some chipboard through my Beautiful Butterflies die in the Big Shot.  I then stamped images from the Flight of the Butterfly stamp set with Blush Blossom and Crushed Curry.  I also stamped a Whimsical Words greeting onto the background with Crushed Curry stamped off once.  The greeting was stamped full-strength onto Whisper White card stock and then sponged around the edges.  I love the Ballet Blue butterfly (he is 2 layers - chipboard then the card stock) with the Crushed Curry embossed butterfly from my Beautiful Wings embosslit.  A dash of Dazzling Diamonds finished the look.  I hope you like it!  Don't forget, only a few days left until Sale-A-Bration ends on March 31st!  You still have time to place an order and get all of the great Sale-A-Bration benefits!  Click HERE to shop now!

Friday, March 26, 2010

Four Ways Friday #1

Today begins a new feature on my blog - Four Ways Fridays!  Every Friday I am going to show you how to use one stamp set to create 4 different looks/projects!  It can be very easy to buy the next new stamp set.  What seems to be more challenging is to think of new and interesting ways to use the stamp sets we already have.  Every Friday we will focus on a single stamp set - sometimes we'll go even further and just focus on one specific stamp in the stamp set.  The projects may include the use of embellishments, dies, texture, designer paper, and other accessories.  If there is a particular stamp set you would like to see featured on a future Four Ways Friday, please leave a comment to let me know.  I'll do my best to give it a try!

Today's Four Ways Friday focuses on the gratitude stamp from the Define Your Life stamp set.
This first project is incredibly simple!  I stamped the greeting with Basic Black in the center of a whisper white piece of card stock.  I used some of the Sweet Pea designer paper and punched 1/2" squares and cut out 2 larger rectangles.  The designer paper is popped up with dimensionals surrounding the greeting.  I layered the whisper white on taken with teal card stock and adhered everything to a so saffron card.  You can use designer paper to dress up any stamped image!

For this second project, I used my stamp-a-ma-jig to repeatedly stamp the greeting on the whisper white base card.  I did not stamp full strength, but rather stamped off twice before stamping onto the card stock.  The main greeting was stamped full strength and popped up on an Orchid Opulence piece of card stock.  I used the sweet pea felt for a cute embellishment.  Using your stamps to create fun backgrounds is always a great choice!

For this third project, I continued the same theme of the second project and used the stamp to create a background.  Then, I used my Flower Folds Die in the Big Shot to cut out a few flowers.  The flowers were then stamped with the greeting.  You can use this technique for die cuts, punches or paper piecing.  I sponged the edges of the flowers and layered them.  I used the greeting again with a build-a-brad for the center of the flower.  Finally, I used a marker to color the word "gratitude" on the stamp and then stamped onto whisper white card stock.  I cut out the greeting to create a flag.

Don't forget that your stamps can do more than just stamp on paper!  For this fourth project, I used black Staz-On ink and stamped the greeting onto wide twill ribbon.  I wrapped the ribbon around a die cut Box #2.  The circle stamping was created with a sponge dauber.  I used an everyday hole punch, combined with the 1/2" circle punch to create the black card stock circles, which I glued to the box.  The jumbo grommet adds a finishing touch.

I would love your comments on this new feature!  Please let me know what you think and what you'd like to see in the future on the next Four Ways Friday!

Thursday, March 25, 2010

Something New

Today's Lesson From The Craft Room:  Try A New Direction

Whether I'm jogging or crafting, sometimes it's fun to try a new direction - go somewhere I haven't gone before.  Today I prepared for a new direction for tomorrow.  I'm going to try to offer a new feature on my blog on Fridays...stop by tomorrow to check it out and let me know what you think!  I'd love to hear your reaction!  See you tomorrow!

Wednesday, March 24, 2010

It's Good To Be Back!

Today's Lesson From The Craft Room:  Do Your Own Thing

Talk about a white-knuckle driving experience!  I flew home and right into a snowstorm last night!  I was so glad to be on the ground, that I wasn't even bothered by the hour that we spent on the tarmac waiting for a gate.  The drive home was nerve-wracking to say the least!  My little car is not fond of driving in snow.  The roads were snowy, icy, slushy...and there were cars and vans buzzing past me on the left.  My internal voice was, at times, berating me, "Can't you go any faster than that?!"  At other times the voice, which I chose to listen to, was much more supportive, "Just do your own thing, Michelle.  Go at your own pace."  I'm so glad I listened since I arrived home, white-knuckled, but safe and sound.  Sometimes you just need to do your own thing and go at your own pace :)

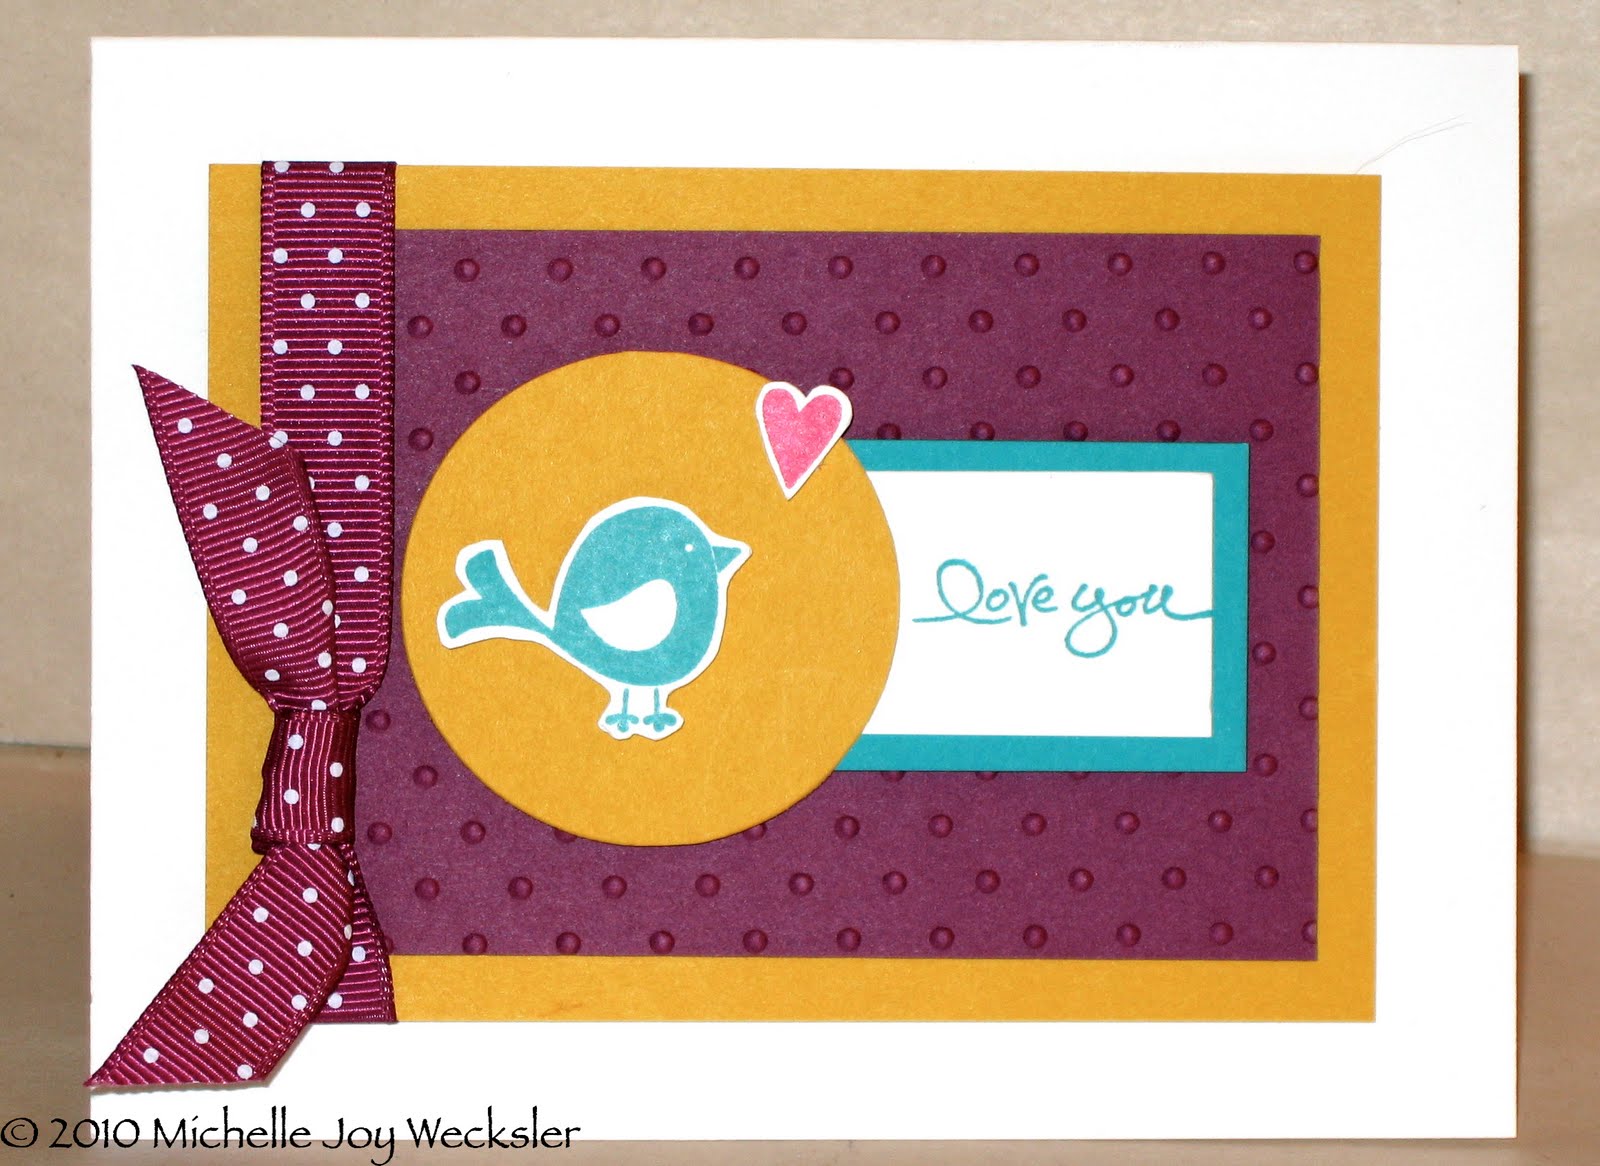
Today's card was FUN since I hadn't done a challenge on SCS in a little while.  I have to admit that part of it was my frustration with the SCS site and the load times - I still haven't learned my lessons around patience :)  This card was simply stamping with the Cheep Talk stamp set and adding a greeting from Short & Sweet.  I couldn't resist a bit of texture with the perfectly polka dots embossing folder.  I hope you like it!

Home At Last!

Thought you might enjoy an outdoor scene from this morning...isn't it supposed to be Spring???? :)  I am very grateful to have made it home safely last night.  I flew in from Houston and the Denver Airport was covered in snow.  They had to shut down departures for awhile and, as a result, we had to wait on the tarmac for just over an hour for a gate to open up for our plane to pull in.  Denver Ground and the United folks on my plane did a wonderful job of handling such a crazy weather experience.  I'll be heading into the craft room today - after a little cocoa and breakfast :)  Today looks like a great day to relax on the couch :)

Sunday, March 21, 2010

Endorphins!

Today's Lesson From Far Away From The Craft Room:  Love Your Endorphins!!!!

I don't have a card/project to share today since I am far away from the craft room...but don't worry, I'll be back soon!  In the meantime, I will still share what I learn on the road.  I began "wogging" on March 6th and thank you for your encouragement!  I have been wogging ever since and I am loving those endorphins!  It is amazing how good a wog can make you feel - about yourself, your outlook on life...everything!  It truly is a natural high!  I have been enjoying making taking care of myself a priority.  What did you do today to release some endorphins?  Keep going!  You can do it!!!!

Friday, March 19, 2010

Easter Card #2 - Chocolate Bunny

I can take absolutely no credit for this cute card!  I copied this card from fellow demonstrator Sharlene Mitchell - I just couldn't resist!  Thanks Sharlene!!!!  I stamped the Chocolate Bunny stamp in versamark on Chocolate Chip card stock and then embossed with clear embossing powder.  The flowers are from the Trio Flower punch and the greeting from the Well Scripted stamp set.  I hope you like this as much as I do!!!!

Easter Card #1

Isn't this card adorable????  I copied almost this entire card from a card created by fellow demonstrator Becky Roberts (thanks Becky!!!!) (Becky's card included a stamped chocolate bunny, a different greeting, and a different ribbon and was so cute)!  How clever to use the Wide Oval punch to punch out some Sweet Pea designer paper to make these adorable eggs!  You could go crazy decorating these punched eggs!  I hope you like it!

My Stampin' Up! Website

Today's Lesson From The Craft Room...Well, Really The Office:  Technology Is Cool!

I just read through instructions for how to have this blog replicate itself to my blog on my Stampin' Up! website at www.M.stampinup.net!  It took me a couple of tries and then "tada!"  Now it will automatically update here and on my SU! website!  How exciting!  Technology is cool :)  I'll be back in a bit to share a creation from the craft room...just had to share my excitement about the technology! :)

Thursday, March 18, 2010

Embossed Anniversary Card

Today's Lesson From The Craft Room:  Get A Breath of Fresh Air!

It is gorgeous outside today!  Warm and sunny - the birds are chirping and the squirrels are running around playing chase in the backyard.  Tomorrow, however, is going to be a different story!  They are predicting at least 4-8 inches of snow in the city!  How crazy!  So, given the beauty of today, I thought it was imperative to go outside to get a breath of fresh air!  OK, I admit it...I got more than one breath!  I actually took my work outside to the backyard and sat on the bench and read in the sun.  I even took the phone out there so I could conduct my conference call outside!  Have you been outside today?  Don't forget to get that breath of fresh air everyday...rain or shine...it really does boost your mood!

Today's card was quick and easy!  I needed to make an anniversary card for my aunt and uncle.  I grabbed the Always stamp set and stamped in versamark onto Very Vanilla card stock.  I embossed with gold embossing powder with my heat tool.  The greeting was stamped in Ruby Red and is from the Teeny Tiny Wishes stamp set (LOVE this set - it has a greeting for everything!).  Finally, I decided the card needed a tiny bit more texture so I ran the bottom of the card through the Big Shot with the Perfect Polka Dots embossing folder.  I embossed the flap of the envelope too!  I have to say that I love that Stampin' Up made these embossing folders a tad bit larger than the Cuttlebug embossing folders.  As a result you can emboss the entire flap of one of our medium envelopes!  It looks great!  Hope you like it!

Tuesday, March 16, 2010

Two Tags Easter Treat

Today's Lesson From The Craft Room:  "If it came from a plant, eat it; if it was made in a plant, don't."

Today's lesson comes from Michael Pollan's new book, Food Rules.  We went to a friend's house for dinner last night and they shared the book with us - it's now on my reading list!  I have read some of Pollan's other books, In Defense of Food and The Omnivore's Dilemma and am becoming much more attuned to the belief that we are what we eat.  How often, these days, are we not even aware what it is that we are eating?  I don't know about you, but sometimes I feel like I need a scientific dictionary to understand some of the ingredients listed on food labels.  So today we signed up for Door To Door Organics and are going to continue to be more conscious of what we consume.  I like the idea of knowing more about what I'm putting into my body.

Today's treat was inspired by a swap I received from Connie Stewart (thanks Connie!).  The treat uses the 2 tags die in the Big Shot and it holds 3 Andes mints (maybe I need to find a healthier treat to fit inside these little containers!).  I used the Good Egg stamp set to stamp the inside and outside of the tag with Rich Razzleberry ink.  The greeting is from the same set.  The Boho Blossoms punch came in handy for creating the flower embellishment.  I hope you like it!

Monday, March 15, 2010

Punch Bunny Easter Treat

Today's Lesson From The Craft Room:  Allow Your Body Time To Adjust

OK, I'll admit it...I slept until 9 a.m. this morning!  That is not my usual approach to the morning, but my body just wouldn't wake up!  It's funny how this happens to me when we adjust the clocks for Daylight Saving Time.  I think we expect that we will just turn the clock ahead one hour and our bodies will adjust as quickly as it takes us to adjust the clock!  Not so.  Our bodies have their own natural rhythm.  A rhythm that, I believe, is very tied to the sun and the moon - light and darkness.  Just because we can adjust the clock in an instant, does not mean our bodies will make the same quick change.  We need to allow our bodies time to adjust to the new time we are presenting them with.  Time to shift rhythm.  Maybe tomorrow I'll wake up a little earlier...I'll let my body decide.

Today's Easter treat was inspired by a punch bunny by Jami Sibley (thanks Jami!).  I believe her bunny was inspired by about 3 other people...so this bunny has come a long way on the creativity train! :)  He was a ton of fun to make (using the wide oval, small oval, word window and heart trio punches) and I thought he'd be adorable as a treat bag topper!  I ran my Top Note die through the Big Shot with both sahara sand textured card stock and then a smaller piece of green galore card stock for the grass.  Two yummy Ghirardelli chocolate square fit perfectly in our small cello bags.  I hope you like him! :)

Saturday, March 13, 2010

A Random Act Of Kindness!!!!


Wow!  I had a surprise in my mail box today!!!!  Look at this gorgeous card that Judi sent me!  She is so talented and I feel so special to have received one of her creations!!!!  Thanks Judi!!!!  You can see more of Judi's beautiful work on her blog.  She has some blog candy that she is giving away this month, so be sure to pay her a visit!

Faux Designer Series Paper - Tart & Tangy

Today's Lesson From The Craft Room:  Pass Along A Last Minute Invitation

Last night I cooked a big meal.  We realized, that if we didn't have company, we would be eating the same recipe for a week!  So, although it was already dinner time, we decided to give Michael's sister a call and invite her over for dinner.  I have to admit that I felt a bit guilty calling her so late to pass along the invite, but I ignored the guilt and called anyway.  I had to leave a message, but 30 minutes later she called back and said she and her boyfriend would be over!  I was so glad I had passed along the invitation - even though it was at the last minute.  We had a great time sitting and chatting.  So next time you want to pass along a last minute invite and are feeling a little guilty about it - swallow your pride and make the call - you'll be so glad you did!

Today's SCS challenge was to find inspiration from the Warm Biscuit Bedding Company.  I chose this fabric as my inspiration!  I stamped the background in barely banana with the Sanded background stamp and then used my markers to color the cherry stamp from tart & tangy and randomly stamped it all over the card stock.  The garden green card stock was punched with the eyelet border punch and then run through the crimper about 5 times to give it a lace feel.  I hope you like it!

Friday, March 12, 2010

A Thoughtful Day

Today's Lesson From My Home:  Find Your Moments Of Heaven Here On Earth

I went for my morning "wog" with Buddy this morning.  Our route takes us by a park near our house.  There is one corner of the park that sits up on a hill and from that vantage point you can see the snow-covered mountains in the distance.  As part of our morning ritual, we have begun to stop at that corner of the park and sit on the bench there and stare at the mountains in silence.  Today, I sat on the bench and Buddy sat down right in front of me (well, actually, right on my left foot) with his back pressing against my calf.  In that moment I felt I was experiencing a piece of Heaven here on earth.  Just thinking about it now makes me take in a deep breath...and exhale.  I want to be mindful of these moments, and try to look for them in my daily life.  Today I'm choosing to not head into the craft room.  Instead, I am heading back into the kitchen where my creating is about nourishing myself and my family tonight for dinner...baklava and vegetarian moussaka...the house smells divine!  Have a beautiful night!

Thursday, March 11, 2010

Video: Dyed Sand Technique

Here is another technique I came up with...my creative mind has been very active these past few weeks! :)  Thought you'd enjoy this quick and easy technique that has a great WOW effect!  Enjoy!

Sneak Peek - Sweet Scoops!

Today's Lesson From The Craft Room: Support Someone Else's Art!

My friend Mario Rivoli is an incredible artist! He has been creating since he was 5 years old!  He is an amazing assemblage artist and I am always wowed by his creations! We went to lunch the other day, and when we picked him up at his house we were given a tour of some of his latest creations. I fell in love with this amazing beaded flower arrangement - just gorgeous.

So...I bought it!!!!! It felt so good to support someone else's creative spirit by purchasing their work. There are a lot of ways we can support someone else's art - by our purchases, our comments, our encouragement. Who can you support today?

Today's challenge on SCS was to incorporate something new. One of my new things is obvious - the new Sweet Scoops stamp set that will be out in the summer mini catalog! Isn't it yummy?! :) I also tried a new technique that came to me in yet another dream!!!! I was dreaming about sand, and, as I was waking up, my creative mind thought, "Hey, I wonder if you can dye white sand with classic ink?" Well, the answer is an absolute YES! It also dries right away so you can get instant gratification! I may put together a quick video today to demo the technique. I adhered the sand to the card using heat and stick powder. I hope you like it!

Wednesday, March 10, 2010

Sale-A-Bration Birthday

Just wanted to share this quick card that we made at a workshop this week.  We used the Happy Moments set from the Sale-A-Bration catalog.  The presents were stamped with Staz-On and then colored in using ink pads and an aqua painter.  Of course we had to add some dazzling diamonds :)  I got this Happy Moments stamp set for free since it is still Sale-A-Bration!!!!  Sale-A-Bration runs to the end of this month!  Don't miss this great opportunity to earn free, exclusive stamps, paper or punches when you make a $50 product purchase!  What are you waiting for?  Shop now! :)
Today's Lesson From The Craft Room:  Follow Your Waking Dreams

Have you ever paid attention to what your internal voice is telling you upon awakening?  I listened very carefully yesterday morning when, upon awakening, I had a waking dream about heat embossing on fabric!  I had never thought of it before, and since I just started sewing last week, somehow the thought of embossing combined with the act of sewing in the middle of the night and I woke with the idea!!!  I love heat embossing on paper, so why not fabric?!  Listen to your waking dreams - you never know where they might take you!

Today's card uses my heat embossed fabric technique!  Scroll down to the next post to watch the how-to video.  I used the Charming stamp set and white craft  ink with gold embossing powder on my black fabric.  Before embossing the fabric, I ran it through the Big Shot with the Flower Folds die.  The flower was made with 4 of the smallest flowers cut from the die.  I also ran the black card stock through the Big Shot with the Finnial Press embossing folder.  I heat embossed the greeting in black on the brushed gold card stock.  I hope you like it!

Tuesday, March 09, 2010

Video: Heat Embossed Fabric

I woke up with a new technique in mind - heat embossed fabric!!!  Here's a video to show you how!  Let me know if you have any questions!  Enjoy!


Here is a package that I decorated with a combination heat embossed fabric and paper flower.  The possibilities are endless with this technique!

Monday, March 08, 2010

Judi's Blog Candy!

Judi is giving away more blog candy on March 25th!  Yeah!!!  Check out all the cool stuff she is giving away!
 Go check out her blog if you'd like to enter to win!

Quilted Furry Purse

Today's Lesson From The Craft Room:  Take On A Challenge!

Late in the afternoon yesterday I decided it was time to head back to the sewing machine.  I knew I could have started small - maybe a pillow cover or something simple for sewing project #2...but what fun would that be!  Instead I chose to challenge myself!  I had seen the rag quilted purse that Angie Juda had made and I had even watched her video on how to make it (before I learned how to sew) and I was so inspired I thought - What the heck!  I am soooooo proud of myself I am going to burst!  I have to admit that choosing to use a bulky furry fabric was probably not the best choice for a first purse, but it didn't stop me :)  I can't wait to use my purse today!  How can you challenge yourself today?

Sunday, March 07, 2010

Decor Elements Auto!

This Afternoon's Lesson From Outside The Craft Room:  Why Create Small When You Can Create Big!

I am the kind of person who believes a car is meant to get you from here to there.  I have had my car since 1998 and I intend to have it until it won't have me anymore :)  My car and I have been through a lot!  She was stolen twice (can you believe it?!), but both times she found me again.  Since the repairs from when she was last stolen, the clear coat has begun to peel away.  I guess the body shop can never do as good of a job as the manufacturer.  I have thought about repainting the car, but I've been told that the car is worth less than the paint job would be...so, I figured, why not make her beautiful in some other way!  Today I ventured outside with my Ginormous Flowers decor elements and began working on her makeover :)  This is what I've done so far - it is already making me smile :)  I'm debating whether or not to cover her entirely, or to just focus on her problem areas.  I figured I would stop for the afternoon and take another look at her tomorrow, once I've stepped away for a bit.  Why create small when you can create big! :)  I hope you like her!

Featured Stamper Inspiration

Today's Featured Stamper on SCS was Vera Schoeters.  What a lot of inspiration her stamping provides!  I chose this card for my inspiration.  I used the ideas of the Warhol technique and the square shapes and went from there!  I hope you like it!  Thanks for the inspiration Vera and congratulations!

Stamp Free Card

Today's Lesson From The Craft Room:  Sometimes You've Gotta Just Get Through It

I don't know what was up with me yesterday.  I was in quite the cranky mood.  I can always use my default PMS excuse, but I think I was just experiencing a case of the blahs.  Nothing seemed to cheer me up - not a trip to our friend's store to visit the new puppy, not a trip to the fabric store to buy some supplies, not even horchata (have you tried this delicious rice, cinnamon and vanilla drink?  It's awesome!!!).  Sometimes you've just gotta get through it and recognize that at some point, like everything else, change will come.  I am here to attest to that!  Today is a new day and my crankiness has gone - yeah!  I've made it through!

Today's card has no stamping!  Blasphemy! :)  I used the Sending Love specialty designer series paper.  This stuff is gorgeous!  One side of each sheet has glitter on it!  Love it!  I also used the Big Shot to emboss the black panel with the finnial press embossing folder.  I used my daisies #2 die to die cut the black flower.  The pink flower was punched using the scallop circle punch.  Finally, I made the brad using our build-a-brads!  I love these too since you can use your 3/4" circle punch to punch out a piece of designer paper and then build your own brad to match your card!  The finishing touch was a piece of our luscious 5/8" black satin ribbon.  I hope you like it!  If you want to order any of the supplies used in today's card, stop by my on-line shopping site - open 24/7!

Saturday, March 06, 2010

Faux Designer Series Paper

Today's Lesson From The Craft Room:  Wog A Little

I used to run...well, maybe you could call it jogging.  I actually ran a marathon for my 30th birthday.  Now, it seems, walking has been challenging enough!  However, this morning, I decided to "wog" - that's my word for a walk/jog.  I have to say, it felt GREAT!  The dog liked it too!  He looked at me as if to say, "Wow!  You're really picking up the pace this morning!"  Why not try a little wog in place of your walk.  It may be just the pick-me-up you need!

Today's challenge on SCS was to find inspiration at the Ginko Papers website.  This card was inspired by a great little mod pear mini bag.  I used my stamp-a-ma-jig and the pear from the Cheep Talk set to create some faux designer paper (measuring 2" x 5 1/2") that I attached to the inside edge of the card.  I used the sanded background stamp to give the so saffron card stock a little interest.  I layered a bunch of panels and popped them up on dimensionals.  I hope you like it!

Thursday, March 04, 2010

Free Standing Pop-Up Card

Today's Lesson From The Craft Room: Remember What Happiness Is All About

In today's world of consumerism it can be hard to remember what happiness really is. Sometimes we feel that the next new home, or car, or craft supply will bring us happiness. But, alas, it is not the "thing" that brings us happiness. As Gandhi put it so perfectly, "Happiness is when what you think, what you say, and what you do are in harmony." It sounds so simple, and yet it takes a lifetime of practice!

The challenge on SCS was to make a free standing pop-up card.  You can learn how to make this card by watching this great video!  I decided to use Ghandi's quote for today's card. I am not going to mail this one. Instead I will keep it on my desk as a constant reminder! I hope you like it!

My First Quilted Flower!

Today's Lesson From The Craft Room:  When You Want To Learn Something, The Perfect Teacher Will Appear!

I am sooooo excited!!!!  Yesterday, my friend Pam came over and gave me my first real lesson on my sewing machine!!!!  About a year ago I had tried the machine for the first time by following the instruction manual - I was able to pleat a piece of paper and then I put the cover back on the machine and hadn't tried it since.  I had been wanting to learn for awhile, but hadn't made much effort to find a teacher...and lo and behold, my teacher found me!  Pam was amazingly patient - she walked me through how to maintain the machine, how to thread the machine, how to thread a bobbin (I think that's what you call it) and then how to sew a straight line.  By the end of our lesson yesterday I had sewed around the first 2 layers of this flower!!!!  Today I went back to the machine and finished it off!

The flower was so easy to make...and I can say that since that was my first sewing project!  You do have to have some patience though - since the petals are curved.  Angie Juda has a great video explaining how to make the actual flowers using your Big Shot machine and a few dies.  I followed those directions for a bit and then went another direction.  I decided to put a corduroy button brad in the center.  I also did something different on the back.  At Leadership we were able to watch a demostration by Jill Olsen and she told us how she places a piece of felt on the back of her flowers so that she can use them for multiple purposes - slide them on barrettes or headbands, put a hair clip through them.  She even puts a safety pin on the front of her apron and then uses the hair clip, through the felt piece, to temporarily attach the flowers to her apron!  What a great idea!  So, I sewed a piece of black felt on the back like this:
I hope you like my first flower...although I'm sure no one can love it as much as I do :)  Let me know if you have any questions!

Wednesday, March 03, 2010

Lucky Leprechaun!

Today's Lesson From The Craft Room:  Take A Minute To Pause And Sit

My dog is the best meditator I have ever seen.  He can sit in the park and stare off into the distance for hours!  It is the epitomy of Zen!  Today I took a cue from him and decided to sit down on the park bench during our morning walk.  From that vantage point I could see the tops of the snow covered mountains.  We sat for awhile, Buddy and I, and just breathed in the scenery.  It brought me calm and peace and a wonderful way to start my day.

These "strips" are for the women at the bank.  I've decided to try to do a new "strip" for them each month so that they can wrap them around the candy dishes that sit on their desks.  This little leprechaun is a mix of a number of punch leprechauns that I discovered while searching the net.  If you haven't checked out Ellen Kemper's blog, you need to do so - she is a master with punch art...and quite funny too! :)  Part of my inspiration came from her adorable leprechaun!  Thanks Ellen!

Tuesday, March 02, 2010

Acetate Effects #4

Tonight's Lesson From The Craft Room:  Fall In Love With A Puppy!

Our friends adopted a new puppy from the shelter on Sunday and today we met her for the first time...What can I say?  I'm in love! :)  There's something about puppies that just puts a smile on my face and a whole lot of love in my heart!  Puppy therapy is the best!

Tonight's card is for tomorrow's sketch challenge on SCS - it was posted early so I got to play before heading off to bed!  It uses my new Acetate Effects technique!  (You can see the video HERE).  I stamped the butterfly image on a whisper white panel and adhered it behind the acetate.  I crimped all of the background panels.  I hope you like it!

Acetate Effects #3

I am having a lot of fun with this new technique, acetate effects, that I created today!  Here is the card I made from one of the panels that you will see in the Acetate Effects video!  You can watch the video on my blog or on my YouTube channel!  Hope you like it!

Video: Acetate Effects

Here's my new video on Acetate Effects!  Let me know what you think!  I would love to see what you create using this technique!  Have fun!

Acetate Effects #2

Here's another card using my Acetate Effects technique!  The acetate effects is on top of the pocket silhouette image.  Hope you like it!

New Technique - Acetate Effects

Today's Lesson From The Craft Room: Dream It...Then Do It!

I woke up this morning having had a series of dreams. I won't bore you with the ones about dropping grapefruits and dog walking (yes, bizarre), but the one that was very vivid was putting together some supplies in the craft room that I hadn't ever put together before.  So, when it came to making today's color challenge card on SCS, I decided to try my new technique!  It's not something I have seen anywhere else - although in the craft world I have a feeling someone has done it before - but it involves a combination of ink, crystal effects, acetate and lots of mushing! Next time you have a dream worth pursuing, don't just dream it, do it!

I am really enjoying the light and texture created by this new technique I dreamed of! I can already see more experimenting going on in the craft room...and maybe a video on its way! I hope you like it!!!!

Monday, March 01, 2010

Faux Nesties/Die Cuts

Today's Lesson From The Craft Room:  Habits Are Die Hard!

All of those old Bruce Willis Die Hard movies were fun to watch and part of the fun was that no matter what came at Bruce he kept on going!  I'm in the process of trying to change some habits - habits that I feel aren't assisting me in my creative journey.  One of the things I'm trying to change is how I start my day.  Rather than jump on line and look at the devastation that has taken place in the world over night, I am trying to sit down and write in my journal.  I will get going pretty well for a few days and then, oops, there comes that old habit again!  Today I triumphed - my journal came first...we'll hope for the best tomorrow!

Today's card is for 2 challenges on SCS; the clean and simple challenge - to make a square card, and the new technique challenge - to make faux nesties.  I used my modern label punch to create the "nesties" feel.  I cut out squares of card stock and then placed the punch half-way into the square and punched all 4 sides.  I also used the end of the punch to punch the corners of the confetti card stock.  I hope you like it!

stamps: Elements of Style (coming soon in the Summer mini catalog)
card stock:  Bravo Burgundy, Confetti
ink:  bravo burgundy
accessories:  modern label punch, 1 1/4" and 1 1/2" circle punches, dimensionals

Sunday, February 28, 2010

Versamark and Soot

Tonight I decided to try something new!  I had been wanting to try stamping with glossy paper and soot from a candle...and here are the results!  I was pretty pleased since it was my first time...not sure what I was more pleased with...the fact that I like how the card came out, or the fact that I managed to not light anything on fire while I was trying this technique!!!!  I think a video may be in order...as soon as I get all this black soot off my fingers and the craft table!

Four Square Birthday

Today's Lesson From The Craft Room:  Don't Be So Straight!

I had a stamp-a-stack at my house today and one of the cards that we were doing was this one (although we were making it in blue instead of chocolate chip):
 
 The larger photo is what one of the 12-year-old attendees created when she stamped the dot, dot, dot stamp and saw that it was a bit crooked.  I LOVE what she did!!!!  I immediately took a picture and recognized that allowing yourself to not be so straight can yield beautiful results!  (I'm not suggesting we all be a little crooked...just not so straight :)  I hope you like it!

Thursday, February 25, 2010

Quilled Flamingo

Today's Lesson From My Make-Shift Craft Room (aka my mom's couch):  Listen To The Sounds Of The Wind And The Rain

It was windy and rainy last night and the windows were cracked open.  I am always awed by the power and majesty of Mother Nature.  From the inside, the sounds were comforting - at times invigorating.  From the outside, I image it was a bit nerve wracking!  Listening to the sounds of nature seems to create a rhythm within me.  It's like my heart starts beating in tune with nature - much like my fingers will start tapping to the beat of music.  Sometimes we need a bit of nature to get ourselves back in tune.

Today's flamingo was a tiny bit more challenging than yesterday's frog :)  I will keep working on my quilling skills...they seem to still be in their infancy :)  At least I've got room to grow :)  Hopefully this little guy will also find his way onto a card...any thoughts on what the sentiment should be????

Wednesday, February 24, 2010

Quilled Frog


Today's Lesson From A Make-Shift Craft Room:  Grow Where You're Planted

I'm visiting my mom right now and, as always, I seem to whither a bit when I am away from my craft room and the tools for creativity are not at my beck and call.  So, I did what any creative person would do, I went to find some tools to create!!!!  A quick trip to the craft store landed me a Klutz book entitled Twirled Paper that came complete with a book and the tools necessary to make some quilled animals!  yeah!  Sometimes you just need to grow where you're planted...even if you'll be transplanted again soon :)

This little quilled frog came together quite quickly - even though I hadn't quilled for awhile.  Once he finds his way back to the craft room, you and I both know he's going to end up on a card!  I hope you like him :)  Now wherever you are....go and grow! :)

Monday, February 22, 2010

Quick and Simple

Today's Lesson From The Craft Room:  Use The Time That You Have

I didn't think I'd have time to do a card this morning, but I decided rather than fret about the time that I didn't have I should use the time that I did have...which was about 5 minutes!

So here is my 5 minute card!  Popped the heart up on a dimensional - that was the most technical part :)  I hope you like it!

Sunday, February 21, 2010

Featured Stamper JovialJudi

The featured stamper on SCS today was my wonderful friend Judi!!!!!  Yeah!!!!!  We were to find inspiration in her amazing work.  I chose this card for my inspiration!  Feel free to check out Judi's amazing talent on her blog - I know you'll be glad you did!

Round Tab Punch Purse

The idea for this card came from a swap I received at least a year ago from Betty Saccocia (thanks Betty!).  I used the sneak peek set, Elements of Style, for stamping the background.  The purse is 1/2 of the round tab punch, which I then coated in tombo mono multi adhesive and chunky silver glitter.  The handle was made from the small oval and oval punches.  I hope you like it!  This one is going to my cousin for her birthday on March 1st!

Monogrammed Stationery

Today's Lesson From The Craft Room:  Create Something For Someone You Love!

I'll be visiting my mom soon and decided I didn't want to go empty-handed.  I've made her a few gifts and this monogrammed stationery is one of them.  It is a wonderful feeling to be able to make something for someone you love!  These cards were quick and easy.  I stamped the "E" from the Lovely Letters stamp set in Always Artichoke.  The Always Artichoke card stock was run through the Big Shot in the Finnial Press embossing folder.  I hope you like it...and I hope my mom does too!

Saturday, February 20, 2010

Video: Styrofoam Frosting


Learn how to make this great, economical "frosting" for your cards and paper crafting projects!  Let me know if you have any questions!  Thanks to Holly Young for this wonderful idea!  You can visit her blog here!