Thursday, December 23, 2010

2011 CD Calendar Continued!

Today's Lesson From The Craft Room:  Whatever You Have Is Exactly What You Need To Produce Your Best Work
Today's lesson, like yesterday's, comes from the book Art & Fear by David Bayles & Ted Orland.  I've realized that there are many ways that I avoid the risk that art making involves.  I tell myself that I need to straighten/clean/organize the craft room before I can create.  Or I tell myself that I need to run out or jump on-line to purchase that special, amazing art tool/item/product that is going to finally change everything and make everything that I create worthy of the walls of the National Gallery of Art!  What I need to keep reminding myself is that whatever I have is exactly what I need to produce my best work - whatever my craft room looks like, whatever tools I'm using, whatever I'm feeling like at the moment, is exactly what I need to create my best work at that time.  I think about artists who drew pictures on the walls of caves and those who found whatever tools they could use to express the art inside of them during the Holocaust.  The need to create, is exactly that, a need - and everything necessary to fulfill that need is right there with you.  All you need to do is take the risk to let that art out!
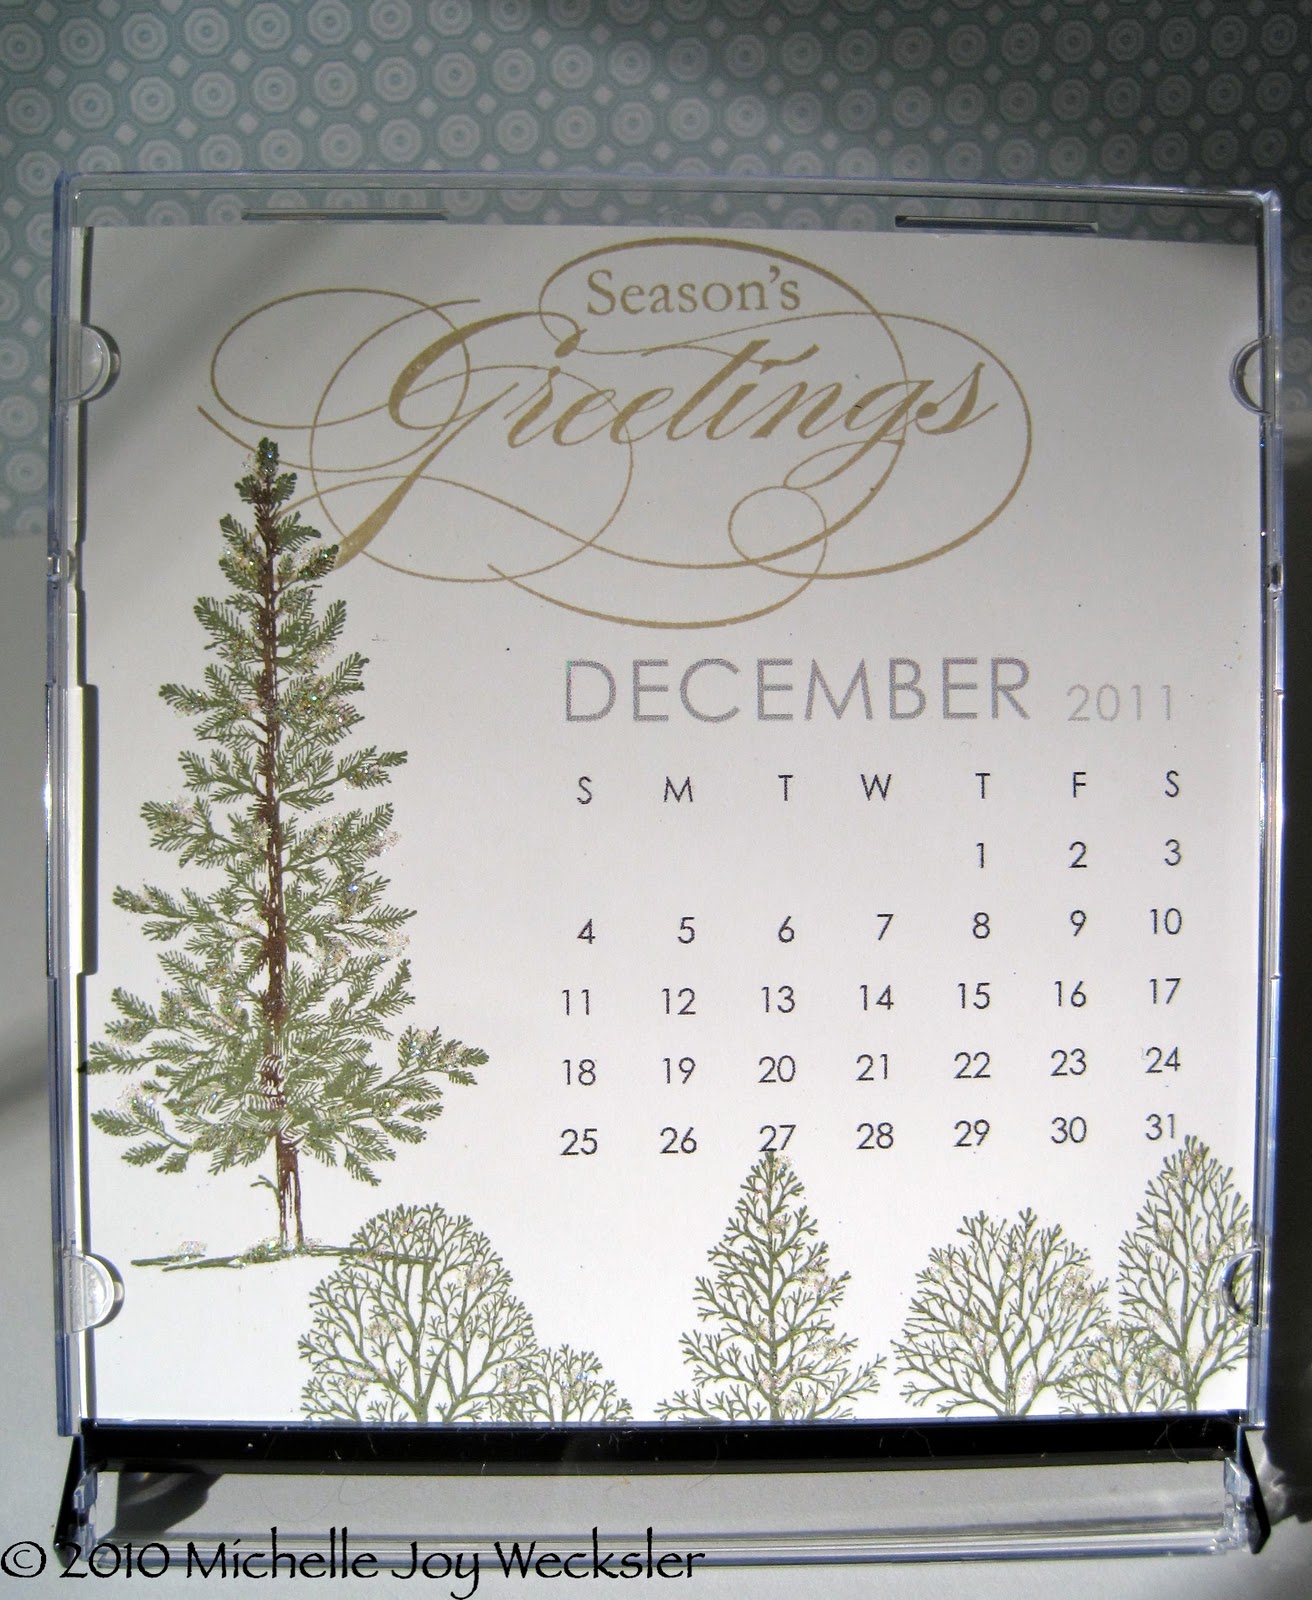
Today I'm sharing the remaining half of the year from my 2011 CD calendar with you (you can see the first 6 months in yesterday's blog post).  Enjoy!

Wednesday, December 22, 2010

2011 CD Calendar

Today's Lesson From The Craft Room:  To Require Perfection Is To Invite Paralysis
Today's lesson comes from the book Art & Fear by David Bayles & Ted Orlando (I highly recommend it!).  When making a handcrafted project, it can be easy to fall into the trap of trying to be "perfect."  Trying to make your work look like it was created by a finely adjusted technological marvel that can apply ink evenly to every spot on a rubber stamp and can apply even and consistent pressure to make the exact impression every time....let alone come up with the perfect, harmonious design elements that elicit ooh's and ahh's from anyone who views the final project!  Well, I don't know about you, but whenever I start trying to achieve anything close to "perfection," I find myself stiffening up, stamping like a whirling dervish with vertigo and, at the worst, walking out of the craft room altogether, totally deflated!  It's time to recognize that requiring perfection from ourselves in inviting paralysis.  If, instead, we can approach our craft with a heart filled with love and a playful spirit, no matter what we create, we will grow and change in the process.  I wish you many moments of playfulness as you create!!!!
Today's project is my yearly calendar.  This year I decided to do a CD case calendar.  I created the template for the months in Pages on my Mac and then printed them off onto Whisper White card stock cut to 4 3/4" x 4 3/4".  This is the perfect size to slide into the opened CD case.  I used current Stampin' Up! stamp sets to stamp all of the months.  Once I stamp all of the months, I wrap them together in this card stock holder that can sit on the back of the CD case once it is opened on a desk/tabletop.
I will share half of the year with you today and the other half tomorrow! :)
Don't forget that you can use hearts to make great shamrocks for St. Patrick's Day!  Try it freehand, or use your stamp-a-ma-jig if you want to be a bit more precise (but watch out for trying to be perfect!).  I drew the stems freehand.

Tuesday, December 21, 2010

Elizabeth Anniversary Card

Today's Question From The Craft Room:  What Does It Take To Be Married For 41 Years?
Today's card is for the 41st wedding anniversary of a couple who lives down the street.  As I made the card I began to wonder, what does it take to be married for 41 years?  I guess it is a question I could ask them and I'm also interested in my own answer to the question.  What I think the ingredients must be to sustain a loving relationship for that length of time.  I believe it would take unconditional love - loving someone when they act in ways you appreciate and still loving them in those times when they act in ways that you wish they wouldn't.  It also must take some selflessness - a recognition that the person you are in relationship with, like you, has needs and wants and goals and aspirations and sometimes that means that both of you make sacrifices to support each other in pursuing and achieving goals.  I also believe it takes a lot of laughter - the ability to not take life or each other so seriously.  Patience must have something to do with it too - the ability to persevere when things aren't exactly as each of you would like.  I'm sure I'll spend more time pondering the essential ingredients - but for now, that's my recipe.  What do you think?
Today's card was my first use of the Elizabeth stamp and I fell in love immediately! :)  I stamped the image with Chocolate Chip ink onto Confetti card stock and it immediately looked elegant!  I used my stamp-a-ma-jig to center the greeting from Teeny Tiny Wishes in the center of the oval in Early Espresso ink.  I added some dazzling diamonds with my 2-way glue pen and place a few pearl jewels around the image.  I used the Calendar Alphabet & Numbers set to stamp the "41" in Soft Suede ink on Very Vanilla card stock and punched it out with a 1/2" circle punch.  I sponged the edges and added a bit of crochet thread and a tiny pearl and then popped it up on 1/2 of a dimensional.  I hope you like it!

Friday, December 17, 2010

Four Ways Friday #30 - Silhouette Sentiments

This week's Four Ways Friday uses the Silhouette Sentiments hostess stamp set.
For this first card I stamped the flower image using 2 different colors and decorated both the central panel and the envelope.  I love how the floral image can be used to create wonderful backgrounds!
I decided to take the background idea a little further for this second card and stamped the image in 3 different colors - some lighter, some darker.  I also sponged the background with 2 different shades of green.
Heat embossing became the focus for this third card.  I still used one of the floral images to create a background, but this time I stamped it multiple times across the bottom of the Old Olive panel using VersaMark and then heat embossed with white embossing powder.  I heat embossed the envelope to match.
For this last card I decided to use this beautiful flower image and have it be the focal point of the card.  I used my markers to color the image and then stamped it onto Whisper White card stock and punched it out with a circle punch.  this card measures 3"x 6".  Thanks for stopping by for this week's Four Ways Friday!  I hope you have a wonderful weekend!!!!!

Wednesday, December 15, 2010

More Monsters!

Today's Lesson From The Craft Room:  What If It All Disappeared?
I'm wondering if asking questions for my lessons is really more significant than making statements - as I realize that sometimes I don't really have answers - just more questions.  Today, as I heard from someone about a news story regarding a man committing suicide, I wonder if the suicide had anything to do with the man losing everything that he had - or at least feeling like he had lost it all.  And, I wonder, what if everything I had disappeared?  I can imagine the things being replaced.  It's more difficult for me to consider the void that is left when those you love disappear.  And what about those times when we aren't there for ourselves?  When we, in effect, disappear into a dark or sad place?  As I sit here pondering these questions, I recognize that there have been times in my life where things, people, and I have disappeared.  When I wasn't sure how I was going to make it through another minute, let alone another day.  But here I sit - having gotten through...and that makes me think that if it did all disappear, I would survive.  That somewhere I would find the strength to move forward - to continue.  It is my hope that we can all find this strength when we need it.  And, when we are having trouble finding it within ourselves, to reach out to those who can help us find the strength when we need it most.  It never does all disappear - it is just hidden from our view and we need to be willing to search deeply for the strength we all have inside.
Today's card was another opportunity to Make A Monster! :)  I added some blue google eyes and some flowers from the Eastern Bloom stamp set.  I can't look at these little monsters without smiling and I love thinking that whoever gets this little 3x3 note will smile too :)

Tuesday, December 14, 2010

Make A Monster!

Today's Lesson From The Craft Room:  Watch Out For The Jump You Make To Conclusions
On my trip I met a great woman - funny, happy, full of energy!  She was quite heavy and one of the other people on the trip actually commented to me about what the woman was eating for dinner...more specifically she said something like, "Why is she eating that?!"  I might have even thought the same question to myself if I had not already learned a bit about her story - and for this I am sorry.  It can be so easy to jump to conclusions as you observe those around you.  We need to recognize when we are doing it and ask ourselves what assumptions we are making.  It turns out that this amazing woman had arrived at this lovely beach location having lost 60 lbs!!!!!  It was incredibly inspiring!!!!!  She also told me about walking a 5K race and deciding that next year she wants to do the race again...except this time she wants to run the race!!!!!!  Talk about amazing energy!!!!!!  I need to remember this story every time I find myself judging someone I do not know - or even those that I do.  Rather than judge, I need to open myself up to their story - their perspective.  I may even encounter amazing inspiration that I might have missed if my judgment got in the way.
I decided to make a little love note today with the Make A Monster stamp set!  This set is so playful and it reminds me of coloring as a child.  How cool that you can build these monsters from scratch - bodies, eyes, mouth...it's all up to you!  I have a feeling another monster may get created for tomorrow...Frankenstein here I come :)

Monday, December 13, 2010

Rest & Relaxation

Today's Lesson From The Craft Room:  Unplug!
My week away was perfect.  I only logged on to a computer one time!  It was so nice to unplug and just relax.  No schedule, no meetings, no pressing appointments.  Just the sand, the sun, the waves.  I even fell in love with a hammock during the trip - the gentle breeze and sway.  Sometimes we just need to unplug from everything - the cell phones, the computers, the same old routines.  I did not read a newspaper or look at the news.  I did not wear a watch.  I barely wore shoes!  So peaceful.  Now as I return to my life at home I hope that I can maintain some of the habits I developed while away.  I also hope to maintain this sense of peace and ease...wish me luck :)

Monday, December 06, 2010

Taking A Break For The Week

Hi!!!!  Thanks for stopping by!  I have decided to take a week off from blogging for a bit of R&R :)  I hope you have a week filled with creativity, laughter and love!  May your creative muse pay you a visit every day.  May your inner critic take a hike for at least a week.  May you be kind to yourself and your creative explorations.  Take deep breaths and take notice of all the beauty that surrounds you.  Have a wonderful week!  I look forward to returning with a renewed spirit!!!!! :)

Friday, December 03, 2010

Four Ways Friday #29 - Solid Stripes

This week's Four Ways Friday uses the single stamp Solid Stripes.
For this first card I used the Solid Stripes stamp as a background element for the greeting.  I stamped the stripes at half strength using Crumb Cake ink onto Very Vanilla card stock.
For this second card I decided to use more of the stripes and do a tone-on-tone effect.  I stamped the stripes onto Real Red card stock using Real Red ink.  This piece formed the perfect backdrop for the butterfly and pansy.
For this thank you card I punched out a circle from scrap paper and used it to mask off a portion of the base card before stamping with the Solid Stripes stamp in River Rock ink.  I then stamped the greeting into the center and surrounded the greeting with punched flowers.
This final card is 6 inches in length.  I masked most of the card and stamped along the edge using Basic Gray ink.  I stamped repeatedly to stripe the entire edge of the card.  I hope you've enjoyed seeing a few different ways to play with the Solid Stripes stamp.  I hope you have a wonderful weekend!!!!!

Wednesday, December 01, 2010

Create With The Time You Do Have!

Today's Lesson From The Craft Room:  Create With The Time You Do Have!
It can be so easy to come up with every excuse in the book for why you can't create - I don't have the right supplies; I'm not talented enough; My muse has left the room...and, one of my all time favorites...I don't have time!  Well I'm here to tell you you DO have time.  In the time it has taken you to read these few sentences, you could have engaged in a creative act!  I got home tonight and I was ready for bed - tired, no motivation.  Yet I had not created today and so my day felt unfinished.  I knew I didn't want to stay up late so I went into the craft room with very low expectations.  Now I'm not saying that what I created is worthy of a second glance.  What I am saying is that I did it!  I left the excuses behind and I did what I need to do every day - engage in an act of creation - no matter what the outcome.  Creating fulfills me.  It is who I am.  Create with the time you DO have rather than focus on what it is you don't have.
Today's card is the collision of card stock, smooch ink, black satin ribbon, rhinestone jewels, Three Little Words, Season of Joy and Thank You Kindly.  It is the collision of my need to create with the limit of time before bed.  Now I can sleep....

2-Step Owl Punch Thank U Card!

Today's Lesson From The Craft Room:  Give Someone A Helping Hand
Our close friend Matt recently received an amazing helping hand from one of his longtime friends.  His friend donated one of his kidneys to him!  I am humbled by this act of unconditional love and kindness.  We each may not be in a position to help someone in this way.  Yet we are each capable of lending someone a helping hand in our own way.  For now, we have been helping Matt and his family by walking their amazing dog.  It's a small gesture on our part and they can't stop saying thank you.  For us it is such a small thing since we walk Buddy anyway - so our walk is just extended by a few extra blocks to pick up and drop off their dog.  The impact for them, however, seems to be huge and we all end up feeling great as a result.  What can you do today to give someone a helping hand?
Today's card was a thank you card to one of my friends and customers :)  I love, love, love the 2-Step Owl punch and this card was so much fun to make - I just want to keep piling these owls on top of each other!  Wouldn't 3 look cute together? :)  (ooh - I wonder if I could make an adorable growth chart just by stacking these owls one on top of the other???  That would be toooooo cute!).  The greeting is from Cute By The Inch, stamped in Peach Parfait.  Just a few little touches give the card a personal touch - the googley eyes on the top owl and the little button and crochet thread in the corner.  I hope you like it!

Monday, November 29, 2010

Cake Pops!!!!!

Today's Lesson From The Craft Room:  Sometimes The Kitchen Can Be Your Craft Room!!!!
I am not responsible if you go to Bakerella's website and decide you have to go racing into the kitchen to make cake pops!  Really, it's not my fault!  Or maybe I should just provide a warning...Warning!  If you visit Bakerella's website you will be overcome with an immediate urge to run into the kitchen and make cake pops!  Proceed at your own risk! :)  I had a ton of fun making these...well, maybe the first batch wasn't a ton of fun...they came out VERY sweet!  The recipe calls for a full container of frosting and for the 2nd batch I decided that 1/2 of a container was quite enough.  Today, recognize that your creativity is not confined to one room or one media.  You ARE creativity and your creative urge goes with you into all aspects of your life...even into the kitchen!  Enjoy! :)

Thursday, November 25, 2010

Happy Thanksgiving!!!!

May you have a day filled with gratitude for all that life provides.  May you take this feeling of gratitude with you into every day you are given.  May you find something to be grateful for every day.  Enjoy this very special day.  Thank you for sharing your time with me!

Wednesday, November 24, 2010

Updated Friends Fur-ever Belated Birthday Card

Today's Lesson From The Craft Room:  Breathe New Life Into Something You've Put Away!
Today's card may look slightly familiar....I made this belated birthday card months ago...minus the dog, the ground and the balloon.  Yesterday a friend came over and wanted to purchase a belated birthday card.  The plain card was all that I had for a belated birthday, but when she saw another card that had this small dog on it she said, "Oh, the person I'm giving the card to has a dog exactly like that!"  So, a quick bit of stamping and ta-da!  We breathed new life into something that had sat for months, waiting to be discovered and loved :)  What can you breathe new life into today?????

Tuesday, November 23, 2010

Friends Fur-ever Sorry

Today's Lesson From The Craft Room:  Say You're Sorry
The adventures with Buddy the dog continue...He seems to be a connoisseur of overgrown grass and there is one particular yard where he likes to stop and act like a cow and munch on the grass.  I had him on his leash and allowed him to walk up into the yard a bit (still holding onto his leash), when I heard a knocking on the window.  There stood a woman, in a robe, motioning for us to get off the yard.  I tried to make a "munching" motion with my hand - just so she didn't think he was doing his business in her yard - and we walked away.  I was embarrassed and a bit angry since Buddy wasn't doing any harm.  At the same time I realized that not everyone loves dogs like I do and it was, after all, her grass and her yard.  So then I decided that an apology might be a nice way to make things feel better.  I really didn't want to walk by her house in the mornings wondering if she was looking out the window, annoyed, every time she saw us.  So I came home and made this quick little card and put it in an envelope that said "a note for you" on the outside.  On my way to the grocery store I dropped it in her mailbox.  It was signed "Buddy & Michelle."  I don't know how she felt about the note or if it changed her feelings towards us - I hope so.  What I do know is that it made Buddy and I feel better - at least we said we were sorry.
It's no surprise that I love the Friends Fur-ever stamp set!  I combined the images with the greeting from Teeny Tiny Wishes.  I find it easiest to cut out images like the dog and bones using a hobby blade - it's much quicker than trying to maneuver scissors.  The dog dish is simple to cut out with scissors.  I hope you like it!

Monday, November 22, 2010

Owl Punch Penguin Christmas Card

Today's Lesson From The Craft Room:  Be Willing To Go Under And Over Fences!
Buddy and I took our morning walk today and I decided to let him off leash when we got to one of our favorite spots at the edge of the park.  The minute he was "free" he went running along a fence that closes off a lot that is for sale.  There is a tree in the corner of the lot and he could see a squirrel at the base of the tree.  The fence was no match for Buddy - that 78 lb. dog wiggled his way under the fence and made a beeline for that tree!  The squirrel didn't sit around and wait - he skedaddled up the tree!  Then Buddy decided to go to the adjacent property and come back to me by jumping over their 3-foot fence!  It's amazing what he will do to go after what he wants!  It makes me wonder what I'm willing to do to go after what I want.  Am I willing to go under and over fences and do whatever I can to pursue my desires and dreams?  Are you?
Today's card is one of the cards we will be making at my upcoming holiday stamp-a-stack.  I LOVE the 2-way owl punch - you can make so many adorable things with it!  This penguin was so simple and I paired it with the Santa hat from the Sock Monkey Accessories stamp set and added a touch of chunky white glitter.  The greeting is from the retired Christmas Punch stamp set.  I had to add some luscious ribbon.  That penguin just makes me smile :)  I hope you like it!

Friday, November 19, 2010

Four Ways Friday #28 - Peaceful Season (Hostess)

For this week's Four Ways Friday I used the Peaceful Season hostess stamp set from the Holiday Mini Catalog.
For this first card I used a greeting from Peaceful Season along with the Dasher stamp (I LOVE Dasher!).  I stamped Dasher in Early Espresso onto Very Vanilla cs and then sponged the edges and spritzed the card stock with Soft Suede ink.  I mounted it on a layer of Early Espresso cs.  The card base is Crumb Cake cs and I added a strip of the neutrals designer paper.  The greeting is stamped in Basic Black and I finished the look with a knotted piece of hemp twine.
This small gift card was a snap to make!  I inked up the holly leaf image using Always Artichoke and Cherry Cobbler markers and stamped the image onto a Bashful Blue card base.  The greeting words are from the Fundamental Phrases stamp set.  I added a little spritz of Always Artichoke to complete this small card.
For this card I decided to have some fun with small circle punches!  I cut out a triangle from Whisper White cs and covered it with a variety of circles in Bashful Blue, Certainly Celery and Perfect Plum.  I added a touch of dazzling diamonds glitter and a few rhinestones and then sponged the edges with Old Olive ink.  The trunk is a piece of textured Soft Suede cs.  The greeting was heat embossed with white embossing powder on Chocolate chip cs.  I tore a piece of Whisper White cs to create the snowy ground and made the snow sparkle with a dash of dazzling diamonds!
Making tags is always fun and easy and now is a great time to stock up on tags for the upcoming gift-giving season!  I hand-cut the tag from Very Vanilla cs and created the hole protector by punching a 1/2" circle inside of a 3/4" circle from Bravo Burgundy cs.  I stamped the bird in Bravo Burgundy at half strength.  The floral image is from the Baroque Motifs stamp set and I stamped it at full strength and then again in Basic Gray at 1/3 strength.  The greeting (to/from) was stamped in Basic Gray.  I sponged the edges with Bravo Burgundy and a little Basic Gray and couldn't resist giving the tag a spritz with my Basic Gray marker and the color spritzer tool.  A few pearl jewels and a piece of Very Vanilla satin ribbon finish the look!  Thanks for stopping by for this week's Four Ways Friday!  I hope you have a wonderful weekend!!!!!

Thursday, November 18, 2010

Lovely As A Tree Christmas Card

Today's Lesson From The Craft Room:  Slow Down And Take Notice
As I post this card today, I realize that I was inspired by a number of cards that I saw while doing some of my daily blog hopping.  However, although the images and ideas stuck in my head, the places where I saw them did not and I did not write the places down.  I know I saw one card that used this Petals A Plenty embossing folder with glitter and the Lovely As A Tree stamp set and it definitely inspired this card!  If you have seen the card I'm referring to, please let me know - I'd love to name the person who inspired me to make this card!  What I do realize is that I need to slow down a bit and take notice of things - like those that inspire me.  I also want to slow down a minute, here, now, to thank you for continuing to visit my blog and for continuing to give me a reason to keep posting!  Have a beautiful day...and don't forget to slow down and take notice of what's around you :)

Tuesday, November 16, 2010

Remnant Birthday Card

Today's Lesson From The Craft Room:  Consider Your Remnants!
Yesterday I made a card with scrap strips and this was the "remnant" that remained after punching out the strips with the decorative label punch...
After I walked by this remnant for the second or third time, it began to occur to me that it was quite bright and fun...and might make a wonderful focal point for another card!  So, I added a strip or two more and cut around the scrap copy-weight paper and then popped the whole thing up on dimensionals and stamped the greeting from Sincere Salutations in Early Espresso and...ta da!  A new card was born from the remnants!  Here is a close-up of the popped up part...
The next time you are about to throw away your remnants, give them a second look...they may just be waiting for you to notice them :)

Monday, November 15, 2010

A Great Way To Use Scrap Strips!

Today's Lesson From The Craft Room:  Find Magic In What Others May See As Waste!
I keep a small container on my craft table where I place little strips and scraps of paper.  I've been collecting them for the day when I decide to try out making handmade paper.  Needless to say they've been sitting there a long time!  So today I decided to try to do something with those small strips of paper and a bit of magic happened :)  I took a bunch of the thin strips and used a glue stick to adhere them to a scrap piece of paper (copy weight, not card stock).  I then used my decorative label punch to punch out the stripes.  Here's what the punched paper looks like...
I stamped the "birthday" from Curly Cute in Versamark and heat embossed with silver embossing powder.  The "happy" from the Teeny Tiny Wishes stamp set (from the Happy New Year stamp) was stamped in Tempting Turquoise onto a scrap strip of Whisper White card stock and then popped up on the label with 1/2 of a dimensional.  I added a few rhinestone jewels for some bling.  Finally, I took a couple of build-a-wheel wheels and wheeled them onto the Pretty In Pink card stock with Pretty In Pink ink.  I also stamped a few cupcakes (from Short & Sweet) and the "happy" and "birthday" on the background as well!  I hope you like it!  What magic can you make today????

Please visit for a post later today!

What a crazy week last week!  I had my posts publish automatically since I was in Houston, Atlanta and Charlotte (I came home on Wednesday night and left again Thursday morning) - what a whirlwind!  Woke up this morning to a touch of snow :)  Everything looks like it's dusted in powdered sugar :)  I'll be posting later today and all this week, so please stop back by!  It's nice to be home :)

Thursday, November 11, 2010

Timeless Type Simple Thanks

I love the Timeless Type sizzlits since the letters are the perfect size for making quick and easy cards!  This thank you card used the In Color Paper Stack, some Bravo Burgundy and a strip of Peach Parfait card stock.  I embellished a bit using the trio punch set and a tiny pearl.  Hope you like it!  I'll be back next week - hope you have a fabulous weekend!!!!!

Wednesday, November 10, 2010

A Variation on Yesterday's Card

Here's a variation on yesterday's card.  I just changed the greeting and added a few more floral embellishments!  Hope you like it!

Tuesday, November 09, 2010

Clear Embossing with Elements of Style

Just a few quick posts for the next few days and, I'm sorry to say, no Four Ways Friday this week.  Lots on my plate and just wanted to make sure I got a bit of inspiration out there for you!  I clear embossed this Elegant Eggplant top note die cut with the Elements of Style stamp set.  A greeting, some small flowers from the trio punches and some pearls and rhinestones finish the look!  Check back tomorrow for a slight variation on this card!

Monday, November 08, 2010

Magnetic Bookmark Card!

Today's Lesson From The Craft Room:  Sometimes It Helps To Get The Yucky Stuff Out Of The Way!
I knew I had some work I needed to get done today and I was tempted to just avoid it and head straight into the craft room.  However, I resisted the urge and decided to buckle down and get the "yucky stuff" out of the way so that then I could enjoy the craft room with a clear head!  It worked!  Unfortunately, I can't show you what I just completed since I decided to try my hand at doing another submission...I'll let you know what happens!
What I can share with you is this fun magnetic bookmark card!  I sent this to one of my wonderful customers - she is a gem!  Making the bookmark is simple.  I took a piece of Regal Rose card stock and folded it over.  Then, I ran it through the Big Shot with the Two Tags Die...except that I placed the fold of the Regal Rose card stock just inside the outside line of the Tag die so that it did not cut the paper into 2 pieces - instead, the fold remained.  I used adhesive magnetic tape on the inside of the bookmark so that it can easily hold its place in a book.  I decorated both sides with various stamps and those great little rhinestone jewels.  To place it on the front of the card, I just stapled a small strip of Daffodil Delight card stock and hung the bookmark over the middle section.  I hope you like it!  I might just have to make a quick video to show you how it's done - although that might not be for another week or so...I've got some other yucky stuff to get out of the way! :)  Oooh - and Pam, if you're reading this....HAPPY BIRTHDAY!!!!!! :)

Friday, November 05, 2010

Four Ways Friday #27 - Tiny Tags Stamp Set

Welcome to another Four Ways Friday!  Today I'm using the Tiny Tags stamp set!
This stamp set is oh-so-perfect to use with the Simply Adorned jewelry!  I was inspired to make this necklace for a wonderful friend and the inspiration came from my cousin Brenda.  Brenda shared the idea with me - to make a mommy necklace - and the inspiration took off from there!  I used a few of the images and words from Tiny Tags to stamp on Very Vanilla card stock.  For the large charm I also used an embossing folder.  For the small round charms I used the Calendar Alphabet & Numbers stamp set to stamp the first initials of my friend's two children.  Here is the reverse side of the large charm...
Aren't those kids gorgeous!!!!!!  You can also see that I used the heart image from Tiny Tags on the back of the round initial charms.  I made the baubles with beads and wire and some small lobster clasps that I purchased at my local craft store.  I tied on a few pieces of chantilly ribbon and early espresso ribbon.  I love that you can change these charms out and place whatever you would like inside of them!
Here is another way to use the heart image from the Tiny Tags stamp set.  I stamped the image multiple times in Cherry Cobbler ink onto Whisper White card stock and then punched them out with my 1/2" circle punch.  I adhered them to 3/4" circles of Cherry Cobbler card stock and then used dimensionals to adhere them to the card base.  Finally, I stamped the word "love" in basic black ink.
I love to create stencils with my Big Shot!  For this card I ran a piece of card stock through the Big Shot with the Scallop Rectangle clearlit.  I then adhered this as a stencil to the card base using drafting tape (unlike masking tape, drafting tape easily lifts off of the card stock without tearing anything).  I used a sponge and sponged the stencil with Crumb Cake ink.  Then I took a few of the images from the Tiny Tags set and randomly stamped them using the same Crumb Cake ink.  I then removed the stencil and added some dazzling diamonds with my 2-way glue pen.  Finally, I stamped the dotted outline and the greeting onto Very Vanilla card stock and punched it out using the jewelry tag medium punch.  A piece of twine finishes the card.
This stamp set also provides an easy way to make simple Christmas cards!  I took a 1 1/2" circle punch and punched out a piece of card stock to use as a mask.  I placed it on the card base and then stamped the leafy image from the stamp set around the circle, multiple times and in multiple layers, using Garden Green ink.  You might choose to use different colors of green to create a different look.  I stamped the word "merry" from the set in the center of the wreath in Cherry Cobbler ink using my stamp-a-ma-jig.  I then attached a small knot of real red 1/4" grosgrain ribbon for the top of the wreath.  Finally, I added some dazzling diamonds and a bit of gold stickles to give the wreath some shimmer!  I hope you've enjoyed this week's Four Ways Friday!  I hope you have a wonderful weekend!  (ps  I started my new challenge today...40 sit ups and 10 push ups in the morning!  Okay...so my sit-ups may look more like crunches right now and my push ups are on my knees, but at least I've begun!!!!!  Want to join in the fun????)

Thursday, November 04, 2010

Timeless Type Monogram Notes

Today's Lesson From The Craft Room:  Allow Your Body Time To Rest
The soreness is starting to fade a bit and I can feel myself wanting to run again.  However, all that I have read suggests taking a week off of running after completing a marathon.  I think I'm just dealing with a bit of fear right now - after all of the running I am afraid that if I stop I will not start again.  I'm afraid of the old adage, "a body at rest tends to stay at rest."  I don't want to fall back into old habits and, at the same time, I want to be sure to allow my body time to rest so that I don't injure myself.  So, to try to keep my body in motion I am starting a new challenge tomorrow - and I'm starting in a realistic way.  I'm calling it my 40/10 challenge - 40 sit ups and 10 push ups every day.  I think I can do it...and maybe I'll even be able to increase the amount after a little while - we'll see.  All I know is that I'm going to do my best to keep this body in motion!
Today's card is part of a set of 8 personalized note cards that I made for a friend for her birthday.  I used the scalloped rectangle sizzlit in the Big Shot and the Timeless Type sizzlits for the monogram.  The Friends 24-7 stamp set provided that great design on the background and on the envelope.  I also used the Wonderfully Worn background stamp to add a bit more interest...along with some sponging.  I created a faux button with card stock and the 1/2" circle punch and added a bit of twine.  I hope you like it!

Tuesday, November 02, 2010

I Did It!!!!!

Today's Lesson From The Craft Room:  By Changing Yourself, You Change The World
I am home and I did it!!!!!!  (That's me with my hands up just before the start of the race).  8 months ago I decided on a goal - to run 26.2 miles on Halloween day in the Marine Corps Marathon in Washington, DC.  Now, here I am, sitting in Denver (with very sore legs I might add) and I accomplished that goal!  What an amazing feeling!  To know that 8 months ago I couldn't run a block.  And to know that 2 days ago, I ran 26.2 miles and finished the race.  It really is amazing what you can do when you decide to make a change.  It's amazing that by changing yourself, you change the world.

Monday, November 01, 2010

Define Your Life - Simple Gratitude Card

This is a quick and easy card that I made to say thank you to a friend for a wonderful birthday gift :)  I began with a basic Very Vanilla card and then added some flocked paper (this is not Stampin' Up! paper - it was actually part of the gift that my friend gave me so I felt I needed to use it on her thank you card :).  I used a piece of sticky strip across the top of the flocked paper and then folded and adhered the Very Vanilla satin ribbon as I went along.  The antique brad, attached with a glue dot, adds that vintage flair.  The greeting is from Define Your Life - stamped in Early Espresso ink onto Crumb Cake card stock and then punched out with the extra large Decorative Label punch.  I sponged the edges with Early Espresso ink and then added a few floral images from the Tiny Tags stamp set (some at full strength and some at half strength).  I hope you like it!!!!!  (p.s. I arranged for this post to appear automatically before I left for the marathon...I'm hoping that by the time you read this I will have made it to the finish line and will be on my way home, back to the craft room!).