Welcome to another Four Ways Friday, where I show you how to use one stamp set (and sometimes just one stamp) in four different ways! This week's Four Ways Friday uses the Baroque Motifs stamp set. This is an all-time favorite of mine! The first card is a reminder that simple stamping can have a huge impact!
This is a small 3x3 card that was incredibly quick and simple to make. Just stamp the flourish with Old Olive and then stamp the flower image and the greeting with Rose Red. These 3x3 cards are great for accompanying gifts or for hiding in small places for your loved ones to find :)
This next card uses a few techniques.
I began by stamping the flourish onto Whisper White card stock with VersaMark ink and then used clear embossing powder and my heat tool to emboss the flourish. I then inked my brayer with Bashful Blue ink and brayered over the embossed stamping. I sponged the edges of the panel with Chocolate Chip ink. I then took a smaller Bashful Blue card stock panel and crumpled it up in my hand. I flattened it back out and sponged the outer edges and used my sponge to gently go over all of the raised creases to give this panel an aged look. The flower was made like the one from the last Four Ways Friday - just 4 or 5 scallop circle punches that were sponged with Basic Black ink and the crumpled until they were just right. They were all connected using a rhinestone brad. The greeting was stamped on a small piece of Whisper White card stock, sponged and made into a "flag."
This third card was made with the chalkboard technique. I stamped the flower image multiple times with VersaMark onto the black card stock. Then I took a sponge dauber with my Pumpkin Pie pastel pounced all over the VersaMark images. I used the pastel eraser to clean up the edges and sprayed this panel with a fixative to eliminate any chance that the chalk dust would rub off the card stock. The larger graphic image was stamped in Basic Black on Pumpkin Pie card stock and a brad was put in the middle. I seem to be enjoying making flags these days, so I stamped the greeting onto Very Vanilla card stock and created a flag with sponged edges. The black panel was mounted onto a Pumpkin Pie panel and then adhered to a Very Vanilla card base.
This final project is a reminder that your stamps are for a lot more than just cards! I used a plain old paper lunch bag and stamped the flourish on both sides using Chocolate Chip ink (you could stamp the side panels too if you'd like!). I then folded down the top a number of times and punched a whole in the center of the folds with my Crop-a-dile. I used 5/8" grosgrain ribbon in Chocolate Chip to tie a knot as the closure. I punched out a 1 3/4" circle and sponged the edges with Chocolate Chip ink and then used my spritzer tool to add a little "splatter." I stamped the flourish at half strength onto the circle and used the Crop-a-dile to punch a whole in the top of the circle. The greeting was stamped in full strength. I attached the tag to the bag using gold elastic.
Let me know if you have any questions. Also, if there is a set or stamp you would like to see featured in a future Four Ways Friday - just let me know! I always love your input!
Friday, April 09, 2010
Thursday, April 08, 2010
The New Color Collections - Coming In July!!!!!
Our Color Renovation happens in July!!!!! I wanted to share the new color collections with you! Here they are! Let me know what you think!
Wednesday, April 07, 2010
Another Sweet Pea Birthday Card
I had to make another birthday card using the same design as the card I made earlier today! I am really loving the Sweet Pea designer paper with Taken With Teal and Chocolate Chip - great for a masculine card. I hope you like it! Remember, Taken With Teal will be leaving come July 1st - stock up on this great color now! Click HERE to shop :)
Loads of Sponging!
Today's Lesson From The Craft Room: Take A Holiday From Complaining
In his book, The Book of Jewish Values, Rabbi Joseph Telushkin shares that he and his wife try to periodically engage in a "complaining fast." For a week at a time they try to refrain from "all whining and complaining." By taking a holiday from complaining, we are guided to think more about what we are grateful for rather than focus on what we lack. I began my holiday today...and I am already grateful!
Today's sketch challenge on SCS really inspired me! I needed a belated birthday card for my cousin David and the sketch was a perfect beginning! I sponged the Taken With Teal card with Chocolate Chip ink...and did the same with the Sweet Pea designer paper panels. I die cut the letters for "belated" from Very Vanilla with the Big Shot and the Simple Letters Alphabet. These letters got a sponge job too! I stamped the "happy" (from Teeny Tiny Wishes) and "birthday" (from Upsy Daisy) in chocolate chip on Taken With Teal and yes, you guessed it, the sponge got them too! I hope you like it!
ps If you love Taken With Teal as much as I do, you'll want to stock up soon! This is one of the colors that will be retiring with the Color Renovation beginning July 1! Don't delay, stock up HERE now!
In his book, The Book of Jewish Values, Rabbi Joseph Telushkin shares that he and his wife try to periodically engage in a "complaining fast." For a week at a time they try to refrain from "all whining and complaining." By taking a holiday from complaining, we are guided to think more about what we are grateful for rather than focus on what we lack. I began my holiday today...and I am already grateful!
Today's sketch challenge on SCS really inspired me! I needed a belated birthday card for my cousin David and the sketch was a perfect beginning! I sponged the Taken With Teal card with Chocolate Chip ink...and did the same with the Sweet Pea designer paper panels. I die cut the letters for "belated" from Very Vanilla with the Big Shot and the Simple Letters Alphabet. These letters got a sponge job too! I stamped the "happy" (from Teeny Tiny Wishes) and "birthday" (from Upsy Daisy) in chocolate chip on Taken With Teal and yes, you guessed it, the sponge got them too! I hope you like it!
ps If you love Taken With Teal as much as I do, you'll want to stock up soon! This is one of the colors that will be retiring with the Color Renovation beginning July 1! Don't delay, stock up HERE now!
Tuesday, April 06, 2010
Color Renovation: Some Favorites Are Returning!
As part of Stampin' Up's! Color Renovation, some of your past IN COLOR favorites will be returning or sticking around as core colors in the new color collections. Look who's coming back/sticking around:
IN COLORS will also be sticking around for 2 years starting in July! While we will still get 5 new IN COLORS every year, they will now stay around for an extra year!!!! Yeah!!!! Let me know if you have any questions!
- Melon Mambo
- Pacific Point
- Tangerine Tango
- River Rock
- Soft Suede
- Riding Hood Red
- Rich Razzleberry
- Wild Wasabi
- Pink Pirouette
- Baja Breeze
IN COLORS will also be sticking around for 2 years starting in July! While we will still get 5 new IN COLORS every year, they will now stay around for an extra year!!!! Yeah!!!! Let me know if you have any questions!
New Colors Are Coming!!!!
Wow! What an exciting new announcement from Stampin' Up! We are undergoing a Color Renovation! Our new color collections will be available beginning with our July Idea Book & Catalog! I'll be posting more information soon and I'll also be posting some card samples using the new colors. You're going to love them!!!!! We will also be saying a fond farewell to some of the colors we have had around for awhile. If you are in love with some of these colors you'll want to snatch them up before July 1! Here is the list of the retiring colors:
Heat Embossed Background Stamp - Bella Toile
Today's Lesson From The Craft Room: Change Your View
We moved a birdbath in the backyard and, by chance, I can now see the birdbath out of my office window when I am sitting at my computer (I'm watching it right now, as I type!). It's not that I didn't look out my window before. But now I am finding a whole new world to look at! Yesterday the robins decided to have a celebration! It was an amazing site to see! How can you change your view today?
Today's color challenge on SCS was a lot of fun - soft suede, certainly celery, tempting turquoise and a neutral of choice...with the added challenge to use some crimping! I had no idea how I was going to mix in the turquoise! I stamped the Bella Toile in certainly celery craft ink and then heat embossed with my heat tool and clear embossing powder. Then I used a sponge and sponged soft suede all over the embossed image and on the areas that were not embossed. I ran the tempting turquoise through the crimper to make it look a bit like ribbon and then "gathered it" using glue dots to create the folds. I even sponged a bit of soft suede to give it an aged/vintage look. Finally, I used some gold alcohol ink to change the color of my silver rimmed tag. The greeting was stamped and a little linen thread added for the finishing touch! I hope you like it!
p.s. Stampin' Up! is making a new product announcement at noon today! Can't wait to hear what it is!!
We moved a birdbath in the backyard and, by chance, I can now see the birdbath out of my office window when I am sitting at my computer (I'm watching it right now, as I type!). It's not that I didn't look out my window before. But now I am finding a whole new world to look at! Yesterday the robins decided to have a celebration! It was an amazing site to see! How can you change your view today?
Today's color challenge on SCS was a lot of fun - soft suede, certainly celery, tempting turquoise and a neutral of choice...with the added challenge to use some crimping! I had no idea how I was going to mix in the turquoise! I stamped the Bella Toile in certainly celery craft ink and then heat embossed with my heat tool and clear embossing powder. Then I used a sponge and sponged soft suede all over the embossed image and on the areas that were not embossed. I ran the tempting turquoise through the crimper to make it look a bit like ribbon and then "gathered it" using glue dots to create the folds. I even sponged a bit of soft suede to give it an aged/vintage look. Finally, I used some gold alcohol ink to change the color of my silver rimmed tag. The greeting was stamped and a little linen thread added for the finishing touch! I hope you like it!
p.s. Stampin' Up! is making a new product announcement at noon today! Can't wait to hear what it is!!
Monday, April 05, 2010
Sitting and Staring...
Today's Lesson From The Office Next To The Craft Room: Take A Break From Doing Taxes And Go Explore Outside!
No time in the craft room yet today...just sitting here in the office trying to get my taxes done. Yes, I am a procrastinator when it comes to doing my taxes. Not sure where I developed my dislike for doing them - maybe because it is the farthest thing from creating art! :) So, I gave myself a break and went outside and explored a bit with the camera. This little guy decided to watch me :) There was also a small party at one of the bird baths...I wasn't invited...but I showed up anyway :)
Hopefully I'll be back in the craft room tomorrow...I'm still buried in papers and receipts and I have a date with Keifer Sutherland tonight...not really...just watching 24 :) Have a great night!
Sunday, April 04, 2010
Die Cut Fabric Sign #2
Today's Lesson From The Craft Room: You Have More Endurance Than You Know!
I began my "wogging" adventure at the beginning of March and today I ran 5.3 miles!!!! It is amazing to me how you can do something that you firmly believe you are not capable of! Had you asked me a month ago if I would be running 5 miles in a month I would have told you you were nuts! Now I know better :) What do you believe you can't do today? How can you use the next 30 days to get closer to that goal? You really do have more endurance than you know!
I have been playing around a lot with fabric and interfacing (I didn't even know what interfacing was a couple of days ago!) and my Big Shot. This project is 100% no sewing involved! Can you believe it?! This sign is getting donated to a friend's non-profit organization for a fund-raising auction. Let's hope someone at the auction likes it! (And, if I'm being honest, I actually made yesterday's sign for the auction...but I can't part with it since it was my first fabric sign :) I am going to hang it in the craft room...or the bedroom - can't decide yet. Shhhh, it will be our secret :)
Saturday, April 03, 2010
Die Cut Fabric Sign
Today's Lesson From The Craft Room: You Are An Artist!
There is a mystique associated with certain words and the word "ARTIST" is as "mystiquey" a word as I know! Why is it so much easier to call oneself a "crafter" or a "hobbyist?" When it comes to calling myself an "artist," I start to sweat! Who me? An ARTIST?! And yet this is a word, an identity, that I want to own. I want to try being an "artist" on for size and walk around to see if I can get comfortable with this identity. It's not that I don't want to be a crafter or a hobbyist...I just don't want to call myself the "C" word or the "H" word if why I'm doing so is because I feel "less than" or "not good enough." So today, I am an artist...and so are you!
I had a lot of fun playing with fabric to make this adorable DREAM sign. It's amazing how you can use the Big Shot to die cut letters and shapes and put them together to make signs, purses, quilts...the possibilities are endless!!!!! I hope you like this first sign...I have a feeling there will be many more to come!!!! After all...that is what being an artist is all about :)
Friday, April 02, 2010
Four Ways Friday #2
Today's Lesson From The Craft Room: Enjoy A Massage
It had been ages since I had my last massage so yesterday turned out to be a real treat! I was given a gift certificate for a 90-minute massage and I must say it was the perfect gift. How often do we stop and allow ourselves to be pampered? I kept telling myself I would get a massage "some day," but with the pace of life, my "some day" kept getting put off. Until I received my gift. My hope is that this will start a new healthy habit - one of treating my body as well as it treats me everyday!
Today's Four Ways Friday focuses on the Friends 24-7 stamp set. I really love this set!!!! For my first card I used the popping pastels technique. I stamped the image in versamark and then pounced on the images using sponge daubers and my chalk pastels. I added a little spritz with the spritzer tool. Another great technique that I used on this card was running my white organza ribbon across my Cameo Coral ink pad numerous times in order to get Cameo Coral ribbon! What a great way to get ribbon of whatever color you need!
This second card came together quickly! I stamped the image on the base layer of the card. One trick I used was to ink up the image and then spray it lightly with water before stamping. I love the watercolor effect this creates. I did the same for the image I stamped on the Confetti card stock. I used my bone folder to break down the fibers in the card stock and peeled back the corners and one full layer of the Bravo Burgundy card stock for a sueded effect. A few brads and the greeting complete the look.
The third card uses the same watercolor effect technique. I stamped the image multiple times, using this technique of spraying water onto the stamp after inking it and then stamping onto the card. I punched 5 flowers from the 5-petal flower punch and used my bone folder to loosen the fibers and then I scrunched and crunched until I liked how the flower looked. A touch of ribbon and a rhinestone brad add a little elegance.
For the fourth card I decided to create a flower by stamping the image multiple times - each time creating a 90 degree angle from the stamped image that came before. In this way I created a flower with 4 petals and then created a center for the flower using the scallop circle punch and the 1 1/4" and 1 1/2" circle punches. A corduroy button brad in the corner along with some spritzer tool spattered color complete the card.
I hope you are inspired to use your Friends 24/7 stamp set in new and exciting ways! I'd love to hear your thoughts on how you are enjoying Four Ways Fridays and if you would like to see this feature continued every Friday. Also, if there is a stamp set you would like to see featured in a future Four Ways Friday, just let me know! I'll do my best to respond to what you'd like to see! Are you wishing you had the Friends 24/7 stamp set? Feel free to click HERE to shop now! :)
Thursday, April 01, 2010
Two-Step Into Spring Promotion
The Two-Step Into Spring Promotion begins today and runs through the month of April! Here are the details:
Hostesses
Host a $350 workshop and receive the brand-new Two-Step Awash with Flowers stamp set FREE!
Customers
Two-Step into spring with a sneak peek from the 2010-2011 Idea Book & Catalog! Be the first to add the Awash with Flowers stamp set to your collection.
Plus, purchase spring-themed Two-Step Stampin' sets at 20 percent off the retail price--no additional purchase necessary! Qualifying stamp sets are listed below:
Things to Remember
Hostesses
Host a $350 workshop and receive the brand-new Two-Step Awash with Flowers stamp set FREE!
| Item | Description |
| 117062 | Awash with Flowers (wood-mount) |
| 120549 | Awash with Flowers (clear-mount) |
Customers
Two-Step into spring with a sneak peek from the 2010-2011 Idea Book & Catalog! Be the first to add the Awash with Flowers stamp set to your collection.
| Item | Description | Price |
| 117062 | Awash with Flowers (wood-mount) | $39.95 |
| 120549 | Awash with Flowers (clear-mount) | $27.95 |
Plus, purchase spring-themed Two-Step Stampin' sets at 20 percent off the retail price--no additional purchase necessary! Qualifying stamp sets are listed below:
| Item | Page | Description | Discount Price |
| 113824 | 94 | Greenhouse Garden | $20.76 |
| 113734 | 98 | Fifth Avenue Floral | $19.96 |
| 111578 | 101 | Flower Fancy | $29.56 |
| 113258 | 112 | Trendy Trees | $14.36 |
Things to Remember
- The Awash with Flowers stamp set is a sneak peek from the 2010-2011 Idea Book & Catalog and will not be available again until the release of the new Idea Book & Catalog.
- You must place your order on a workshop, customer, or demonstrator order to qualify. Online orders are not eligible for this part of the promotion.
- There is a limit of one free Awash with Flowers stamp set per workshop; the reward is for reaching the $350 workshop level, and is not incremental.
- Qualifying hostesses may choose either the wood-mount or clear-mount set. Please note: Clear-mount blocks are not included with the clear-mount set (blocks C and H are recommended this set).
- You may place your order on any order type (customer, demonstrator, workshop, or online).
- There are no limits, and there is no minimum purchase to qualify for the 20 percent off.
- The 20 percent off discount does not apply to the Awash with Flowers stamp set.
Wednesday, March 31, 2010
Metal Die Cutting
Today's Lesson From The Craft Room: Move Outside Your Comfort Zone!
I took my permission to make a mess seriously the other day and I have the inked up fingers and cuts to prove it! I decided to have a little fun with my Big Shot and some metal flashing from the home improvement store. Metal is quite a bit different from paper and I knew this meant moving outside my comfort zone...literally...die cut flashing is sharp! I highly recommend wearing gloves if you're going to make a mess with metal! I used alcohol inks to die the metal, but the dies I used were all Stampin' Up! exclusives! I used the flower folds and the daisies #2 die. Now I'm thinking of the artwork that I'm going to create that will incorporate these flowers...I sense more messes ahead!!!
Tuesday, March 30, 2010
Clear Embossed Stencil
Today's Lesson From The Craft Room: It's OK To Make A Mess!
I keep telling myself that it's OK to make a mess and I'm waiting to accept that message with the energy of a child!!!! I seem to look at the piles or messes I make in the craft room with a bit of disdain - like it's something I'm not supposed to do. This attitude, I feel, is holding me back. I remember as a child, the idea of making a mess was a joy! Mud pies and puddles to jump in were the BEST! I want to tap into that again - wish me luck making a mess!!!!!
Today's card was a ton of fun to make! I began by sponging my stencil with versamark ink on whisper white card stock and then clear embossed. I used my brayer to brayer on basic gray ink. I touched up the brayering with some basic gray sponging. The flower is 5 scallop circle punches that I sponged with bermuda bay and basic gray and then scrunched, crunched and softened with a bone folder and my fingers. The center is a build-a-brad with an image from tiny tags stamped in basic gray onto so saffron and and then punched with a 3/4" circle punch. I hope you like it! There is only 1 day left of Sale-A-Bration! Don't miss out! Shop HERE now!
I keep telling myself that it's OK to make a mess and I'm waiting to accept that message with the energy of a child!!!! I seem to look at the piles or messes I make in the craft room with a bit of disdain - like it's something I'm not supposed to do. This attitude, I feel, is holding me back. I remember as a child, the idea of making a mess was a joy! Mud pies and puddles to jump in were the BEST! I want to tap into that again - wish me luck making a mess!!!!!
Today's card was a ton of fun to make! I began by sponging my stencil with versamark ink on whisper white card stock and then clear embossed. I used my brayer to brayer on basic gray ink. I touched up the brayering with some basic gray sponging. The flower is 5 scallop circle punches that I sponged with bermuda bay and basic gray and then scrunched, crunched and softened with a bone folder and my fingers. The center is a build-a-brad with an image from tiny tags stamped in basic gray onto so saffron and and then punched with a 3/4" circle punch. I hope you like it! There is only 1 day left of Sale-A-Bration! Don't miss out! Shop HERE now!
Sunday, March 28, 2010
Beautiful Butterflies
Today's Lesson From The Craft Room: Strive For What You Believe You Cannot Do!
Almost 14 years ago, I ran a marathon. Talk about a feeling of accomplishment! I had never been a big runner, but one day I woke up and decided to set a marathon as my goal...and I did it! Now, 14 years later, running a marathon feels like something totally out of reach. Prior to March 6th, I hadn't run, wogged, jogged or did much of anything exercise-related in AGES! My standby excuse here in Denver is that it's because of the altitude :) Well, on March 6th, I got out of bed, went for my morning walk with Buddy and decided to wog instead (my word for a jog that looks a bit more like a walk with a little umph)! I have not looked back since that morning and Buddy and I have continued to wog since then. I actually jogged 4 miles the other day! So now, I'm striving for what I would have believed a month ago I was not capable of doing. I have looked at marathons in the fall and am setting my sights on a return to the Marine Corps Marathon in October!!!!! I'm going to try to not get too excited...I had tried, after the last marathon, to train for another and ended up with an unrelated injury that made me hang up my running shoes for awhile. I am praying for health as I start out on this new journey towards who I once was and who I want to be! Wish me luck!!!!
Today's card began with sponging some butterfly silhouettes. I used the background scrap as a stencil after running some chipboard through my Beautiful Butterflies die in the Big Shot. I then stamped images from the Flight of the Butterfly stamp set with Blush Blossom and Crushed Curry. I also stamped a Whimsical Words greeting onto the background with Crushed Curry stamped off once. The greeting was stamped full-strength onto Whisper White card stock and then sponged around the edges. I love the Ballet Blue butterfly (he is 2 layers - chipboard then the card stock) with the Crushed Curry embossed butterfly from my Beautiful Wings embosslit. A dash of Dazzling Diamonds finished the look. I hope you like it! Don't forget, only a few days left until Sale-A-Bration ends on March 31st! You still have time to place an order and get all of the great Sale-A-Bration benefits! Click HERE to shop now!
Friday, March 26, 2010
Four Ways Friday #1
Today begins a new feature on my blog - Four Ways Fridays! Every Friday I am going to show you how to use one stamp set to create 4 different looks/projects! It can be very easy to buy the next new stamp set. What seems to be more challenging is to think of new and interesting ways to use the stamp sets we already have. Every Friday we will focus on a single stamp set - sometimes we'll go even further and just focus on one specific stamp in the stamp set. The projects may include the use of embellishments, dies, texture, designer paper, and other accessories. If there is a particular stamp set you would like to see featured on a future Four Ways Friday, please leave a comment to let me know. I'll do my best to give it a try!
Today's Four Ways Friday focuses on the gratitude stamp from the Define Your Life stamp set.
This first project is incredibly simple! I stamped the greeting with Basic Black in the center of a whisper white piece of card stock. I used some of the Sweet Pea designer paper and punched 1/2" squares and cut out 2 larger rectangles. The designer paper is popped up with dimensionals surrounding the greeting. I layered the whisper white on taken with teal card stock and adhered everything to a so saffron card. You can use designer paper to dress up any stamped image!
For this second project, I used my stamp-a-ma-jig to repeatedly stamp the greeting on the whisper white base card. I did not stamp full strength, but rather stamped off twice before stamping onto the card stock. The main greeting was stamped full strength and popped up on an Orchid Opulence piece of card stock. I used the sweet pea felt for a cute embellishment. Using your stamps to create fun backgrounds is always a great choice!
For this third project, I continued the same theme of the second project and used the stamp to create a background. Then, I used my Flower Folds Die in the Big Shot to cut out a few flowers. The flowers were then stamped with the greeting. You can use this technique for die cuts, punches or paper piecing. I sponged the edges of the flowers and layered them. I used the greeting again with a build-a-brad for the center of the flower. Finally, I used a marker to color the word "gratitude" on the stamp and then stamped onto whisper white card stock. I cut out the greeting to create a flag.
Don't forget that your stamps can do more than just stamp on paper! For this fourth project, I used black Staz-On ink and stamped the greeting onto wide twill ribbon. I wrapped the ribbon around a die cut Box #2. The circle stamping was created with a sponge dauber. I used an everyday hole punch, combined with the 1/2" circle punch to create the black card stock circles, which I glued to the box. The jumbo grommet adds a finishing touch.
I would love your comments on this new feature! Please let me know what you think and what you'd like to see in the future on the next Four Ways Friday!
Today's Four Ways Friday focuses on the gratitude stamp from the Define Your Life stamp set.
This first project is incredibly simple! I stamped the greeting with Basic Black in the center of a whisper white piece of card stock. I used some of the Sweet Pea designer paper and punched 1/2" squares and cut out 2 larger rectangles. The designer paper is popped up with dimensionals surrounding the greeting. I layered the whisper white on taken with teal card stock and adhered everything to a so saffron card. You can use designer paper to dress up any stamped image!
For this second project, I used my stamp-a-ma-jig to repeatedly stamp the greeting on the whisper white base card. I did not stamp full strength, but rather stamped off twice before stamping onto the card stock. The main greeting was stamped full strength and popped up on an Orchid Opulence piece of card stock. I used the sweet pea felt for a cute embellishment. Using your stamps to create fun backgrounds is always a great choice!
For this third project, I continued the same theme of the second project and used the stamp to create a background. Then, I used my Flower Folds Die in the Big Shot to cut out a few flowers. The flowers were then stamped with the greeting. You can use this technique for die cuts, punches or paper piecing. I sponged the edges of the flowers and layered them. I used the greeting again with a build-a-brad for the center of the flower. Finally, I used a marker to color the word "gratitude" on the stamp and then stamped onto whisper white card stock. I cut out the greeting to create a flag.
Don't forget that your stamps can do more than just stamp on paper! For this fourth project, I used black Staz-On ink and stamped the greeting onto wide twill ribbon. I wrapped the ribbon around a die cut Box #2. The circle stamping was created with a sponge dauber. I used an everyday hole punch, combined with the 1/2" circle punch to create the black card stock circles, which I glued to the box. The jumbo grommet adds a finishing touch.
I would love your comments on this new feature! Please let me know what you think and what you'd like to see in the future on the next Four Ways Friday!
Thursday, March 25, 2010
Something New
Today's Lesson From The Craft Room: Try A New Direction
Whether I'm jogging or crafting, sometimes it's fun to try a new direction - go somewhere I haven't gone before. Today I prepared for a new direction for tomorrow. I'm going to try to offer a new feature on my blog on Fridays...stop by tomorrow to check it out and let me know what you think! I'd love to hear your reaction! See you tomorrow!
Wednesday, March 24, 2010
It's Good To Be Back!
Today's Lesson From The Craft Room: Do Your Own Thing
Talk about a white-knuckle driving experience! I flew home and right into a snowstorm last night! I was so glad to be on the ground, that I wasn't even bothered by the hour that we spent on the tarmac waiting for a gate. The drive home was nerve-wracking to say the least! My little car is not fond of driving in snow. The roads were snowy, icy, slushy...and there were cars and vans buzzing past me on the left. My internal voice was, at times, berating me, "Can't you go any faster than that?!" At other times the voice, which I chose to listen to, was much more supportive, "Just do your own thing, Michelle. Go at your own pace." I'm so glad I listened since I arrived home, white-knuckled, but safe and sound. Sometimes you just need to do your own thing and go at your own pace :)
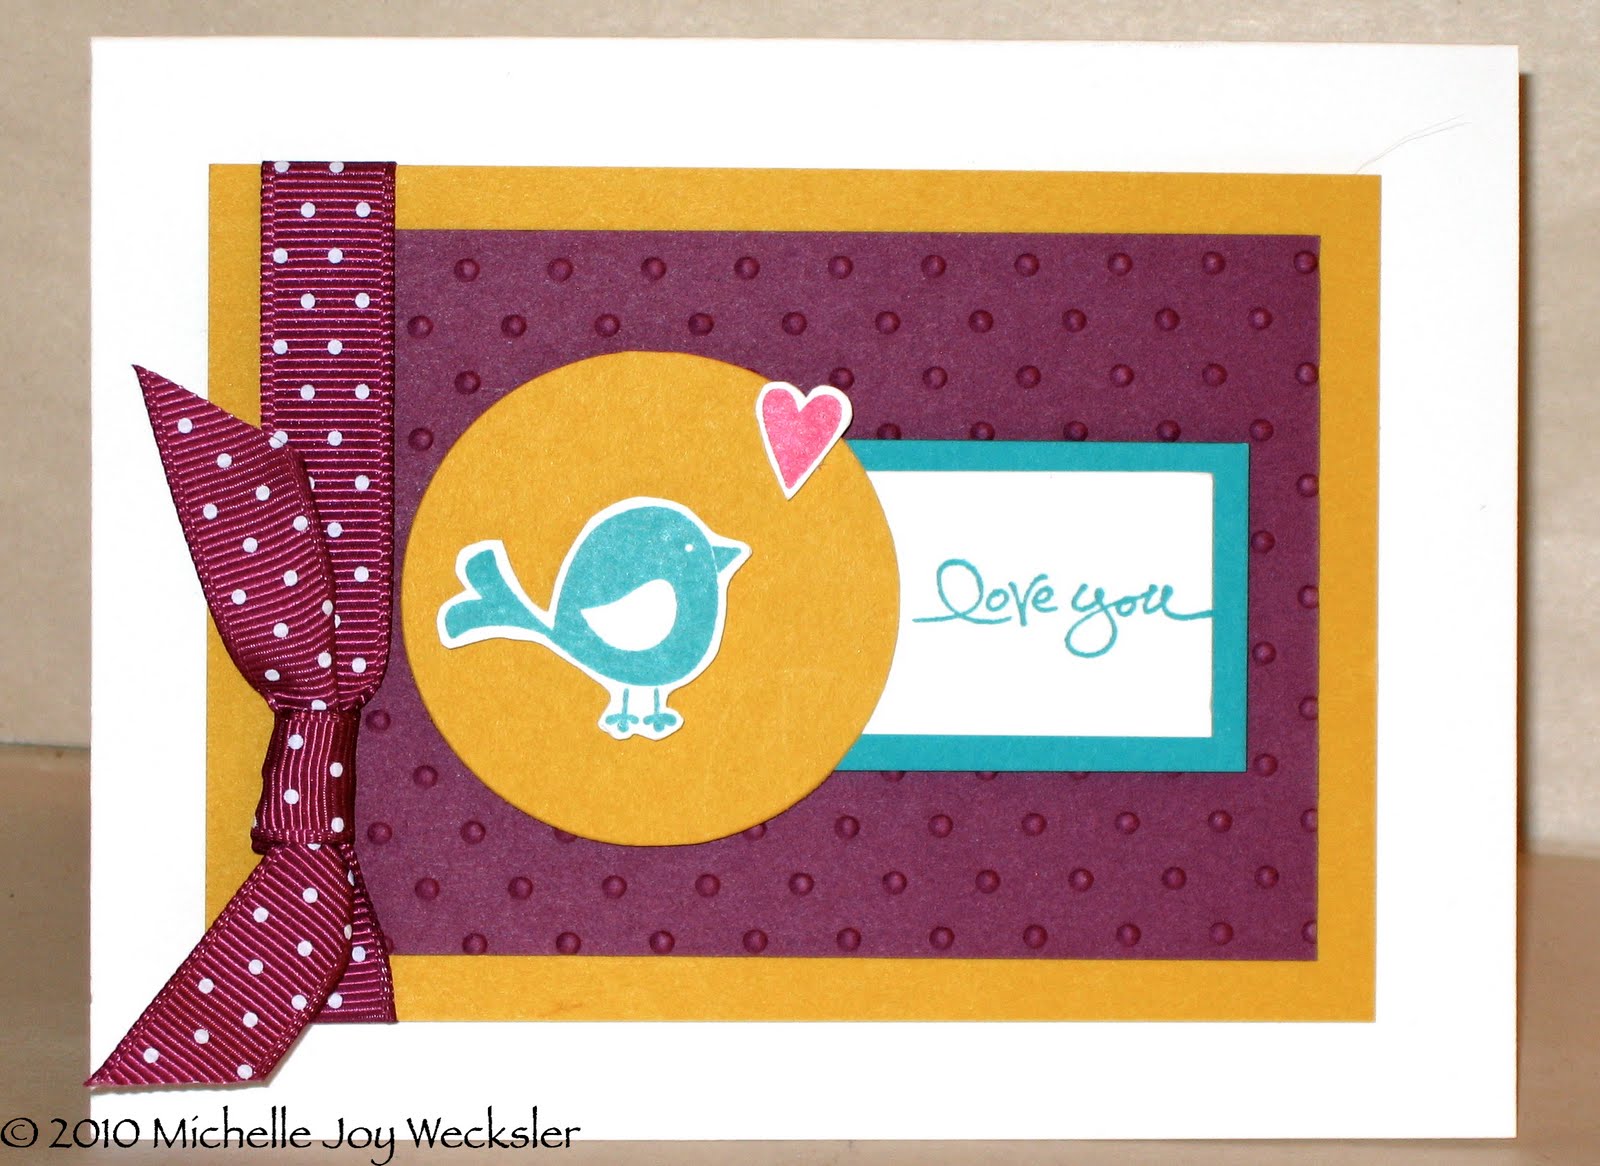
Today's card was FUN since I hadn't done a challenge on SCS in a little while. I have to admit that part of it was my frustration with the SCS site and the load times - I still haven't learned my lessons around patience :) This card was simply stamping with the Cheep Talk stamp set and adding a greeting from Short & Sweet. I couldn't resist a bit of texture with the perfectly polka dots embossing folder. I hope you like it!
Talk about a white-knuckle driving experience! I flew home and right into a snowstorm last night! I was so glad to be on the ground, that I wasn't even bothered by the hour that we spent on the tarmac waiting for a gate. The drive home was nerve-wracking to say the least! My little car is not fond of driving in snow. The roads were snowy, icy, slushy...and there were cars and vans buzzing past me on the left. My internal voice was, at times, berating me, "Can't you go any faster than that?!" At other times the voice, which I chose to listen to, was much more supportive, "Just do your own thing, Michelle. Go at your own pace." I'm so glad I listened since I arrived home, white-knuckled, but safe and sound. Sometimes you just need to do your own thing and go at your own pace :)
Today's card was FUN since I hadn't done a challenge on SCS in a little while. I have to admit that part of it was my frustration with the SCS site and the load times - I still haven't learned my lessons around patience :) This card was simply stamping with the Cheep Talk stamp set and adding a greeting from Short & Sweet. I couldn't resist a bit of texture with the perfectly polka dots embossing folder. I hope you like it!
Home At Last!
Thought you might enjoy an outdoor scene from this morning...isn't it supposed to be Spring???? :) I am very grateful to have made it home safely last night. I flew in from Houston and the Denver Airport was covered in snow. They had to shut down departures for awhile and, as a result, we had to wait on the tarmac for just over an hour for a gate to open up for our plane to pull in. Denver Ground and the United folks on my plane did a wonderful job of handling such a crazy weather experience. I'll be heading into the craft room today - after a little cocoa and breakfast :) Today looks like a great day to relax on the couch :)
Sunday, March 21, 2010
Endorphins!
Today's Lesson From Far Away From The Craft Room: Love Your Endorphins!!!!
I don't have a card/project to share today since I am far away from the craft room...but don't worry, I'll be back soon! In the meantime, I will still share what I learn on the road. I began "wogging" on March 6th and thank you for your encouragement! I have been wogging ever since and I am loving those endorphins! It is amazing how good a wog can make you feel - about yourself, your outlook on life...everything! It truly is a natural high! I have been enjoying making taking care of myself a priority. What did you do today to release some endorphins? Keep going! You can do it!!!!
Subscribe to:
Posts (Atom)