Monday, December 26, 2011

Painted Martini Glasses

Today's Lesson From The Craft Room:  Play Like A Child!!!!!
This weekend we had a ton of fun in the kitchen turned craft room!  Michael and I set up a table in the center of the kitchen...
and we played like children!!!!!  I had recently purchased some new paints - glass paint and porcelain paint that you can use in your home.  You can paint glass and ceramic/porcelain objects and then, once they are dry, bake them in your own oven!  We had no idea what we were doing, but we dove in with enthusiasm!!!!  We began with the glasses pictured above - a gift for a friend's birthday.  Michael painted two and I painted two and boy did we experiment!  We dripped and drew and sponged and spattered!  Yes, the internal critic showed up along the way, but we told him to shut up and just kept going :)  After all, if we are playing like children, why would we listen to any "adult voices?!"  I highly recommend some time to play like a child - draw outside the lines, make a mess, break the rules!!!!!  It feels amazingly free! :)
I also want to use this post to say a very special thank you to Doris for your wonderful comment this weekend!  You put a huge smile on my face and warmth in my heart!!!!  Thank you for that!!!!  Also, I absolutely know where you can get your hands on some sequin waste (also called punchinella) ;)  I know someone who would LOVE to send you some if you would be willing to provide a mailing address :)  Feel free to email me at m@figmentsofmyimagination.com so you can keep your email private (although I guess I just made mine incredibly public :)  It truly would be my pleasure!!!

Friday, December 23, 2011

Four Ways Friday #73 - Satin Ribbon

For this week's Four Ways Friday I want to show you four ways to use your 5/8" satin ribbon!
I LOVE using satin ribbon to make ribbon roses!  Here I used some Old Olive satin ribbon and a hot glue gun to roll this rose.  I may try to make a video to show you how I made the rose - it is still an imperfect science for me and every rose comes out different!  The petals are from Awash With Flowers.  I stamped them with Wild Wasabi ink and cut them out and adhered them to the stamped, sprayed, stenciled and embossed tag :)  The "U" was die cut from chipboard using the Big Shot and the Serif Essentials die.  The "just for" is from a stamp in the Just Believe stamp set.
Roses aren't the only flowers you can make with your satin ribbon!  I found a few really good tutorials on YouTube for how to make gathered flowers.  You can see them HERE and HERE.  To make my flowers I used Whisper White satin ribbon and then sprayed them with various colors of ink mixed with water in small spray bottles!  I love that you can use the Whisper White ribbon to create flowers of any color!  Very economical!  I added brads and buttons for the centers.  Can't wait to use these on a project!
Your ribbon makes gorgeous flowers and it can also be used as a hangar for ornaments!  I created this ornament as a 42nd anniversary gift for some friends.  The ribbon is sandwiched in between pieces of embossed chipboard.  I ran the chipboard through the Big Shot with the Vintage Wallpaper embossing folder.  I then sponged some champagne shimmer mist paint over the chipboard.  Prior to adhering the pieces of chipboard together I hot glued pieces of waffle paper to the back of the chipboard pieces to create the "fringe."  A touch of glass glitter, a vintage brad, some ribbon roses and a bit of stamping with gold heat-embossing finishes the look!  Here are a few close ups so you can see the details more clearly:
Your ribbon can also be used with fabric to create a quick and easy bulletin board!!!!  Here is a picture of the bulletin board I created, along with a video to show you how to make one!

Here is a picture of the back of the board (oops!  I forgot to show that in the video!).  I just cut a piece of 11" x 11" chipboard and hot glued it onto the back of the bulletin board.  Then I added a cloth picture hangar.
I hope you've enjoyed this week's Four Ways Friday!!!!  Wishing you and your loved ones a wonderful holiday season!!!!  May you have a peaceful and love-filled weekend!!!!!  Let me leave you with a picture of what I woke up to Thursday morning :)  It was a day filled with shoveling :)

Thursday, December 22, 2011

Extreme Elements Gift Tag

Today's Lesson From The Craft Room:  Some Days It Takes Awhile To Get Started
I'm writing this post at night after a day of spending time doing who knows what in the craft room!  It seemed that by noon I had written a few thank you notes, taken Buddy for a walk, and had breakfast.  Not what I would call a particularly productive morning.  I felt a bit like Michael's car - it's a diesel and you have to turn the key part way and wait for this little light to go off before turning the key fully.  You have to let something in the engine warm up before just starting the thing.  Well, I was that engine today - I just had a hard time getting started.  The afternoon went a bit better - I got down to the business of creating (and watching Law & Order in the background...not sure that this helps with my creative energy, but I sure do seem addicted to the old episodes!).  Once I started creating, time seemed to move differently and I felt like my time was being well-spent - like my engine was humming.  I guess it's just another reminder that some days it takes awhile to get started, but once you do, you'll be warmed up to head in the exact right direction for yourself :) 
Can you tell that I'm on a bit of a tag kick right now?! :)  I've really been enjoying a break from traditional cards and playing around with techniques and lots of ink on the tags!  This tag started out as a vintage vanilla tag.  It then got sprayed, stenciled, and sprayed some more with various colors of ink (Cajun Craze, Cherry Cobbler, one of the brown colors - I can't remember which, and So Saffron).  Next I did a bit of stamping using the Extreme Elements stamp set.  First the small dots with Early Espresso ink and then the large "splat" with VersaMark and then gold embossing powder (heat embossed).  I then stenciled a few additional circles using champagne shimmer mist paint.  I die cut a piece of chipboard using the Top Note die (just a small piece of chipboard placed strategically on the die before running it through the Big Shot).  The chipboard was stamped with a greeting from Afterthoughts (retired) and heat embossed with gold embossing powder.  I then stenciled with champagne shimmer mist paint and sponged the edges before gluing the chipboard to the tag.  I punched a piece of watercolor paper with the designer label punch and then cut it and sponged the edges.  I added a few eyelets with the crop-a-dile before adding the pieces to the tag with glue.  A few pieces of fiber were added to the tag for a bit more shimmer.  I hope you like it!!! :)

Wednesday, December 21, 2011

Nature Walk Painted Transparency Card

Today's Lesson From The Craft Room: People call me a feminist whenever I express sentiments that distinguish me from a doormat. - Rebecca West, writer
I saw this quote in a book called The 12 Secrets of Highly Creative Women written by Gail McMeekin and it really struck me.  Maybe it struck me right now because I have recently been noticing how much I hate bras!  Yes - I confess!!!!  I know, I know - they are a necessary evil at times - or at least we've been led to believe they are.  But I can totally understand the Burn Your Bra movement back in the '60s!  For some reason bras make me feel trapped or "contained" - two things, as an artist, I seem to loathe.  So maybe my current distaste for bras right now goes well beyond the bra itself.  Maybe it is much more about a desire for freedom - a need to release myself from any limitations or bounds that I have put on myself in my artwork and, maybe even, my life.  So while I am here at home - undershirts and tank tops, here I come!!!!  And maybe, when I do need to wear them (I haven't quite decided what the criteria is for determining when is a "yes I need to" day and when is a "no way in heck will I wear one" day), I can take the metaphor of the bra into my art making - maybe on those days I can set certain limits on my artwork and see where that leads me.  Maybe I can see both freedom and containment as ripe seeds for growing some art!  Phew - that felt good :)  Now let's get on to some art :)
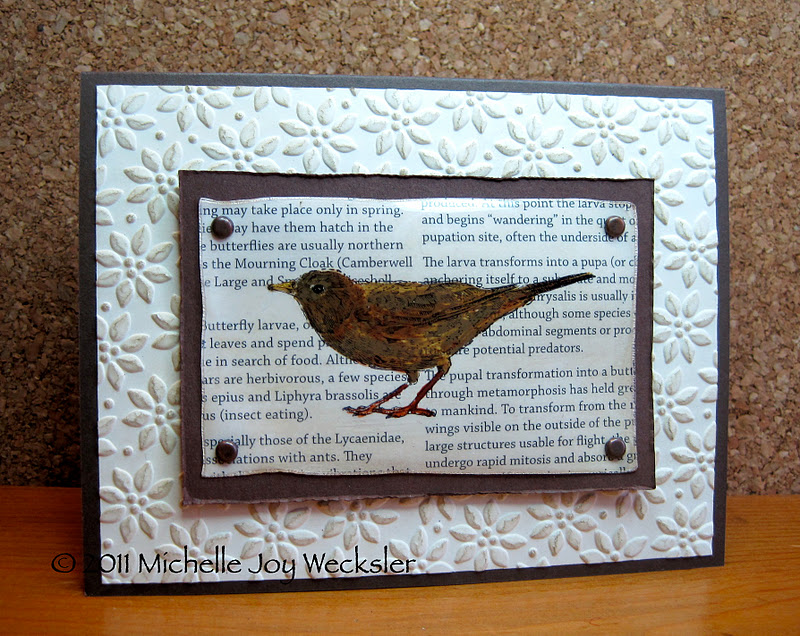
Yes, I do seem to be in love with this bird from the Nature Walk stamp set right now.  Maybe it's because in the midst of winter, painting this bird makes me feel like spring inside :)  This card was created by stamping the bird image, using Jet Black Staz-On ink, onto a transparency/window sheet.  I then painted the back of the image with acrylic paint.  I stamped the kraft tissue paper using a stamp from the Elements of Style stamp set and Crumb Cake ink.  Can you see the score lines on the card?  I love adding these lines using my scoring board - they create a wonderful frame for your stamped and painted transparencies!  For more details on how I created this card, feel free to watch this video - the steps are the same - I just used different stamps and paint colors.  You can also skip the step of stamping on the tissue paper and instead adhere designer series paper to the backside of the transparency/window sheet.  Here is a card I created using designer series paper in place of the tissue paper.  Enjoy!

Tuesday, December 20, 2011

Transparency Gift Tag

Today's Lesson From The Craft Room:  There are only two ways to live your life. One is as though nothing is a miracle. The other is as though everything is a miracle.   Albert Einstein
This quote stands on its own.  It doesn't need any commentary from me.  What it does need from me is my attention.  Oh to walk through my life as though everything is a miracle - this is the prayer I have for today.  I wish the same for you :)
Today's tag was a lot of fun to make!  I began by using a retired SU stamp set called God's Beauty and stamped the butterfly onto transparency/window sheet using Jet Black Staz-On.  Next I painted the back of the transparency with acrylic paint...and even added a few dots of acrylic paint on the front of the transparency to highlight the body of the butterfly.  A piece of chipboard was die cut using the Circles #2 die.  I then cut off one of the edges of the circle and stamped the circle with the sentiment from Elements of Style using Jet Black Staz On.  Next I turned my attention to the tag where I sprayed with ink (I mix drops of ink with water in small spray bottles and spray the tags) and sponged the edges.  I used a stencil and sprayed with Elegant Eggplant ink to create part of the background design.  I then used some sequin waste - which I use as a circle stencil - with Frost White shimmer paint to create the dots on the tag and on the chipboard.  Next, the chipboard was adhered to the front tag with glue, as was the butterfly.  I then took some paper flowers (non-SU) and sprayed them with a variety of ink colors.  I added adhesive pearls to the centers and then drizzled some Crystal Effects on the flowers and on the tag to adhere some orange microbeads (non-SU).  The flowers were also attached to the tag using Crystal Effects - it makes a wonderful adhesive!  Finally, I sponged the strings at the top of the tag and also sprayed some pieces of natural cheesecloth with ink.  I tied the cheesecloth pieces through the tag.  I added one final touch - a spritz of black ink with the spritzer tool - somehow that brought everything together.  Here is a picture of the back of the tag - it got sprayed too :)  I hope you like it!

Monday, December 19, 2011

Stamped, Sprayed & Painted Gift Tag: A Video!!!!

Today's Lesson From The Craft Room:  You Don't Always Have To Plan Ahead
Today I am sharing a new video with you.  My hope is that it will become part of a series that I am calling "Process Stamping."  Usually when I create a video, I first create the project I am going to share and then I prepare to film myself making the project for a second time.  I always know, in advance, what I am going to be doing - it's all planned out.  Well this time I decided to not plan at all!  Instead, I set up my camera and turned it on and then just sat down to create from scratch.  As a result, I'm not narrating this video - instead I just put captions to share some important tips and info.  Beyond that you will just hear some jazzy music and you will see me in my own creative process - going step by step into the unknown :)  I admit that I edited out the time when I was just sitting trying to figure out what I wanted to do next and I also sped up sections where certain steps were repetitive or just took a bit of time.  I would love to hear your thoughts on this video format to see if I should continue with this series of Process Stamping.  It was a new journey for me - a journey that has so far taught me that you don't always have to plan ahead.
Here is the video - feel free to let me know your thoughts! :)

Friday, December 16, 2011

Four Ways Friday #72 - Chipboard

For this week's Four Ways Friday I wanted to share four different ways you can use chipboard in your papercrafting projects!  I hope you find some inspiration in these ideas!
For this first project I incorporated stamping and stenciling on chipboard.  I cut the chipboard using the Circles #2 die in the Big Shot and then used a paper cutter to cut off one piece of the circle.  The tag was sprayed, sponged and stenciled.  Next I sprayed the chipboard with a mixture of alcohol and champagne shimmer mist paint (I keep the mixture in a small spray bottle).  It is difficult to see in the photo, but this chipboard is really sparkly!  Next I stamped the chipboard with the sentiment from Sincere Salutations and Staz-On ink.  The final touch was to add some stenciling to the chipboard using some sequin waste and gold acrylic paint.  The chipboard was then adhered to the tag using glue.  Of course, I had to add a painted transparency bird :)
Did you know you can use your embossing folders with chipboard????  It works great and creates all kinds of possibilities for your chipboard!  Here I cut a triangle from the chipboard and then ran it through the Big Shot with the Petals A Plenty embossing folder.  I then rubbed the embossed chipboard against the Cherry Cobbler ink pad and did a touch of sponging as well.  Next I added a bit of champagne shimmer mist paint with my finger and a touch of gold smooch ink to the raised dots.  Here is a close up:
I then adhered the chipboard and a trunk made from card stock to the Wild Wasabi card base using glue.  The banner was created with a piece of Very Vanilla card stock and stamped with Early Espresso ink and the Calendar Alphabet & Numbers stamp set.  I curled the banner with my bone folder and then adhered it using 2 glue dots at the ends.  The adhesive rhinestones were added for a touch of bling :)
Chipboard is great to use for making signs!!!  Here I used a combination of mat board (my Aunt owns a framing gallery and had given me some leftover pieces of mat board to play with) and chipboard to create the sign itself.  The mat board was glued to two layers of chipboard to give the sign additional thickness.  I outlined the edges with a gold leaf marker.  Next I drilled a few holes into the chipboard (gotta love using power tools on your paper crafting projects!).  I then attached the silverware to the sign with some thin wire.  The letters were die cut from chipboard using the Serif Essentials dies and the Big Shot.  I then sponged the letters with a combination of Chocolate Chip and Early Espresso ink.  I sponged them about 3 times to create the dark brown color (chipboard likes to soak up ink and as it dried the color tends to get a bit lighter).  I adhered the letters to the sign with glue.
Chipboard also makes a wonderful base for the faux metal technique using your embossing powders!  Here I cut a circle from the chipboard using the Circles #2 die and the Big Shot.  Next I inked up the chipboard with VersaMark ink and then covered it with silver embossing powder.  I heat embossed with my heat tool.  I repeated the VersaMark, embossing powder and heating until I had four layers of melted embossing powder on the chipboard.  Immediately after melting the last layer, I pressed the snowflake stamp from Sweet Season into the hot embossing powder.  I pushed it down for a few seconds and then pulled it up and the image was embossed into the powder - magic!!!!  Here is a close up:
I added an adhesive rhinestone to the center.  Next I used the modern label punch to punch out a small piece of brushed silver card stock.  I adhered this piece to the chipboard ornament with glue and then adhered the entire ornament to the Whisper White card base with glue.  A small bow of gold elastic was added to the top of the ornament with glue and the greeting from Short & Sweet was stamped with Jet Black Staz-On.
I hope you've enjoyed this week's Four Ways Friday and I hope it inspires you to look at your chipboard in new and interesting ways!!!!!!  Wishing you a wonderful, peaceful and creative weekend!!!!!!!

Thursday, December 15, 2011

Framed Transparency Very Veggie Card


Today's Lesson From The Craft Room:  Never Say Never!!!!
I am still in a bit of disbelief as I write this!  Today I was sitting in Michael's office - on Buddy's bed (Buddy has beds all over the house...totally spoiled :)  Anyway, I was sitting there talking to Michael and Buddy came in and plopped down on his bed.  Then Willow came sauntering into the room and she seemed to want some attention.  So I patted Buddy's bed - the part right beside me...and...she actually got on his bed...with him there!!!!!!  Now this may not seem miraculous to you, but these two house-sharers have never done this!!!!  When we got Buddy we already had Willow and it took her awhile to accept that he was now in HER house!  He learned very quickly that if they both ended up on the stairs at the same time he would be smart to look the other way as she passed so as to appear invisible to her! :)  Over time they seemed to warm up a little to one another (it's been over 6 years) - to a point where they could now pass each other in a hallway and steal a glance or a sniff.  But today was a day I never thought I would see!  Wanna see?
Pretty amazing, huh?! :)  Today I learned to never say never :)
Today's card is a continuation of my transparency/window sheet journey.  I have really been enjoying combining ink, paint and transparencies.  I started out with a piece of transparency and stamped the artichoke from the Very Veggie (retired) stamp set using Staz-On ink.  I then turned it over and painted the back with acrylic paints.  Next I cut a "mat" out of Bravo Burgundy card stock and ran it through the Big Shot with the Vintage Wallpaper embossing folder.  I then added a bit of champagne shimmer mist paint on the "mat" with my finger.  The transparency was then glued to the back of the mat using glue.  The Crumb Cake card base was stamped with a few words from Fabulous Phrases as well as a leaf image from Very Veggie using Early Espresso ink at half strength.  The framed artichoke was then mounted onto the card with dimensionals (I was careful to not stamp behind the artichoke on the card, but am now thinking that could have looked really interesting as well).  Finally, I added a vintage mother of pearl button with a glue dot.  I hope you like it!
Check out the Clearance Rack Blitz beginning today!!!!  Shop HERE now!

Wednesday, December 14, 2011

Creating A Shaker Card With Transparencies/Window Sheets: A Video!!!!


Today's Lesson From The Craft Room:  One Thing Leads To Another!
Do you remember The Fixx????  Back in the 80's they had a hit song called One Thing Leads To Another (of course I am now to blame for you having that song running through your head for the next 24 hours!).  Anyway, today I realized, yet again, that one thing does lead to another!  As you have noticed, I've begun playing around with window sheets/transparencies and how to incorporate them into paper crafting.  I began by simply stamping on them with Staz-On and that led me to stamping on them and then painting on them with acrylic paint.  Well today the stars aligned and the thought occurred to me to combine them in multiple layers and fill the spaces in between with fun things like glitter and dazzling diamonds!  What fun I had in the craft room today!!!!!  Here is a video to show you how I made this shaker card.  I hope it inspires you to give it a try...and maybe that will lead you to another thing...and another...and another!!!!! :)

Tuesday, December 13, 2011

On Your Birthday Gift Tag

Today's Lesson From The Craft Room:  What If We Just Sit?
Have you ever watched little sandpiper bird foraging on the beach?  They skiddadle this way and that - bobbing their heads up and down, searching for food.  That's the way I've been feeling in the craft room this morning (I'm writing this post at 12:30 pm on Monday).  I sit down to create and next thing I know I've jumped up from my chair and I'm skiddadling into the kitchen to find something to munch on.  Or I'm skiddadling to my computer to check email - bobbing my head up and down - searching for something - although I'm not quite sure what.  So I'm wondering...what if I just sat?  What if, when I don't know what project I want to start next - or I don't know what next step to take on the piece I am working on - I just sat and waited 'til my next move or thought arrived?  My uncle, who is a sculptor, shared with me that he gave himself a 30-day challenge awhile back - to create a single piece of sculpture every day.  He would awake every morning, do some yoga, eat some breakfast, and then make his way into his art room.  Some days he would have a thought in his head about where to begin.  Other days, not a clue.  Either way, he would show up in his art space and commit himself to being there.  If not ideas were waiting for him, he would just sit...maybe handling some of his materials or staring around at his supplies - until inspiration or his creative muse took over.  Some days the wait was longer than others.  No offense to the sandpiper intended, but maybe I need to just sit and not skiddadle...I wonder what I would find if I did...
Today's tag began with a vintage manilla tag.  I sprayed the tag with mixtures of ink and water that I placed in small spray bottles.  I used a piece of hardware tape as a mask while spraying to create the grid-like pattern.
 I then sponged the edges with Chocolate Chip and Early Espresso ink.  Next I stamped the dotted image from Extreme Elements with Early Espresso and the star from Varsity Numbers with Riding Hood Red ink.  The birthday greetings from On Your Birthday were stamped with Early Espresso.  Finally, I cut a few pieces of cheesecloth and sprayed them with ink, let them dry, and then tied them onto the tag.  Tags are a great way to add a wonderful personal touch to your gifts!  I hope you like it!

Monday, December 12, 2011

Adding Backgrounds To Your Transparencies or Window Sheets: A Video!!!!!!

Today's Lesson From The Craft Room:  The Time Will Come When The Book Is Exactly What You Need!
Have you ever tried to read a book and just couldn't get into it?  This has happened to me numerous times and I always feel badly, especially when the book is one that someone has recommended to me.  Years ago someone mentioned that I needed to read Women Who Run With The Wolves by Clarissa Pinkola Estes.  I tried to read it - really I did.  I picked it up on numerous occasions and just couldn't get into it.  Finally, I decided to try to sell it on an on-line marketplace, but there were so many other copies available that even my 99 cent price didn't attract any buyers.  Well, the book has stayed with me for years - literally, years.  And then, last week, the book came up in conversation again.  So last night, I found the book on one of my bookshelves and brushed the dust off the cover and began to read.  WOW!!!!  I am hooked!!!!!  Something in the first 10 pages has already grabbed me - in a BIG way!!!!!  This is a book that was destined to find me when the time was right for me - and that time is now.  So if you are having trouble getting into a book that someone has recommended to you, don't worry!  Sometimes you just have to wait for the time to come when the book will be exactly right for you!!!!!
The last video I shared with you was on how to stamp and paint on your window sheets/transparencies.  Today I'd like to add to that experience by showing you how to add a beautiful background to the transparency.  Enjoy!!!!

Saturday, December 10, 2011

Lovely As A Tree Holiday Card

I have decided to not do Four Ways Friday this week and instead, share this card with you.  This past week began last Sunday like this...
I was away until Thursday night for work and I have to admit that I am officially pooped!  I have been sitting in the craft room today doing a bunch of organizing (and building a new cart that I bought at IKEA!) and for whatever reason, my creative mojo seems to be hiding out in the recesses of my being right now.  I was able to put together enough motivation to create this card for you...but that seems to be all the creative energy I can muster.  So I hope this will do and I hope you and my creative mojo will be back this coming week for a week's worth of projects and a new Four Ways Friday next Friday!!!!!  Today's card was so simple - just a piece of Naturals Ivory card stock that I stamped with the tree from Lovely As A Tree using Garden Green ink.  I then stamped the greeting from Sincere Salutations using Sahara Sand ink.  There is something very peaceful to me about this color combination.  The final touch was to add a bit of Dazzling Diamonds with the 2-way glue pen.  I hope you like it and I hope the rest of your weekend is peaceful, creative and filled with love and laughter!!!!!!

My On-Line Store Is Back Up!!!!

Just wanted to let you know that my on-line store is back up and running!  Yeah!!!  You can place your orders HERE!  Thanks for your patience!!!!

My Stampin' Up! Store Is Temporarily Off-Line

I just wanted to let you know that there are some technical issues with my Stampin' Up! on-line store and that on-line ordering is currently unavailable.  I have been informed by Stampin' Up! that it should be up and running within the next 24 hours.  Thank you so much for your patience!  I appreciate your business!!!!!

Thursday, December 08, 2011

My Encaustic Journey - Part III

Today's Lesson From The Craft Room:  Push Past The Dislike...Yummy Cupcake Sprinkles Await!
This is the third and final piece I created in my encaustic class last week.  It's funny how this piece came about.  I had completed my first two pieces and our time in the class was coming to a close.  I knew I didn't have a lot of time and yet I still wanted to try to get a third piece done.  So I began by trying to adhere this fortune from a fortune cookie to the panel using encaustic medium.  The minute the medium hit the fortune the paper became transparent and you could see the words on the back of the fortune (a definition of a Chinese word) start to peek through.  I pulled the fortune off - a bit frustrated - and wondered what to do next.  Victoria, our teacher, walked by and said something like "I kind of like the transparent look of the paper" and that helped me begin to push past my dislike.  I committed myself again to adhering the fortune to the panel so I dipped the fortune in the wax medium and positioned it on the panel.  I then started to create a box around the fortune and the encaustic paint and my hurrying turned into a frustrating combination!  We definitely weren't helping one another out!  So I took a deep breath and decided I just needed to loosen up and just start flinging encaustic paint.  I needed to stop being so purposeful and rushed and to just play - a decision that helped me push past the dislike of what I had been seeing unfold in front of me on the panel.  So I began to play!  I covered the fortune with a piece of painter's tape to protect it and then began going around the room and borrowing melted encaustic paint from other participants to add to my board.  Drip, drip, fling, spatter...with a bunch of fusing with the heat gun in between.  As the piece began to build I began to smile.  It started to remind me of candy or cupcake sprinkles!  Yummy!!!!  By the time I removed the painter's tape from the fortune, my dislike had turned to joy.  So next time you find yourself criticizing your art and feeling rushed, see if you can just loosen up and play...you may end up with yummy cupcake sprinkles!!!! :)
Just a quick note...due to my schedule I will likely be posting Four Ways Friday on Saturday this week.  Thanks for your patience - I really appreciate it!!!  Have a beautiful tomorrow! :)

Wednesday, December 07, 2011

My Encaustic Journey - Part II

Today's Lesson From The Craft Room:  Take Bold Steps!
Today I wanted to share with you the second piece I created in my encaustic class last week at Victoria Eubanks Studio.  Victoria had suggested we bring bits of ephemera and scraps of paper/fibers/knick-knacks with us to the workshop.  I did a bit of scavenging in my craft room prior to heading to the class and grabbed a Polaroid photo of our house, some polymer clay tiles I had made, some dictionary pages, and some odds and ends.  I began this second encaustic piece with a piece of mdf board.  I glued down a piece of dictionary page and then asked if adhering a photo would work.  I was told it would and was asked if I wanted to use the original photo or make a black & white photo copy of it.  I had taken this picture with a Polaroid camera that I purchased off of ebay.  It was my first successful Polaroid (I tried to take a picture before reading the directions and the first picture didn't come out - after reading the directions this second photo worked perfectly...lesson learned :)  The picture is of the back of our house as we began our house-painting project.  I decided to take a bold step and believe that whatever I would do with the photo it would somehow work out.  So, rather than photocopy or preserve the photo in some way, I just went for it!!!!  I had to scratch the photo up with sandpaper in order to give it some "tooth" for the wax to grab onto.  Then I added glue to the back of the photo and adhered it to the board and then, once the glue dried, on went the first layer of encaustic medium!  The photo stayed clear and the piece was then built from there!  I'm not sure what will happen over time to the photo - it may fade over the years even though it is encased in the medium.  No matter what happens, this piece will always be a reminder to me - not just of the effort and enjoyment of painting the house, but also of always having the courage to take bold steps!

Tuesday, December 06, 2011

My Encaustic Adventure - Part I

Today's Lesson From The Craft Room:  Don't Assume It Won't Work.  Just Try It!!!!
I took an amazing encaustic class last week given by Victoria Eubanks here in Denver.  I highly recommend it!!!!!  It was an all-day creative session - from 9-4 - and Victoria shared her passion and knowledge in a patient and inspiring way!!!!!  What a great teacher!!!!!!  Over the next few days I want to share with you the three pieces I created that day.  This piece began with lots of questions - could I stamp on tissue paper and embed that in the wax?  Could I incorporate broken pieces of a vintage Christmas ornament?  What would happen if I colored the stamped image with colored pencils and then embedded it?  For some of my questions Victoria had immediate responses based on her experience.  For others she said, I haven't ever tried it, let's see what happens!  I loved the opportunity to just try things and to see what would happen!  It seemed easy for me to apply this attitude since this was a medium I had never explored and I was curious.  I think the more familiar you are with working with supplies, it can be a bit more challenging to keep this open mindset.  Shunryu Suzuki said that In the beginner's mind there are many possibilities, in the expert's mind there are few.  May we all learn to approach our art with the beginner's mind - believing that there are many possibilities waiting to be discovered!
For this encaustic piece I began with a piece of mdf board that I covered with kraft tissue paper that I stamped with the retired Stippled Butterfly stamp using Staz-On ink.  I then stamped the image again on another piece of kraft tissue paper and colored it in with colored pencils.  I applied a few layers of encaustic medium and encaustic paint and then added the colored butterfly.  I then added an additional layer of encaustic medium and the drips of green encaustic paint.  Finally I embedded the small pieces of broken vintage glass Christmas ornament.  This was my first encaustic piece ever and I loved the journey!!!!  Thank you Victoria!!!!

Monday, December 05, 2011

2-Step Bird Punch Stencil

Today's Lesson From The Craft Room:  It's A Beautiful Day If You Think It Is!
On Saturday it was snowing - Buddy's favorite weather!  We decided to go out for a morning walk and the snow was about 5 inches deep and still coming down.  It was peaceful and quiet - very few cars driving around the neighborhood so early on a Saturday morning.  We finally came upon one man walking his dog - a small husky named Kona.  Buddy and Kona said hello and the man turned to me and said, "Beautiful day, isn't it!"  It was a statement - not really a question.  I agreed that it was gorgeous out and then, as Buddy and I went on our way, I began to think about the day and how there were likely people out there who would not have agreed with us.  For some, Saturday's weather would have seemed inconvenient - maybe even downright miserable!  Not for us.  It is a beautiful day is you think it is!  It matters not what others might think about the day...or so much more for that matter.  It is beautiful - if that's what you think!
Today's card began with the idea of using the 2-step bird punch as a stencil and combining that with a stamp.  I began by punching the bird out of a piece of scrap paper and adhering it to the Whisper White card stock with drafting tape.
Next I took a flourish stamp from the Tiny Tags stamp set and stamped it again and again with Crumb Cake ink.
I then repeated the same stamping using Chocolate Chip ink.
And finally Early Espresso ink.
When I went to remove the drafting tape things didn't go as planned.  The tape pulled up some of the card stock.  But I decided to just go with it!  So I masked off the bird and grabbed some Blushing Bride ink and began sponging all over the card.  Next I took a Crumb Cake marker and placed it in the color spritzer tool and did a bit of spritzing!  I removed the mask and began to build the nest with punched out branches from the 2-step bird punch.  The greeting was the next to be added - a word from Fabulous Phrases stamped using Early Espresso ink.  I felt the card needed a bit more color so I cut off the bottom and then cut a piece of Rose Red card stock.  I ran the Rose Red panel through the Big Shot with the Perfect Polka Dots embossing folder.  I then used the scallop edge punch to scallop the card before adhering the Rose Red panel to the underside of the front of the card with glue.  It was fun to let the drafting tape take me in a new direction :)  I hope you like it!

Saturday, December 03, 2011

Four Ways Friday #71 - Repurposing Dryer Sheets!

For this week's Four Ways Friday I wanted to show you four ways to take used dryer sheets and repurpose them for your paper crafting projects!
One way you can repurpose used dryer sheets is to get ink on them!  For this card I just took the dryer sheet and then pressed it onto multiple ink pads from lightest color to darkest color (daffodil delight, pumpkin pie, tangerine tango, and real red).  I let the sheet dry (with a light blast from the heat tool) and then I cut it and adhered it to a piece of Very Vanilla card stock using matte gel medium.  I then used the Pennant Parade stamp set to create the banner pieces and adhered them to the card with glue.  The letters are from the Calendar Alphabet & Numbers stamp set.  The scalloped trim was created with the scallop edge punch.  Finally I added two knotted pieces of Early Espresso ribbon with glue dots.
There are many ways to add color to your dryer sheets!  To create this flower I began by spraying a dryer sheet with ink mixed with water (I place a bit of reinker into small spray bottles with water and then spray away!).  For the larger flower layers I used Tempting Turquoise and Rich Razzleberry.  I allowed the sheets to dry and then die cut them in the Big Shot using the Daisies #2 die!  I layered the flowers and used a bit of glue to hold them together and then adhered them to the card with glue.  I punched the leaves from the 2-step bird punch and added them with glue.  Finally, I adhered a button in the center with a pop-up glue dot.  Here is a close-up of the flower:
The greeting was stamped in Basic Black ink using the Sincere Salutations stamp set.  To add a bit of interest to the bottom of the card I scored three scoring lines with my scoring board.
Another way to add color and interest to your dryer sheets is to paint them!  To create this butterfly I began by painting a dryer sheet with a mixture of Champagne Shimmer Mist paint and some water.  I allowed the sheet to dry and then die cut the butterfly in the Big Shot with the Beautiful Butterflies die.  I then used a thin piece of wire that I wrapped around the center of the butterfly to create the antennae and body.  Three adhesive pearls were then added.  Here is a close-up of the butterfly - hopefully you can see the sparkle from the shimmer paint!
The greeting was then stamped using Basic Black ink and the Flight Of The Butterfly stamp set on a Naturals Ivory card base.  The butterfly was attached with glue.
If you are a fan of texture, you'll enjoy this last technique!!!  I began by spraying the dryer sheets with Tempting Turquoise and Elegant Eggplant ink.  I allowed them to dry and then cut them into pieces (triangles and rectangles).  Since your dryer sheets are made from synthetic material, they will melt if heated long enough.  I highly recommend doing this in a well-ventilated room or outdoors and be careful!  I held the dryer sheet pieces down with a wooden skewer and then heated them with the heat tool until they started to scrunch up and melt.  I stopped when I like the look I had achieved.  I then sewed the pieces to a piece of Tempting Turquoise card stock using metallic thread and my sewing machine.  I stamped the greeting onto a Whisper White card base with Basic Black ink using the Fabulous Phrases stamp set.  Finally I added the dryer sheet panel with dimensionals.
I hope you've enjoyed this week's Four Ways Friday and I hope it inspires you to resist throwing your dryer sheets in the garbage and instead repurpose them in your crafting projects!!!!  I hope you have a wonderfully creative weekend!!!!! :)

Friday, December 02, 2011

Four Ways Friday Will Be Here...By Saturday :)

I am sitting on the couch right now and I am pooped.  I've decided to give myself the night off and not try to rush through creating this week's Four Ways Friday tonight.  So, I will work on it on Friday and post it for you either Friday or Saturday.  Hope that's okay :)  It snowed here today - very beautiful!  A great evening to curl up on the couch and stay warm :)