Friday, March 16, 2012

Four Ways Friday #83 - Paper Doily Large Sizzlit

For this week's Four Ways Friday I decided to play around with the Paper Doily Large Sizzlits Die.  I hope you enjoy these ideas!
The paper doily adds a beautiful layer to cards!  Here I die cut Naturals Ivory card stock and then adhered it to the Whisper White card base with glue.  Here I layered a 2 1/2" circle punch, a framelits Labels collection die cut and a smaller circle punch on top of the doily.  All the layers were adhered with dimensionals.  The sentiment is from the Petite Pairs stamp set and the floral images and outline are from the Apothecary Art stamp set.  A piece of ruffled Wisteria Wonder ribbon finishes the card.
The paper doily makes a great stencil for sponging too!  Here I used the doily as a stencil to sponge on a Whisper White piece of card stock.  I sponged using a variety of greens and blues (Old Olive, Not Quite Navy...and a few others :)  Next I cut out the sponged image and adhered it to the Very Vanilla card base with glue.  Of course, I had to incorporate the stencil - it looked so pretty with all that color!  So, I cut out the center of the doily (hard to see in the photo) and added the sponged stencil as a layer with glue.  I then took the center that I had cut out and turned it over and painted it with champagne shimmer paint!  once it had dried, I added it to the card with dimensionals (cut into tiny pieces).  For the center I punched some of the waste from all the sponging I had done with the Boho Blossoms punch.  I then used my paper snips to cut in between some of the petals so that I could add some dimension to the flower before gluing the three flowers together.  I added an ice rhinestone brad to the center and ended by stamping the greeting from Teeny Tiny Wishes and creating a little banner that was adhered with glue.
Once I started sponging, I couldn't stop!  But you don't have to just sponge with regular ink!  Here I used the doily as a stencil and sponged with VersaMark and then applied different colored Stampin' Pastels using cotton swabs!  I then stamped and punched out some of the images from the Mixed Bunch stamp set.  The image on the left is from the Fresh Vintage Sale-a-bration stamp set.  The greeting is from Petite Pairs.  I mounted the entire panel onto a Lucky Limeade card base and added an adhesive rhinestone to the center of the flower.
Since my stencil was now entirely covered with VersMark ink, I decided it needed some Stampin' Pastels too :)  So, I added a variety of colors and then cut out the central part of the stencil.  I adhered it to a punched 2 1/2" circle of Pacific Point card stock with dimensionals and then added the greeting from Petite Pairs.  The finished card size is 3x3.
I hope you've enjoyed these four cards using the Paper Doily sizzlits die!  The ideas for this die are endless - you can die cut it, use it to embellish an altered CD, create beautiful place settings (I am imagining one of these doilies underneath a cupcake on a small plate)!  Let your imagination run wild!!!!  I hope you have a wonderful and creative weekend!  Happy St. Patrick's Day to all those who are celebrating the holiday!!!!  May you find the gold at the end of the rainbow every time you look for it!!!!! :)

Thursday, March 15, 2012

Furry Folk Happiness Card

Today's Lesson From The Craft Room:  Find Your Haven
It was gorgeous out today (I'm writing this on Wednesday) and I decided to take some time to sit outdoors in the backyard on a lounge chair and read a bit of a book.  It was perfect!  The birds flying right over me to get to the bird feeder that was in the tree behind me.  The branches moving in the breeze.  It was a haven for me in the midst of my day - a place of safety - a refuge.  Today's card represents finding my haven - being with those I love in nature - whether that be in the backyard or on a mountaintop.  I used the Furry Folk stamp set (so cute!) and did some stamping and a bit of heat embossing...and a bunch of cutting :)  I also heat embossed a small rectangle using the Woodgrain background stamp and Soft Suede with VersaMark ink.  The greeting is from Loving Thoughts.  Where is your haven?  You may have more than one...just like my cat Willow :)  She likes the back of the couch, the top of her scratching post....or, as you can see in this photo, the recycle box that lives under my desk :)

Wednesday, March 14, 2012

Out On A Whim Wednesday: Take Flight!

Today's Lesson From The Craft Room:  Boldly Go Where You Have Never Gone Before!!!!
I was so happy to be included in Lorraine's Pigs On Parade event!!!!!  You can read about it HERE.  I saw the original post too late, but not too late to see her post when she happened upon 2 additional pigs that needed to be decorated!  I jumped at the chance.  And then, once my pig arrived, we stared at each other for days on end...and I wasn't so sure I had made the right decision by jumping at the chance!  Seeing that plain pig staring at me brought up all kinds of weird thoughts...What should I do?  What if I ruin him?  What if I do something and it doesn't turn out quite the way I want?  What if everyone thinks my pig is ugly?  Yes...a lot of what if's and should's!  I am happy to say I survived the what if's and should's and jumped in with both feet!  I had never worked with joint compound before, but figured this was a great way to give it a try.  I first wrapped wire around the pig so that once he was decorated I'd be able to hang him up (I already knew I wanted to give him wings to fly!).  Next, I "iced" the pig...that was how it felt as I covered his entire body with joint compound and a small spatula - it was very peaceful.  Once he was covered, and while the joint compound was wet, I decided to mix a bunch of beads together and sprinkle and smoosh them into the compound.  I was definitely boldly going where I hadn't gone before!  Well, it looked great...until it began to dry and I heard "tap," "tap," "bounce," "tap."  Almost every single one of those beads fell off of the pig as it began to dry!  Oh well!  Now what to do with all of that white, dried joint compound????  Color it!  I took out some pink metallic powder and began to brush it over the pig.  It looked okay, but I really missed the look of all of those beads.  So, out came my next approach - gel medium!!!!!  Yeah!!!!  It worked!!!!  I first added the beads and then began adding micro beads and glitter by brushing additional bits of gel medium onto the pig as layers dried.  Yes, my craft room looked quite like the pig when I got done!  Glitter and beads everywhere!  But at least this time they stuck to the pig.  Oh, I forgot about the wings!  I hot glued them to the body before I began adding the joint compound.  They were die cut out of tooling foil.  I started thinking about ways to decorate them and was attracted to some iridescent film that I had purchased a bit ago and hadn't yet used.  I stamped the word "believe" on one of the pieces of film and then began cutting and die cutting the film and adding it to the wings.  It was another experiment and, after playing with layering the film a bit, I decided to end with a layer of the film without any type of medium on top - that way the film kept its shine.  The last step was to create the decorative wire hangar.  I used wire, beads and pieces of Stampbord that I cut and stamped and sponged.  I used a retired SU! set - Collage Alphabet - for the letters.  Yes, this was definitely an adventure and I am happy I boldly went where I had never gone before!  Thank you Lorraine!  I can't wait to see all of the other pigs on March 31st!!!!!

Tuesday, March 13, 2012

Loving Thoughts and Framelits Card

Today's Lesson From The Craft Room:  Order Matters
Today's lesson actually came from outside of the craft room.  I had the pleasure of getting a massage today!  It felt great!  I know some people don't like massages, but I happen to be one that does :)  After the massage I was incredibly relaxed and very noodle-like - that's how I describe that loose and limber feeling you get when you are totally relaxed :)  Going home would have been the best idea, but I had committed to doing our Costco shopping after the massage...why I did that I don't know...probably because the massage location and Costco are quite close to one another so I figured I would get both done at once.  The reverse order wouldn't have worked since I was going to be buying some perishables.  Well, to say that order matters is an understatement.  Do not...let me repeat those important words...do not go to Costco after a massage!  That's my big lesson for today!  I went from totally relaxed to lifting boxes of cans and bottles that my body did not want to lift!  I am grateful I didn't injure myself.  What I did do, though, was take myself out of my blissful noodle-like state and crash myself right back into reality.  Yes, order matters.
Today's card combines a sentiment from the Loving Thoughts stamp set with the framelits Labels Collection dies.  I used the framelits in two ways here - to die cut the middle label and to create the decorative edge on the Crumb Cake piece of card stock.  Somehow this color combination - the Crumb Cake with the Daffodil Delight - puts me right back into that place of peace :)  I added some crochet trim, First Edition specialty designer series paper, and a vintage trinket brad for some detail.  There are a few other details as well - the linen thread, the scallop edge punched card stock and a bit of spritz added to the En Francais stamping on the label.  I hope you like it!
p.s.  I sent in photos for 2 different submissions to PaperCrafts magazine last night.  It always makes me equal parts excited and nervous whenever I submit anything to anyone!  I should know by Friday whether either project made it - I'll keep you posted!  On another front, I submitted a project to last month's Stampin' Up! contest.  They say you will hear within 10 days from the close of the contest...and I haven't heard anything :(  I'm keeping my hopes up though...maybe they meant business days and not actual days?! :)  If I don't hear anything in another day or 2 I will share the project with you :)

Monday, March 12, 2012

Attic Boutique Suite Friend Card

Today's Lesson From The Craft Room:  Dog Knows Best
It never ceases to amaze me how well my dog knows what I need.  If I am feeling down, he looks at me with those sad eyes that say, "a walk would be the perfect thing right now."  So, off we go on a little walk and sure enough, I am feeling better.  He also seems to know what's best once we are on our walk.  Over the weekend we took a long morning walk and I was starting to get a little tired and ready to head home.  But instead of going straight - the most direct route to getting back to the house - Buddy indicated, by pulling me a bit to the right, that he felt going right would be the best thing to do.  We walked about a 1/4 of a block when I noticed that there, on the yard to our left, were some gorgeous purple and yellow flowers that had just sprung from the Earth!  We would have missed them had we taken my route.  Once again, Buddy knew best :)  I wonder if it's a special intuition he has for what I am feeling and for what will make me feel better?  Whatever it is, I am learning to really listen to him - he is proving again and again that he knows what is in my best interest :)
For today's card I played with a few items from the Attic Boutique suite of products.  I began with a Soft Suede card base that I scored to create a tri-fold card.  I then cut a 1" x 12" piece of Attic Boutique designer series paper and sponged the edges with Soft Suede ink before wrapping it around the card and securing it with glue.  Next I took one of the embellishments from the Attic Boutique Side Notes and popped it up on the designer paper using dimensionals (after sponging the edges of course :).  I stamped the crown from Established Elegance using Soft Suede ink on Very Vanilla card stock and punched it out and added it to the center of the embellishment using dimensionals.  The greeting is from Tiny Tags.  I stamped the tag and then punched it out with the jewelry tag punch and added a Vintage Trinket brad.  Next came some stamping on the card base - one of the images from the Rue Des Fleurs stamp set.  I then took some scrap from die cutting a decorative box and cut it down to adhere to the card base.  I love the decorative edge waste that the decorative box die creates!  Next came some spritzing with the color spritzer tool and my Soft Suede marker.  For the inside I just stamped a piece of Very Vanilla card stock with another image from Rue Des Fleurs and adhered it to the inside of the card using glue.  I hope you like it!  Here is a pic of what the card looks like when you remove the band:

Friday, March 09, 2012

Four Ways Friday #82 - Established Elegance

This week's Four Ways Friday shows you four ways to put your Established Elegance stamp set to use!  This is one of those stamp sets that can really create gorgeous cards with just simple stamping...or you can jazz things up with a few simple additions.
I know the saying is "save the best for last," but this turned out to be my favorite card and I'm too excited to share it with you!  I stamped the dress form from Established Elegance using Island Indigo onto a Whisper White card base.  The sentiment was then stamped, with the help of the stamp-a-ma-jig, in Lucky Limeade.  Next came the Twitterpated designer fabric (love, love, love it!!!!).  I cut and tore very small strips of the fabric and then adhered them to the card using fabric glue.  I created about 3 layers of fabric strips to give the skirt some dimension.  I used adhesive pearls to form the waist of the skirt.  I will definitely be making a set of these cards and playing dress up with different types of fabric and ribbon! :)
If you don't have fabric or ribbon, don't worry!  This stamp set holds its own with just simple ink and card stock!  I love how you can layer the images in this set to create depth.  Here I combined the two stamps that I used on the first card with one more of the images in the set.  All were stamped onto Naturals Ivory card stock using Early Espresso ink.  I am going to stamp up a bunch of these - they will make a wonderful note card gift set!  (I can already see the cards in a box tied with Chantilly or Victoria crochet trim!).
I always enjoy when a stamp set comes with an image or two that can be stamped multiple times to create a border!  This floral image from Established Elegance is a perfect example!  With the help of my stamp-a-ma-jig, I repeatedly stamped the image using More Mustard ink on Confetti card stock.  I start by stamped the center image first and then work out to the right side and then the left side - just so my stamping is relatively centered.  The sentiment is from Loving Thoughts and was stamped using Cherry Cobbler ink.  The final touch was a piece of crochet thread tied through a Bitty Button.
Of course, you can always stamp and create layers using the gorgeous images in this stamp set.  I love the old fashioned typewriter in this set!  It makes a great focal image!  Here I stamped the image onto Crumb Cake card stock with Early Espresso ink.  I distressed the edges with my fingernail (very high tech! :).  I then spritzed this piece with the color spritzer tool and my Early Espresso marker.  The card base began as a piece of Lucky Limeade card stock and I cut back the front of the card and adhered a strip of In Color patterns stack designer paper using glue.  I then stamped the solid portion of the card front using the Rough Type (retired) stamp set and Lucky Limeade ink and spritzed the card front with Early Espresso ink as well.  Next I used the scallop edge punch to punch a few strips of First Edition specialty designer series paper.  I then layered them - a little askew from one another - and adhered them together and to the back of the typewriter using glue.  A piece of linen thread was wound around the piece and knotted and a little vintage trinket pin was added.  The sentiment from Loving Thoughts was stamped onto Very Vanilla card stock using Early Espresso ink.  I then used the Decorative Label punch to punch out the greeting....I punched it out and then threaded it through the punch again to create this unique label shape.  A few Vintage Trinkets brads were added to the tag before I adhered it to the card using dimensionals.  The whole panel was then attached to the card with dimensionals.
I hope you've enjoyed this week's Four Ways Friday!  I had a lot of fun with this stamp set and I hope these ideas inspire you to use this, or any set that you have, in fun new ways!!!!  Wishing you a wonderful and creative weekend!!!!

Thursday, March 08, 2012

March Blossom Punch PCL Design Team Projects - Part 2

Today's Lesson From The Craft Room:  You must learn to be still in the midst of activity and to be vibrantly alive in repose.  - Indira Gandhi
I thought I would share another quote with you today :)  I have mentioned before that I travel quite a bit for work and at times, being around all of that activity - in hotels, airports, planes, meeting rooms...can, well, make me a bit nuts!  So I continue to try to learn how to be still in the midst of all of that activity - how to quiet my body and mind - which usually involves finding a quiet place to sit down - sometimes even on the floor in a hallway in the airport; or maybe deciding to buy groceries so that I don't have to leave my hotel room in the evenings.  On the plane it usually involves putting on my noise-cancelling headphones and listening to music that centers me - a favorite is Native American flute music by R. Carlos Nakai - so soothing.  I feel like I do a better job of being vibrantly alive in repose :)  Yesterday morning was a perfect example.  I went into the bathroom to brush my teeth and start my day and Willow, our beautiful cat, followed me into the bathroom (why is it that the animals like to follow me into the bathroom?!).  Anyway, she meowed at me so, while brushing my teeth, I sat down on the floor and she proceeding to climb into my lap and curl up into a little ball to be petted :)  And so we sat there, Willow and I, in the middle of the bathroom floor.  I with a toothbrush sticking out of a my mouth.  Her with her eyes closed.  And I pet her...for quite some time.  And during that time I was vibrantly alive - so connected to her - feeling the love and trust flowing between us - the comfort and peace.  Hmmm...I wonder if Willow can come with me on my next trip...although I think she would have issues trying to be still in the midst of all of that activity :)
Today I want to share with you the final two projects I created this month as a Design Team member for Paper Crafter's Library!  I decided to make my first-ever wreath using the Blossom Punch and the beautiful Everyday Enchantment designer series paper, brads and ribbon from Sale-a-Bration!  I covered the styrofoam wreath with strips of unbleached muslin and then attached muslin and ribbon bows and the flowers to the wreath using hot glue.  You can't really see it in the photo, but I lined the back edges of the wreath with Pear Pizzazz pleated satin ribbon.  This wreath is proudly hanging in our home :)
I decided to do a little upcycling for my second project :)  For some reason a pair of old, ripped jeans caught my eye in my fabric box and I decided the pockets would make a perfect holder for a mini book :)  I used the images from the Mixed Bunch stamp set and heat embossed on the fabric with ink and clear embossing powder.  The book was put together with a bamboo skewer binding.  Here is a picture of the inside pages before they were bound into the book:
It's hard to believe that I only have one more month as a Design Team member for Paper Crafter's Library - the time has flown by!  (A hint for next month's projects...I'm using the Attic Boutique Suite from the Occasions Mini Catalog :)  I am happy to report that they have asked me to remain on their team longer term as a Designer/Educator!  I immediately accepted and will continue to make exclusive videos that will be available to Paper Crafter's Library members!  To learn more about Paper Crafter's Library and to view their free blog, click HERE!

Wednesday, March 07, 2012

March Blossom Punch PCL Design Team Projects - Part 1

Today's Lesson From The Craft Room:  One can never consent to creep when one feels an impulse to soar.  - Helen Keller
I was working on my next set of Paper Crafter's Library design team projects the other day and decided I might want to incorporate some quotes into the project.  So I started searching for quotes by women and came across a few that really spoke to me.  This quote from Helen Keller was one of them.  This quote can serve as a mantra for life in general and, I believe, it can serve as a guide for us when it comes to our art making.  How often do you hold yourself back when you feel the impulse to just go nuts with your art?!  Do you hold yourself back because you might make a mistake?  or someone else won't like what you do?  or you don't want to "waste" your favorite paint, ink, paper, whatever?  The risk we accept by not expressing ourselves in the way we want in our art is far greater than the risk involved in wasting a bit of paint or making a boo-boo.  Today, give up creeping with your art - go wherever your impulse wants to take you - follow your impulse to soar!!!!!!
Today I am sharing with you two of the projects I created this month as a Design Team member for Paper Crafter's Library.  For today's projects I focused on using the Blossom Punch.  If you followed my blog last week, you saw the video on how to create flowers using your Blossom Punch.  Here, I used a similar technique to create flowers out of kraft colored tissue paper.  It is a lot easier to punch through tissue paper with your punch if you fold the tissue paper over a few times before punching.  Each layer of the flower was glued in the center to the one on top of it and then I scrunched the flowers and hot glued them to the branches.  The vase was filled with floral foam and covered with strips of First Edition Specialty designer series paper to hide the foam :)  I also used a piece of this designer paper to wrap around the outside of the vase - I adhered it to itself so that I can choose to slide the paper off of the vase if I want to decorate it differently.  Do you see the little bird in the branches?  I die cut some muslin using the Elegant Bird die and then sewed the parts together to create a small stuffed bird that I then hot glued to a branch.
For my second project I created a card to demonstrate how you can paper piece using your Blossom Punch.  Here I punched out a blossom punch flower from a variety of different papers and some silver glimmer paper (love it!).  I then cut the flowers up into smaller pieces and glued the pieces onto a base flower.  I added a greeting from the Elementary Elegance Sale-a-bration stamp set as well as a few extra embellishments.  I hope you've enjoyed these first two projects.  Join me tomorrow to see the second two projects I created! :)  You can learn more about Paper Crafter's Library here!

Tuesday, March 06, 2012

Make Your Own Die Cut Foam Stamps: Video!!!!

Today's Lesson From The Craft Room:  Location, Location, Location
I'm not sure what possessed us - maybe the same thing that possesses anyone to walk into an open house or search on-line for real estate.  Somehow we ended up finding a house on-line that we decided we needed to see in person.  It sounded like it might meet our dream needs - you know the list that you make up in your mind as you are falling asleep at night...Our list has things like more land to grow more veggies and flowers, a larger garage for storage and workshop space, and....an artist's studio in a separate building...with a bathroom and kitchen of course!!!!!  Believe it or not, this property had all of those things and then some so we decided to go take a look.  The property was beautiful - it fulfilled a lot of the dream list...and then we started talking about how easy the decision would be if we could just move it a few blocks northwest...or maybe even across town!  Where it is currently located just didn't feel safe to me - a bit of a transitioning neighborhood.  I also began thinking about building a brick and mortar fence around the whole property - about 10-feet high - with electronic gates (and if I was really being honest, a moat and 24-hour armed security!).  Yes, the house had a lot to offer - it was just the location that caused concern.  One of our friends said it best, "The nicest property we ever looked at was just not in the right place."  And so it was with this house.  It's funny though, when we returned home and started our evening routine, I began to think more about what moving there would mean and realized that what I think I really want in my dreams, may really not be what I want in my reality.  A separate building that houses a studio might be nice...at the same time, it's nice to eat dinner and then walk down the hall into my craft room in my pj's, without having to venture into the cold night to head to a studio.  It's also nice hearing the sound of Michael working down the hall.  I begin to realize that some things I have right now are exactly right - in the right location :)  Yes, location is everything :)
For today's card I decided to create my own foam stamp using my Alphabet Simple Letters Bigz dies!  Here is a video to show you how you can use your Bigz dies to create fun foam stamps to use for your paper crafting projects!  Enjoy!!!

Monday, March 05, 2012

Altered Altoid Tin

Today's Lesson From The Craft Room:  Breathe In The Fresh Air!!!!
Yesterday I was able to open the window in the craft room and let the fresh air in!  It was just over 60 degrees here in Denver and I definitely had Spring fever!!!!!  It's funny how people start to come out of the woodwork when the weather starts to warm up.  We took a walk in the afternoon and there were kids in the park, families riding bicycles, runners taking an afternoon jog - it's as if the neighborhood came awake after a long winter's nap :)  We even noticed that the daffodils and some other early flowers are starting to begin their ascent from the winter soil.  Yes, Spring is letting us know she is on her way.  It is definitely time to breathe in the fresh air!!!!!
I wanted to send a little gift to a friend and I decided it would fit perfectly into a Altoid tin.  I have collected these tins from various places over the years and had never altered one...and I am so glad I did - it was sooooo simple!  I took the Everyday Enchantment designer series paper from Sale-a-bration and outlined the top and bottom of the Altoid tin on the paper (I traced around the outside of the tin on the side of the paper that I did not want showing - just in case some of the pen marks weren't cut perfectly).  I then cut out the two pieces of paper and adhered them to the top and bottom of the tin using glue.  Next came the ruffled Wisteria Wonder ribbon - adhered with a bit of sticky strip.  I cut the prongs off of a rhinestone brad and adhered it to the ribbon using a glue dot.  Next I got out the Framelits Labels collection and the Apothecary Art stamp set and did a bit of stamping and die cutting.  Here is a view from the top of the tin so that you can see things more clearly:
I do have a confession to make - I never intended to incorporate the Wisteria Wonder color into this tin, but the 3/8" ribbon fit perfectly, so I went with it!  Now I'm so glad I did!  I really love how all the colors work together - definitely not a combination I would have thought of in advance!  For a touch of sparkle I added a bit of dazzling details on the flowers in the stamped image.  I hope you like it...I will definitely be doing some more tin altering in the near future!!!!!  (Oh...and I made a mini card to match :)  I am also excited to let you know that I will be sharing my second set of projects as a Paper Crafter's Library Design Team Member this week!  I had a lot of fun with my Blossom Punch!!!! :)

Friday, March 02, 2012

Serif Essentials Elegant Bird Journal

If you came here looking for this week's Four Ways Friday, let me begin with an apology.  I have been really tired the past two days and on Wednesday, my creative mojo was nowhere to be found...or maybe it was just slightly visible.  I did manage to start on creating this bird on Wednesday, using the Elegant Bird Bigz Die, some gesso and some modeling paste with a stencil...
And that was as far as I got...  Thursday morning I spent quite a bit of time contemplating the bird.  He got painted with a pearlized paint and then he sat some more.  Next he found his way onto a piece of mat board that I had gotten from my aunt a few years ago.  My aunt owns a frame shop and had given me quite a few mat board scraps one year when I visited her at the store.  Once the bird was against the mat board some ideas started to flow.  Of course, none of those ideas were remotely concerned with Four Ways Friday.  So I decided to go where my creativity was taking me and focus on the bird rather than on Four Ways Friday.  So instead of four ways to use something, I'm going to share with you one way to use a bird that you gesso, stencil and paint :)
I decided to make the bird and the mat board into a journal! :)  Here is a side view...
The inside pages of the journal were made from a stack of yellow paper that came out of an estate sale.  I cut the pages down to size (just under 8"x10") and then punched holes using my bind-it-all.  I punched holes in the mat board front cover and used a heavy chipboard for the back cover.  Once the book was bound with a spiral binding, I began to decorate the cover.  The mat board had come with the fabric on it, so I just built things up from there.  I adhered the bird and added some buttons that I had in my button box.  I then die cut some chipboard with the Serif Essentials dies and painted the letters with pearlized paint.  The letters, buttons and bird were adhered to the cover of the journal with hot glue.  Next came all of the bows on the spiral binding!  I used Always Artichoke seam binding, Whisper White satin ribbon, Whisper White taffeta ribbon, Whisper White grosgrain ribbon, Whisper White organza ribbon and some Chantilly crochet trim.  Finally I added a few jewelry tags that I stamped with a retired Stampin' Up! set and Chocolate Chip ink.
I hope you don't mind the departure from Four Ways Friday and I hope this project inspires you to follow your creativity where it takes you!  Wishing you a wonderfully creative and peaceful weekend!!!!!


Thursday, March 01, 2012

Kindness Matters Hello Card

Today's Lesson From The Craft Room:  I'm Tired...
I just returned from a work trip last night.  It's funny when I consider the yin and yang of the work I do on the road and the work I do here at home.  I am an introvert by nature - I like to regenerate by being by myself or with my family or with nature.  I enjoy quiet and the comforts of home.  When I go on a work trip I am required to be an extrovert (a skill that I have learned over the years...to a point where people are surprised to learn that I am an introvert!).  On the road I am surrounded by people on planes, trains and automobiles; in airports and hotels; and I conduct training sessions where I am giving every ounce of energy I have to the participants in the room.  The yin and yang - the introversion and extroversion.  By the time I return home from a work trip I am incredibly tired - needing to recharge by sitting in the calm.  I have been trying to spend time in the craft room today (Wednesday) - and I am feeling like what I really need is a nap :)  So I may spend a bit of time cat napping on the couch and hope that my batteries are recharged enough to venture back into the craft room to create later today.  Sometimes I just need to admit that I'm tired...
For today's card I used the Curly Label Movers & Shapers die to create the window and then used a greeting from Elementary Elegance.  The butterflies and flourish from Kindness Matters were stamped with Early Espresso onto a piece of Sahara Sand card stock that I had die cut using the Framelits Labels Collection to create a decorative edge.  I small adhesive pearl finishes the Naturals Ivory card.  I hope you like it!

Wednesday, February 29, 2012

Out On A Whim Wednesday: Flying Pigs!

Today's Lesson From The Craft Room:  Take A Leap!!!!!
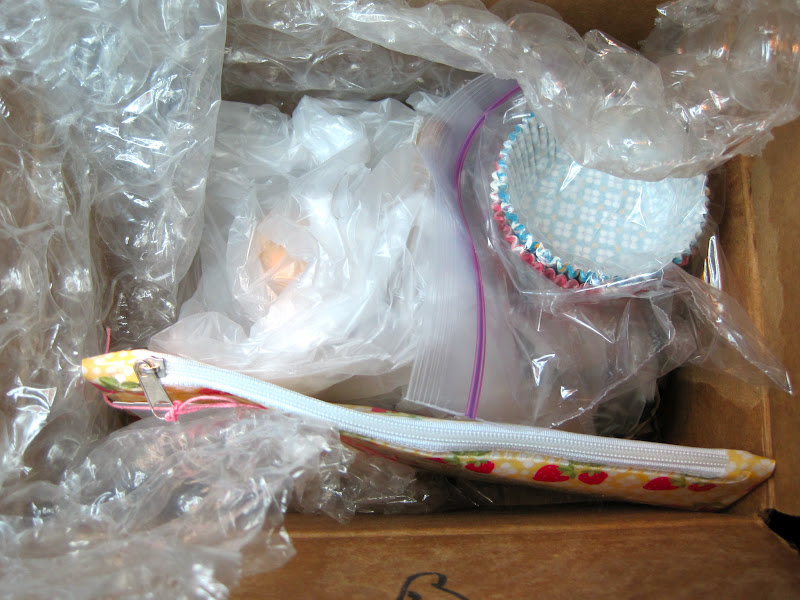
Happy Leap Day!!!!!  It always feels so special when you get to enjoy February 29th!!!  I recently took a little bit of a leap!  One of my friends, Lorraine, who has a wonderful blog (you can see it HERE), decided to celebrate her blogging anniversary in a very special way.  She had purchased a number of paper mache pigs and decided that she wanted to send them to people who would be willing to decorate them and send her photos of the finished pigs to include on her blog.  I thought it was an amazing idea and I quickly let her know I was interested!!!!  So guess what showed up in my mailbox????  This amazing box...Want to know what was inside...
 
And then I started taking things out...
Ooh!!!!  And then I kept digging...
YIPPPPEEEEE!!!!  I can't wait to get this little fellow decorated!  I know that he is going to have some type of wings, but beyond that, he is a blank sow...I mean slate! :)  Lorraine, thank you so much for sending this little guy to me and for letting me participate in your special anniversary!  I will be sure to share photos of my fully decorated piggy once he is done....it's time to take a leap!!!! :)  (I can't wait to see what some of the other artist do with their pigs too!!!!!!) :)

Tuesday, February 28, 2012

Blossom Punch Paper Flowers & Video!!!!

Today's Lesson From The Craft Room:  Ice Melts
Okay, I admit it, today's lesson may seem a bit obvious :)  But when you really begin to think about it, there is a deeper lesson awaiting us :)  We have had quite a bit of ice this winter - on the driveway and sidewalks.  Quite treacherous when you are trying to walk the dog!  Some of the ice at the end of our driveway had gotten to be about 6 inches thick and hard as a rock!  It felt impossible to break through it!  And then came the sun - little by little - day after day - and that ice that at one time felt impossible to remove - was all of a sudden a puddle of water.  What obstacles are you facing right now?  What seems impossible to resolve?  Maybe the ice has a lesson for us all - when it seems impossible and insurmountable, maybe if we just wait and shine some light on the situation day-after-day - our obstacle will dissolve and we will move forward without constraint.
I am loving my Blossom Punch!  For today's project I used the punch with waffle paper and designer series paper and then used the flower to decorate this little gift box.  Here is a video to show you how I created the flower.  (WARNING:  Watching this video may cause addiction to paper flower making!).  Enjoy!!!!

Monday, February 27, 2012

Circle Circus Tile Magnets

Today's Lesson From The Craft Room:  Listen To The Sounds Of Nature
Have you ever heard the sound of earthworms moving through the leaves at night?  Or the hoo-hoo-hooing of an owl in a tree overhead?  Or the rustle of branches as the wind passes through?  When was the last time you heard these sounds?  For so many of us, the sounds in our life include the whirring of electronics, the roar of traffic, the sound of music from the computer/ipod, voices talking at us from the television screen.  There is something about the sounds of nature that moves right past my brain and right into my being.  Something deep within me feels at home with the noises of nature, even when those noises seem odd or even threatening (the screeching of an owl in a tree the other night sounded like a chicken being tortured!).  When I am inside for too long, I miss the sounds of the nature around me.  I long for a walk, or just a moment outdoors, to reconnect.  There is just something about those sounds...
For today's project I used the Circle Circus stamp set with some Jet Black Staz-On ink to create these graphic tile magnets!  I created a video on how to use your Crystal Effects to create these quick & easy magnets - you can find the video in the list of videos on the left-hand side of my blog.  Stamp, coat, and attach your magnets and this gift is good to go (you also need to add in some drying time...preferably a couple of days just to be safe)!  I hope you like them :)

Friday, February 24, 2012

Four Ways Friday #81 - Movers & Shapers

This week's Four Ways Friday focuses on the Movers & Shapers dies!
The Movers & Shapers Curly Label die does a great job of cutting windows in your cards!  The die also coordinates perfectly with the Curly Label punch!  Here I die cut a piece of Very Vanilla card stock and added some spritzing with an Always Artichoke marker and the color spritzer tool.  I stamped a few flourishes from the Established Elegance stamp set and knotted a piece of Always Artichoke seam binding around the card and through the window.  I stamped a scrap piece of Very Vanilla card stock with images from Established Elegance and the greeting from Kindness Matters (a set that is available for free with your Sale-a-Bration $50 purchase!).  I then punched out the stamping using my Curly Label punch and added it to the inside of the card using dimensionals.
This card began with the "waste" from the first card!  When I die cut the first card, I was left with a die cut label in Very Vanilla.  The Curly Label die cut is ever so slightly larger than the Curly Label punch, so it makes a wonderful layer!!!!!  Here I once again stamped with images from Established Elegance and Kindness Matters using Always Artichoke ink on Always Artichoke card stock.  I then punched the stamping out with the Curly Label punch and layered it on top of the Very Vanilla label with glue.  I added an adhesive pearl to the label.  I stamped the card base and then added a piece of Victoria crochet trim.  Next, I stamped a Mini Vintage Tag with an image from Tiny Tags and added it to the card with a safety pin from Vintage Trinkets.  A spritz with Always Artichoke ink and the color spritzer tool finishes the card!
There are many different dies available for your Movers & Shapers die base and the shapes make beautiful additions to your cards!  Here I die cut the bird using First Edition Specialty designer series paper and the bird from the Holiday Windows Movers & Shapers (a set that comes with 4 small dies to use with your Magnetic Movers & Shapers die base).  I sponged the edges with Chocolate Chip ink and then added it to a card I had made using my Framelits Labels Collection.  The greeting and flourish are from the Elementary Elegance stamp set - another set that is available for free with your $50 Sale-A-Bration purchase!!!! :)
You can also die cut double windows with your Movers & Shapers!!!!!  Here I ran the card through the Big Shot with the heart die from the Punch Windows Movers & Shapers (a set that comes with four magnetic Movers & Shapers dies - a heart, star, modern label, and scallop oval).  I then moved the magnetic die so that the next heart would overlap the first and ran it through the Big Shot again to create the overlapping hearts.  The die coordinates beautifully with the large heart punch, so I punched a few hearts and embellished them and added them to the inside of the card.  Some pleated satin ribbon and a piece of card stock punched with the eyelet border punch finish the look!
I hope you've enjoyed this week's Four Ways Friday!!!  Have fun with your Movers & Shapers dies!!!!!  I hope you have a beautiful, peaceful and creative weekend!!!!!

Thursday, February 23, 2012

Bring On The Cake Birthday Card

Today's Lesson From The Craft Room:  Push Reset
After a power outage in the house everything electronic seems to be blinking at me!  The clock on the microwave, the lights on the cable box - you name it, it's blinking.  So you either have to power off the item and then turn it back on or press that nifty little reset button.  What causes the power outages?  It could be a sudden surge of energy or a lightening strike.  It could be some faulty wiring or an accident somewhere on the power grid.  Whatever the cause, sometimes you just need to push reset.  The same is true with us.  I had a huge power surge over the past few days, creating until my fingers and brain were sore.  So I've taken some time to power down and push my reset button - putting on soothing music in the craft room and methodically cleaning up the huge pile of mess that I had created during my power surge!  That seems to be how I push my reset button - clear my space so that it is neat again; maybe a walk outside; or looking out the window to watch the birds and squirrels.  Your reset button may be a little different than mine.  When was the last time you pushed it?
Today's card is a great one for a guy's birthday!  I always love coming up with a "man card" that I like :)  I began with a Neutrals Ivory card base and spritzed it with Early Espresso ink.  Next I rolled the card with the awning builder wheel and Early Espresso ink.  The hand and greeting were stamped onto Crumb Cake card stock with Early Espresso ink and both were cut out.  A die cut (Circles #2 die) circle of Old Olive card stock serves as the backdrop for the cut out pieces.  A vintage trinket was added to the hand as a cuff link :)  I hope you like it!

Wednesday, February 22, 2012

Out On A Whim Wednesday: Paper Bead

Today's Lesson From The Craft Room:  What If We Treated Our Words Like Our Favorite Stashed Items?
I have some craft items that I have stashed away and am waiting to use for a very special time and place.  Just a few of my favorite things that I'm keeping hidden away until the exact right piece of art comes along (I might be waiting a very long time...we'll see!).  There can be a tendency to do this - hold onto something because we don't want to let it go - feeling that it is too precious to just be casually put out there.  Some people say to just go ahead and use it and enjoy it now since you never know what tomorrow will bring.  I'm not so sure yet.  Today I began to wonder what it would be like if we treated our words the same way?  If we actually considered our words to be precious and in short supply and to only be used at the exact right moment.  If we actually thought of ourselves as having a limited number of words.  How might that impact what we say and when we say it and if we choose to say whatever it is at all?  I guess in one sense we all have a limited number of words to speak or write.  It seems, though, that we don't really consider this.  Or, we just blather on and on (as I might be accused of doing right now), and just use as many words as we can in the time that we have - feeling like we have a limitless supply as long as we are breathing.  Today I'm going to begin to consider my words like precious treasures that exist in limited supply.  When and where and how will I choose to use them?
I went out on a whim today - inspired by a necklace I had made a few years ago with lava rock and some paper beads that had been made by a group of women in Africa (a friend had purchased the beads for me as a gift).  I found the necklace in my jewelry drawer today and wondered how I might be able to make paper beads with the strips of designer series paper sitting on my craft table.  Here is a photo of the necklace that inspired me:
The photo at the top of this post is of my first-ever designer series paper bead :)  I cut a thin triangle of paper and then rolled it on a skewer, adding small amounts of glue as I went.  Once I was done rolling and gluing, I rolled the bead on my VersaMark ink pad and then in the clear embossing powder and heat embossed.  I have a feeling this might lead to other beads in my near future :)

Tuesday, February 21, 2012

Kindness Matters Embossed Framelit Card

Today's Lesson From The Craft Room:  Right Now I Am A Woman Of Few Words
I am exhausted as I type this (is this becoming a theme?!).  I just spent the entire day working on the videos, pictures and instruction sheets for my next round of Design Team projects...and I'm pooped!  So I will allow myself to be a woman of few words tonight and just share a quick card with you before heading off to bed (it's Monday night as I'm typing this).
I created this card by stamping the card base with the Apothecary Art image and adding the greeting from Kindness Matters.  I then ran the card through the Big Shot with one of the labels from the Framelits Labels Collection to emboss the stamped image.  I stamped the butterfly from Kindness Matters onto a piece of Whisper White card stock and cut it out with my paper snips.  I then added it to the card with part of a dimensional.  A piece of 1/4" grosgrain ribbon in Rose Red was added to the bottom of the card and adorned with an adhesive pearl.  The final touch was to add some Dazzling Details to the butterfly and flowers.  I hope you like it!!!!!

Monday, February 20, 2012

Artistic Etchings Stamped Tile

Today's Lesson From The Craft Room:  It Takes A Heap Of Loafing To Write A Book.  - Gertrude Stein
I didn't even think I was going to be able to write this post tonight.  It is Sunday evening as I am typing this and I am thoroughly exhausted.  I wasn't really sure why I was so exhausted until I came upon this quote by Gertrude Stein and it made absolute sense.  Not only does it take a heap of effort to write a book or engage fully in the act of creativity.  It also takes a heap of loafing.  Today, I realize, I spent a lot of time on the "heap of effort" side of things as I have been working hard to make my next set of projects for the design team that I am on and, at the same time, I have been trying to come up with ideas for projects I want to create as soon as I'm done with this set of projects!  All of that creating really takes a lot of my energy...and while it doesn't always look like I am doing a ton, my wheels are always turning inside my head and that zaps my energy.  So now it is time to enjoy a heap of loafing!!!!!  I'll make this post short and say that I may decide to take a break tomorrow...we'll see if loafing a bit tonight restores some of my energy.  Just remember both the yin and yang of creating - as much as you need the effort, you need the loaf :)
Today's project is a stamped tile I made into a home decor item to hang in the house.  I stamped the tile with Staz-On ink and an image from Artistic Etchings and the sentiment from Elements Of Style.  I attached a few brads, after clipping off the prongs with my craft & rubber scissors, with Crystal Effects.  The whole piece was then adhered to a piece of masonite that I covered with black card stock using decoupage medium.  A picture hangar was then adhered to the back.  Finally, I sprayed the entire piece with acrylic sealer (next time I'll use glossy, as opposed to matte, acrylic sealer - the matte sealer dulled some of the shine of the tile).  Ahhhh....it's now time to go and loaf...sweet dreams :)