Wednesday, January 12, 2011

3-D Flower With Rolled Fabric Center

Today's Lesson From The Craft Room:  Keep Going!
I'm still under the weather - hopefully this cold that is inhabiting my body will leave sooner v. later.  I mean isn't 6 days long enough?!  I will say though, it has been fun spending time in the craft room and playing around with building 3-D flowers.  I've played with paper, fabric and ribbon and the more I keep going the more I like it!  I will admit that the first few flowers were a bit tedious and I was thinking to myself "there's no way I'm going to keep making these time-consuming flowers!"  However, the more I kept going, the less tedious the task and the more meditative and fun it became!  So if you find yourself dreading an activity - or if you find it a bit tedious - you may choose to keep going.  Who knows - it could turn into fun!!!!
For the first card I used the daisies #2 die to die cut the flowers.  For this second card I used the decorative accents with flowers & leaves die (a die I hadn't used in ages!).  I hope you like them...I can feel a video coming on :) (and thanks to Doris for sharing your thoughts and to Nathalie for encouraging me to get back to making videos!  I really appreciate your comments :)

Tuesday, January 11, 2011

Scallop Envelope Mini Book Video!!!!

Today's Lesson From The Craft Room:  Teach Something!
I shared a picture of this mini book with you as part of last week's Four Ways Friday.  Today I decided I needed to show you how to make it!  Each of us has something we can teach someone else.  What can you teach someone today?  I hope you enjoy the video and I hope you enjoy, even more, making your own!

Monday, January 10, 2011

3-D Flowers!

Today's Lesson From The Craft Room:  It's The Act Of Creation, Not The Amount, That Counts
I have been sick for a number of days now and so I have found myself sitting in the craft room - sniffling, drinking tea, and making 3-D flowers!  It's been wonderful therapy although I must admit that at the end of a day I look around at the few flowers I have created and I have thought to myself, "Really?!  You just spent an entire day here in the craft room and all you have to show for it are five 3-D flowers?!"  I knew there had to be a lesson in that thought and as I stared at those flowers today I realized that it's not the amount or the number of items I have created that determine whether my day was spent in a meaningful way - it is the enjoyment and satisfaction I feel by bringing another creation into this world - a creation that adorns the world in a beautiful way.  Have you heard that song in the show/movie "Rent?"  It is called Seasons Of Love and the question the song tries to answer is how do you measure a year in a life?  I believe one of my measures for a year in my life is how much time I spend expressing the creativity that has been given to me as a gift and sharing that love with others.  What about you?
I've been enjoying die cutting flowers using whatever Sizzix flower dies I have.  I then spray the card stock lightly with water and begin scrunching or curling the petals around a skewer.  Then comes the smooch spritz and water and ink mixtures in spray bottles.  Of course, I never have the patience to let them dry on their own - I bring out the heat tool to help them along :)  I hope you enjoy this flower...I have a feeling you'll be seeing a few more this week :)

Friday, January 07, 2011

Four Ways Friday #32 - Scallop Envelope Bigz Die

Today's Four Ways Friday is all about the Scallop Envelope Bigz Die for the Big Shot.  Hope you enjoy these four different ways to use your die.
You can use the envelope "as is."  Just create the envelope by running it through the Big Shot with some card stock and then using a bit of glue when you fold in the side flaps to construct the envelope.  Here I ran the envelope through the Big Shot with an embossing folder and then sponged it with some ink before putting it together.  I added some punched circles, brads and a bit of linen thread for the closer.  Here are views of the front and inside.
You can also use these small envelopes as layers on larger cards.  Here is a standard size card with the envelope added to the front as an element.
I used a dimensional on the bottom part of the scalloped oval - that way I was able to tuck the envelope flap under the top of the scalloped oval to act as a closure for the envelope.  You can put a special note in the little envelope and then write your letter on the inside of the card itself.
You can make adorable mini books with these envelopes too!  This is the outside - and here is the inside...
To make this mini book I just adhered the flap of one envelope to the back of another envelope.  You can make these books as large or as small as you like and you have all kinds of fun space to decorate and fill!  I cut off the flap of the top envelope and created a cover with some card stock.  I may need to put together a video on this one so you can see how fun and easy it is to make!
You can also use these great envelopes to make a gift box!!!!!  Here I adhered four of them together and added some side embellishments.  You can wrap some yummy Valentine's chocolates in some fabric or tulle and give these as adorable gifts!  Have fun with it!  I hope you've enjoyed this week's Four Ways Friday.  I'm hoping to be back next week with some new videos for you!  Have a great weekend!

Thursday, January 06, 2011

Feeling Punky :(

It seems a cold has decided to try to inhabit my body.  I am making a valiant effort at letting it know it is not welcome.  The battle is my focus right now and is taking all my energy, so I will not be posting a project for you today.  However, I fully intend to slay this dragon and be back tomorrow with 4 Ways Friday!  Have a great day and wish me luck!!!!

Wednesday, January 05, 2011

Varsity Numbers New Years Card

Today's Lesson From The Craft Room:  Take A Step Forward And Turn Your Dreams Into Visualizations
It's easy for me to sit and dream about being (insert words here)...for example "an artist," "healthier," "financially secure," "athletically fit"...you get the idea.  What I realize is that dreaming about it isn't going to make it happen.  I need to do more than just dream - I need to accept that it is possible and then take action.  One way to believe that it is possible is to turn the dream into a visualization - actually picture myself as an artist - as financially secure - as already having achieved athletic fitness.  If we begin to create the pictures in our minds of having already arrived at our dream we are demonstrating to ourselves and the universe that we have accepted the possibility and are ready to move from dream and acceptance into reality.  Can you accept what you are dreaming about?
Don't you just love all these colors together!  I'm not sure how it happened - it began with Soft Suede and Melon Mambo and took off from there!  I then added Daffodil Delight, Tempting Turquoise and Old Olive.  This just says "you're gonna have a great 2011" to me!  The Varsity Numbers stamp set is a great set for creating any year you want - for cards for birthdays, anniversaries, new years, weight goals - wherever you need numbers, this set can help!  It is also easy to cut out since all the lines are straight and not curvy.  The scalloped chipboard circle was made as an experiment.  I ran the chipboard through the Big Shot with the scallop circle die and then ran the scallop circle through again using the clear circle die.  I love how it turned out!  The Billboard decorative strip die was used to make the letters for "happy."  Finally, I added some rhinestone jewels for some sparkle!  I hope you like it!

Tuesday, January 04, 2011

Nature Walk Sympathy - OCCASIONS MINI MERCHANDISE AVAILABLE TODAY!!!

Today's Lesson From The Craft Room:  Sit And Write
I sometimes wonder where creative ideas come from - especially when I find that mine are running dry and the muse had fallen asleep.  It is at these times when I find it incredibly helpful to get back to the habit of sitting down each day and writing in my journal.  If I just show up and start writing down my stream of consciousness (and yes, sometimes my stream of consciousness writes things like, "how am I going to sit here and write for another minute?  What am I going to say?") at some point the ideas seem to flow into my thoughts and onto the page.  At times, a thought that has nothing at all to do with creativity will lead to a creative idea.  What I am learning is that I just need to show up - to sit down and write - and the muse will come and sit down with me :)  One of my resolutions this year is to lighten my thinking by getting my thoughts out of my head and onto a page every single day.  In this way I will coax the muse by lightening my thoughts and clearing the way for her to enter.
Today's card is for a friend whose father recently passed away.  His dad was 93 years old!  The sentiment is from Teeny Tiny Wishes and the flower and butterfly from the new Nature Walk set that is in the Occasions mini catalog.  I stamped the image and heat embossed using black embossing powder.  I then took out some Copic markers and colored the flowers and butterfly.  I also added some dazzling diamonds to the butterfly.  I distressed the edges and also used the spritzer tool to add some "age" to the background.  I hope you like it!

Monday, January 03, 2011

Elizabeth Thank You with Deck the Halls Designer Fabric

Today's Lesson From The Craft Room:  Lighten!
Happy New Year!!!!  "Lighten" is my theme for 2011!  Lighten my load (ie get organized and purge that which is weighing me down); lighten my self-talk; lighten my food; lighten my mood.  I have decided to ask myself the same question at the end of everyday, "What did I do today that helped me lighten even more?"  Hopefully I'll have an answer each and every day :)  What is your theme for 2011?
Today's card uses the Deck the Halls designer fabric.  This fabric has a great winter look and is only available if you order it from the holiday mini catalog by close of business TODAY!  (click HERE to shop now).  This card is designed as a "holder" with an insertable card.  Here is the card with the insert taken out.

I used the Elizabeth stamp on the front of the card and the insert.  The card was embellished with some pearl jewels and dazzling diamonds.  I adhered a piece of Sahara Sand card stock to line the holder and I embossed it using the Vintage Wallpaper embossing folder (one of my absolute favorites!).  A piece of hemp twine adds an additional touch.  I hope you like it!

Friday, December 31, 2010

Four Ways Friday #31 - Springtime Vintage Designer Fabric (SNEAK PEEK!)

This week's Four Ways Friday is a sneak peek of the Springtime Vintage Designer Fabric that will be available beginning January 4th in the Occasions mini catalog!  I don't know about you, but I shied away from using fabric on cards since I thought I needed a sewing machine...not to mention the ability to sew a straight line...in order to use fabric on paper projects.  But you don't!!!!  This week I've decided to show you 4 ways to use the fabric on your cards and other paper projects without needing a sewing machine!!!!
You can use fabric as a background on your cards and paper projects!!!!!  Don't you just LOVE the added texture?!!!!!!  I just tore a piece of the fabric into a square and then adhered it to the card using sticky strip (snail does not work well with the fabric - you need to use a stronger adhesive and sticky strip does the trick)!  Then you can build your card on top of the fabric.  Dimensionals work great for adding layers.  I also used a few mini glue dots - they don't seem to adhere as well, so you might just want to use small pieces of sticky strip to ensure your pieces stay put!  The buttons are from the subtles designer buttons and I added a few punched flowers using the itty bitty shapes punch pack.  I love adding the pearl jewels to the centers of these tiny flowers!  I am also forever in love with the decorative label punch!  Here I punched 2 labels, embossed one in the Big Shot and then layered it on top of a darker label that I had cut into 2 halves.
Ooh - can you see the gorgeous embossing around the edge of this card?!  That's from using the new Framed Tulips embossing folder!  Notice the torn piece of ribbon?  It's not ribbon at all - it's the fabric!!!!  Here I tore a piece of the fabric and then gathered it on the card stock using sticky strip.  So easy, and it adds such a wonderful, textured touch to the card.  The greeting is from the On Your Birthday stamp set (I used the same set for the greeting on the first card too!).
For card #3 I used the fabric in the same way I would use a piece of ribbon.  Here I tore a length of the fabric (I LOVE the frayed look) and then wrapped it around the card and knotted it.  If you turn the fabric while you are tying the knot, you can get the printed side of the fabric to show on both ends of your bow.
Don't forget that you can also die cut your fabric!!!!!  Here I used the Daisies #2 die and another pattern from the Springtime Vintage designer fabric.  I die cut 2 of the medium daisies and 2 of the small daisies.  I didn't use any glue.  I just sandwiched the fabric flowers in between a punched circle of baja breeze card stock on the bottom and then 2 smaller punched circles on the top (baja breeze and pear pizazz).  A rhinestone brad holds it all together!  I hope you've enjoyed these 4 ways to use your fabric.  Fabric adds a great new texture and feel to your cards and paper projects - give it a try!!!!  Happy New Year everyone!!!!  May the coming year be filled with creative exploration, joy, health and prosperity!!!!!

Thursday, December 30, 2010

Top Note Treat Topper

Today's Lesson From The Craft Room:  Make Your Sweet Gifts Extra Special!
Baking sweet treats is one of the special things to do this time of year.  I can't take credit for these yummy pretzel creations.  Elizabeth made them the other day...and I tasted them and they are yummy!  Some pretzels topped with Hershey hugs and then, once heated, the melted hug is topped with an M&M.  Sweet & salty...what more could you ask for?! :)  We needed a quick and cute way to decorate them and here's what we came up with.  A top note die cut of Whisper White card stock, scored and folded in half.  Then we stamped the top note with the flourish image from the Baroque Motifs stamp set using Garden Green ink.  The Thanks stamp is from the Perfect Punches stamp set - stamped once in Garden Green and once in Cherry Cobbler.  We cut around the oval greeting from the Garden Green image and popped it up in the middle of the Cherry Cobbler image using a dimensional.  The Old Olive backing was punched using the Decorative Label punch.  A piece of Night of Navy 1 1/4" striped grosgrain ribbon and a small piece of hemp twine finish the look.  The topper is attached to the treat bag using a few mini glue dots on each side.  Taking the time to stamp a handmade topper makes your sweet gifts extra special!

Wednesday, December 29, 2010

Birthday Bakery Card

Today's Lesson From The Craft Room:  See The World Through Someone Else's Eyes
I went an enjoyed a play date at my friend Elizabeth's the other day!  I love getting together with her to play with new product!  It inspires me!  When I walked into her craft room and started looking at some of her latest creations I came across this adorable card and fell in love!!!!!  I can't tell you how many times I passed by p. 10 of the Idea Book & Catalog and didn't give this Birthday Bakery hostess set a second look.  I'm not sure why I wasn't interested in it - it just never caught my eye...until today!  Until I was able to see the stamp set through Elizabeth's eyes and see this adorable creation she made from it!  I think that happens quite a bit in life - that we see something in a new way because someone else is passionate about it or enjoys it so much that their passion and excitement becomes contagious!  Thank you Elizabeth for helping me see something in a totally new way! :)

Tuesday, December 28, 2010

Fun Foam Magnets

Today's Lesson From The Craft Room:  Identify What You Liked About Today And Build On It Tomorrow!
What did you like about today?  Did you eat one healthy snack?  Did you spend a half hour creating?  Did you tell someone you love how much you appreciate them?  Did you talk on the phone with someone without multi-tasking?  Whatever you did today that you liked, consider how you can build on it tomorrow!  I feel the same way about my art.  The other day I made magnets out of card stock and chipboard and really enjoyed it.  Today I found myself wondering how I could build on the idea.  Specifically, as I walked the dog I wondered "how can I make the magnets more durable - especially in the kitchen?"  Fun Foam came to mind!  So today I decided to make a gift for a friend building on my experience from the other day and these fun foam magnets were the result!

I die cut the thin fun foam pieces with the Big Shot and used hot glue to adhere everything together.  I even snuck a piece of ribbon in between the layers :)  You can't see the back of the magnet, but one little tip I have for you is to cut a 3/4" circle from plain copy paper and adhere it to the back of your magnet.  This helps prevent the magnets from scratching surfaces or leaving black residue on surfaces.  Here is a picture of the full magnet set (the last name of my friend) and a close up of one of the magnets.  I hope you like them!

Monday, December 27, 2010

Heart Woven Basket

Today's Lesson From The Craft Room:  Cleaning Can Lead To Creating!
What a disaster my craft table was this morning!!!!!  Piles of paper, ink, punches, glitter...you get the picture!  So, I decided to do a bit of straightening...and that turned into creating - once I was able to see the table top :)  Sometimes sitting down to clean can lead you straight to creating.  Just touching your supplies and sorting through what you have may inspire you to start crafting - even when you feel your creative energy has been turned off.  So go sort and clean...who knows what will happen!
(I have to admit that I am hiding what I made in the craft room today since I am thinking about submitting it for publication at some point and the publication requires that the item not be posted anywhere if you submit it...so, let me share with you an item I made awhile back that didn't get published)...I made this woven heart basket as a submission for a magazine.  Since I haven't heard anything for a few months, I'm assuming that enough time has gone by to figure they didn't want to publish it so now I can show it to you!!!!!  I wove together 2 colors of pink card stock after stamping them with the Bella Toile background stamp.  If you google "paper weaving" or "paper basket weaving," I'm sure you can find a template to weave your own basket!  I attached a braided satin ribbon handle with hot glue and linked the inside of the basket with gold waffle paper.  Some glitter around the edge, along with a greeting and antique brad finish the basket.  Some treats in a small cello bag are the perfect insert!  I hope you like it!

Friday, December 24, 2010

Die Cut Magnets

Today's Lesson From The Craft Room:  Cookie Dough Is Not An Ingredient!
I was watching tv the other night and a Pillsbury commercial came on.  The commercial claimed that you could bake cookies with just 3 ingredients and my ears perked up....until I heard what they meant by 3 ingredients...cookie dough, icing and sprinkles!  Since when is "cookie dough" (let alone icing and sprinkles) an ingredient????  What I really wonder is how many ingredients are ACTUALLY in those cookies that Pillsbury is claiming can be made with just 3 ingredients...I might have to go to the store and start counting.  I bet that I'll need 2 columns - one column for the ingredients on the labels of the cookie dough, icing and sprinkles that I can actually pronounce and one column for all of the ingredients I can't pronounce!  No Pillsbury, I likely can't make a cookie from 3 real ingredients, but I can say that whatever I do make with real ingredients will be a lot healthier for me and the ones that I love than the cookies you are selling :) (Okay, I'll get off of my soap box now...but I reserve the right to get back on it at a later date :)
Four Ways Friday will return next Friday.  For today I wanted to share with you a fun gift that I am giving to my friend Emily for her birthday.  Each of these is a refrigerator magnet!  I had thought about spraying them with an acrylic sealer, but since I hadn't tested the ribbon with the sealer, I didn't want to take the chance.  I'll have to try the sealer out another time and see how that works since I think it would make the magnets keep their pretty look for a lot longer.  The letters were die cut from the piece of white chipboard that comes with the Stampin' Up! designer series paper (don't throw that chipboard out - you can definitely use it!).  I then used Tombo Mono multi adhesive to adhere the fine silver glitter and then covered the glittered letters with Crystal Effects and let them dry.  I used mini glue dots to adhere all of the little ribbon loops.  Here is a close up of one of the magnets...I hope you like them!

Thursday, December 23, 2010

2011 CD Calendar Continued!

Today's Lesson From The Craft Room:  Whatever You Have Is Exactly What You Need To Produce Your Best Work
Today's lesson, like yesterday's, comes from the book Art & Fear by David Bayles & Ted Orland.  I've realized that there are many ways that I avoid the risk that art making involves.  I tell myself that I need to straighten/clean/organize the craft room before I can create.  Or I tell myself that I need to run out or jump on-line to purchase that special, amazing art tool/item/product that is going to finally change everything and make everything that I create worthy of the walls of the National Gallery of Art!  What I need to keep reminding myself is that whatever I have is exactly what I need to produce my best work - whatever my craft room looks like, whatever tools I'm using, whatever I'm feeling like at the moment, is exactly what I need to create my best work at that time.  I think about artists who drew pictures on the walls of caves and those who found whatever tools they could use to express the art inside of them during the Holocaust.  The need to create, is exactly that, a need - and everything necessary to fulfill that need is right there with you.  All you need to do is take the risk to let that art out!
Today I'm sharing the remaining half of the year from my 2011 CD calendar with you (you can see the first 6 months in yesterday's blog post).  Enjoy!

Wednesday, December 22, 2010

2011 CD Calendar

Today's Lesson From The Craft Room:  To Require Perfection Is To Invite Paralysis
Today's lesson comes from the book Art & Fear by David Bayles & Ted Orlando (I highly recommend it!).  When making a handcrafted project, it can be easy to fall into the trap of trying to be "perfect."  Trying to make your work look like it was created by a finely adjusted technological marvel that can apply ink evenly to every spot on a rubber stamp and can apply even and consistent pressure to make the exact impression every time....let alone come up with the perfect, harmonious design elements that elicit ooh's and ahh's from anyone who views the final project!  Well, I don't know about you, but whenever I start trying to achieve anything close to "perfection," I find myself stiffening up, stamping like a whirling dervish with vertigo and, at the worst, walking out of the craft room altogether, totally deflated!  It's time to recognize that requiring perfection from ourselves in inviting paralysis.  If, instead, we can approach our craft with a heart filled with love and a playful spirit, no matter what we create, we will grow and change in the process.  I wish you many moments of playfulness as you create!!!!
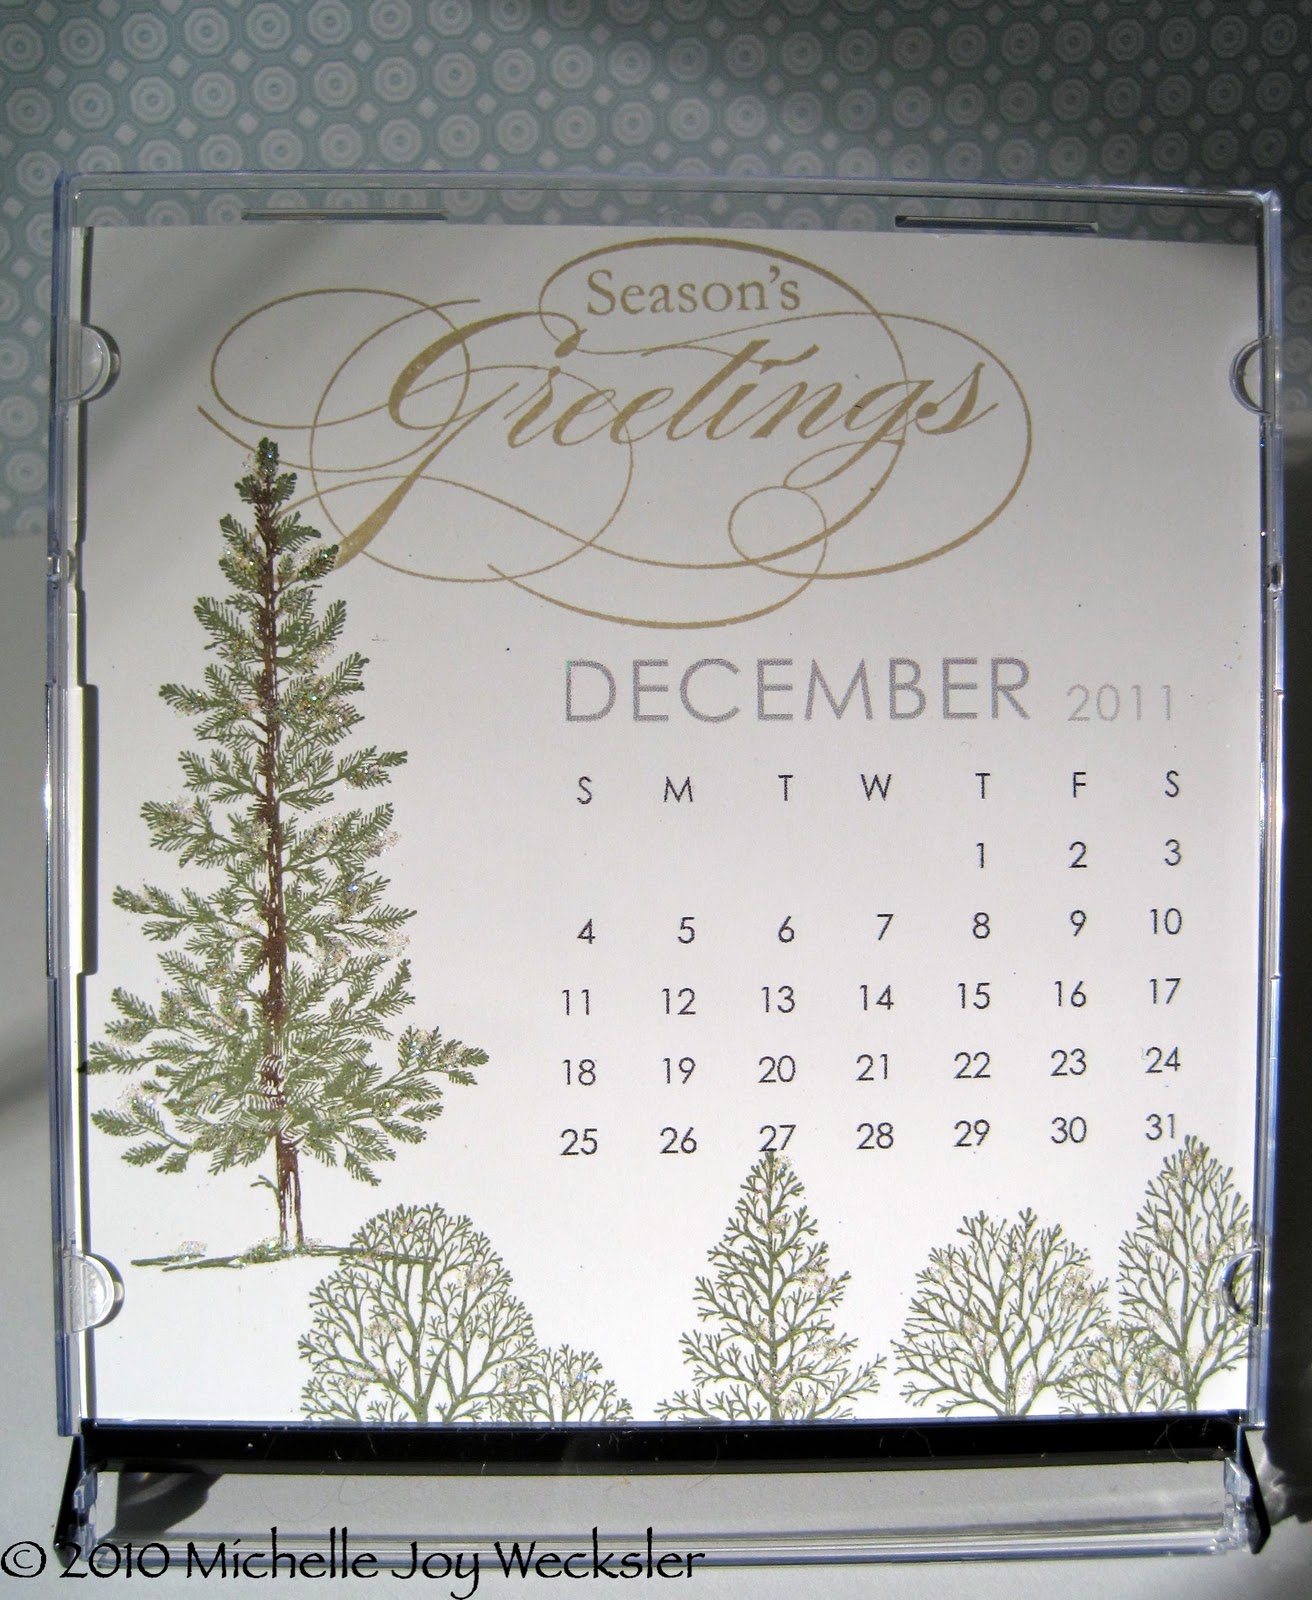
Today's project is my yearly calendar.  This year I decided to do a CD case calendar.  I created the template for the months in Pages on my Mac and then printed them off onto Whisper White card stock cut to 4 3/4" x 4 3/4".  This is the perfect size to slide into the opened CD case.  I used current Stampin' Up! stamp sets to stamp all of the months.  Once I stamp all of the months, I wrap them together in this card stock holder that can sit on the back of the CD case once it is opened on a desk/tabletop.
I will share half of the year with you today and the other half tomorrow! :)
Don't forget that you can use hearts to make great shamrocks for St. Patrick's Day!  Try it freehand, or use your stamp-a-ma-jig if you want to be a bit more precise (but watch out for trying to be perfect!).  I drew the stems freehand.

Tuesday, December 21, 2010

Elizabeth Anniversary Card

Today's Question From The Craft Room:  What Does It Take To Be Married For 41 Years?
Today's card is for the 41st wedding anniversary of a couple who lives down the street.  As I made the card I began to wonder, what does it take to be married for 41 years?  I guess it is a question I could ask them and I'm also interested in my own answer to the question.  What I think the ingredients must be to sustain a loving relationship for that length of time.  I believe it would take unconditional love - loving someone when they act in ways you appreciate and still loving them in those times when they act in ways that you wish they wouldn't.  It also must take some selflessness - a recognition that the person you are in relationship with, like you, has needs and wants and goals and aspirations and sometimes that means that both of you make sacrifices to support each other in pursuing and achieving goals.  I also believe it takes a lot of laughter - the ability to not take life or each other so seriously.  Patience must have something to do with it too - the ability to persevere when things aren't exactly as each of you would like.  I'm sure I'll spend more time pondering the essential ingredients - but for now, that's my recipe.  What do you think?
Today's card was my first use of the Elizabeth stamp and I fell in love immediately! :)  I stamped the image with Chocolate Chip ink onto Confetti card stock and it immediately looked elegant!  I used my stamp-a-ma-jig to center the greeting from Teeny Tiny Wishes in the center of the oval in Early Espresso ink.  I added some dazzling diamonds with my 2-way glue pen and place a few pearl jewels around the image.  I used the Calendar Alphabet & Numbers set to stamp the "41" in Soft Suede ink on Very Vanilla card stock and punched it out with a 1/2" circle punch.  I sponged the edges and added a bit of crochet thread and a tiny pearl and then popped it up on 1/2 of a dimensional.  I hope you like it!

Friday, December 17, 2010

Four Ways Friday #30 - Silhouette Sentiments

This week's Four Ways Friday uses the Silhouette Sentiments hostess stamp set.
For this first card I stamped the flower image using 2 different colors and decorated both the central panel and the envelope.  I love how the floral image can be used to create wonderful backgrounds!
I decided to take the background idea a little further for this second card and stamped the image in 3 different colors - some lighter, some darker.  I also sponged the background with 2 different shades of green.
Heat embossing became the focus for this third card.  I still used one of the floral images to create a background, but this time I stamped it multiple times across the bottom of the Old Olive panel using VersaMark and then heat embossed with white embossing powder.  I heat embossed the envelope to match.
For this last card I decided to use this beautiful flower image and have it be the focal point of the card.  I used my markers to color the image and then stamped it onto Whisper White card stock and punched it out with a circle punch.  this card measures 3"x 6".  Thanks for stopping by for this week's Four Ways Friday!  I hope you have a wonderful weekend!!!!!

Wednesday, December 15, 2010

More Monsters!

Today's Lesson From The Craft Room:  What If It All Disappeared?
I'm wondering if asking questions for my lessons is really more significant than making statements - as I realize that sometimes I don't really have answers - just more questions.  Today, as I heard from someone about a news story regarding a man committing suicide, I wonder if the suicide had anything to do with the man losing everything that he had - or at least feeling like he had lost it all.  And, I wonder, what if everything I had disappeared?  I can imagine the things being replaced.  It's more difficult for me to consider the void that is left when those you love disappear.  And what about those times when we aren't there for ourselves?  When we, in effect, disappear into a dark or sad place?  As I sit here pondering these questions, I recognize that there have been times in my life where things, people, and I have disappeared.  When I wasn't sure how I was going to make it through another minute, let alone another day.  But here I sit - having gotten through...and that makes me think that if it did all disappear, I would survive.  That somewhere I would find the strength to move forward - to continue.  It is my hope that we can all find this strength when we need it.  And, when we are having trouble finding it within ourselves, to reach out to those who can help us find the strength when we need it most.  It never does all disappear - it is just hidden from our view and we need to be willing to search deeply for the strength we all have inside.
Today's card was another opportunity to Make A Monster! :)  I added some blue google eyes and some flowers from the Eastern Bloom stamp set.  I can't look at these little monsters without smiling and I love thinking that whoever gets this little 3x3 note will smile too :)

Tuesday, December 14, 2010

Make A Monster!

Today's Lesson From The Craft Room:  Watch Out For The Jump You Make To Conclusions
On my trip I met a great woman - funny, happy, full of energy!  She was quite heavy and one of the other people on the trip actually commented to me about what the woman was eating for dinner...more specifically she said something like, "Why is she eating that?!"  I might have even thought the same question to myself if I had not already learned a bit about her story - and for this I am sorry.  It can be so easy to jump to conclusions as you observe those around you.  We need to recognize when we are doing it and ask ourselves what assumptions we are making.  It turns out that this amazing woman had arrived at this lovely beach location having lost 60 lbs!!!!!  It was incredibly inspiring!!!!!  She also told me about walking a 5K race and deciding that next year she wants to do the race again...except this time she wants to run the race!!!!!!  Talk about amazing energy!!!!!!  I need to remember this story every time I find myself judging someone I do not know - or even those that I do.  Rather than judge, I need to open myself up to their story - their perspective.  I may even encounter amazing inspiration that I might have missed if my judgment got in the way.
I decided to make a little love note today with the Make A Monster stamp set!  This set is so playful and it reminds me of coloring as a child.  How cool that you can build these monsters from scratch - bodies, eyes, mouth...it's all up to you!  I have a feeling another monster may get created for tomorrow...Frankenstein here I come :)